FLASH SALE Get 20% OFF everything using the coupon code: FLASH20 View Pricing Plans →
There are many ways to set up the front page using the Inspiro theme.
The theme will most probably display your latest blog posts on the front page on a new installation, which is the default behavior of WordPress themes.
Below, you can find the needed steps to create a static front page that can be easily edited using a page builder or Gutenberg blocks.
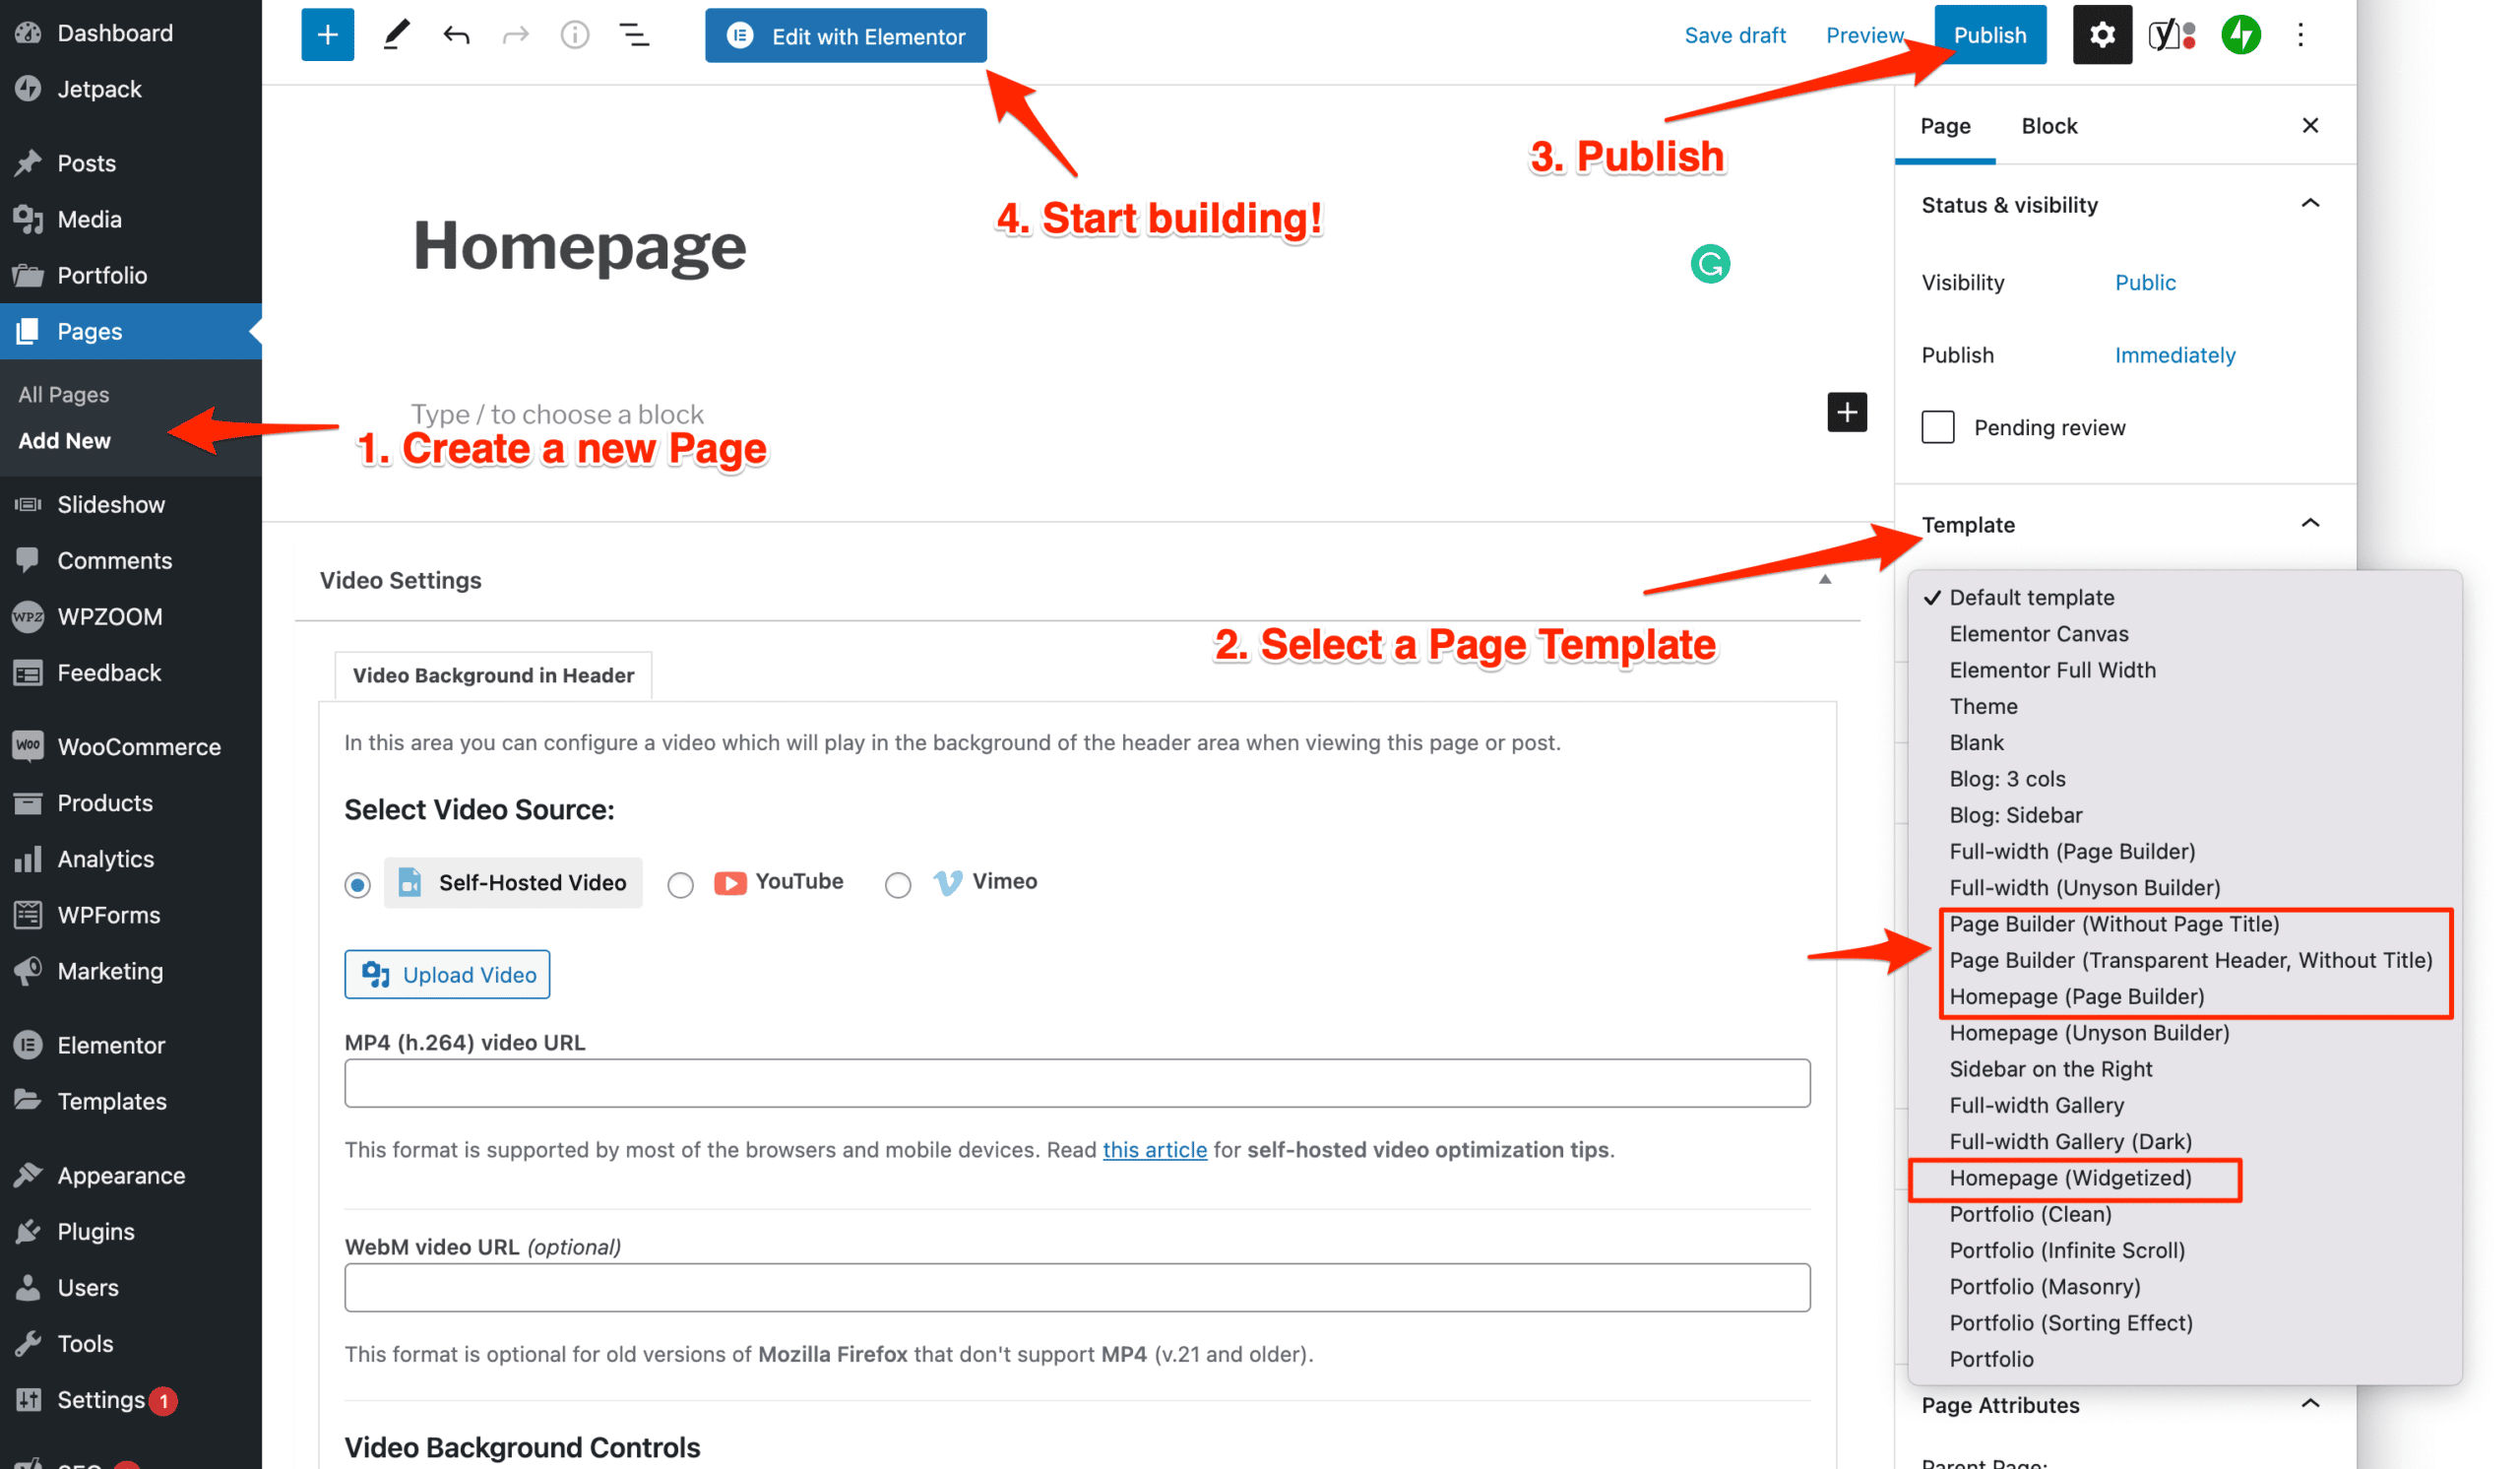
The theme includes multiple Page Templates to create your front page:
– Homepage (Page Builder) – this template automatically shows the theme’s slider at the top. Other sections below can be added using a page builder or Gutenberg blocks.
– Page Builder (Transparent Header, Without Title) – use this template if you don’t want the slider to appear automatically at the top or if you want to add it as a widget in Elementor.
– Homepage (Widgetized) – this templates shows the slider at the top and widgets added to the “Homepage” widget area (old method)
Except for the Widgetized template, the rest of the templates are perfect for use in combination with a page builder.
Here are some advantages why you should use a Page Builder to create your homepage:
– A page builder gives you more control and flexibility: full-width sections, image, and video backgrounds;
– Custom sections with different number of columns;
– Easily adjust design options of each section, column, or widget individually: margin, padding, fonts, etc.
Now that the differences between the templates are known to you, let’s proceed to the first step.
First, create a new page or edit an existing page (e.g. your current static page) and make sure to select the right Page Template:
Additional details and instructions for the homepage when the Page Builder template is selected can be found here.
You can read more about the differences between page templates here.
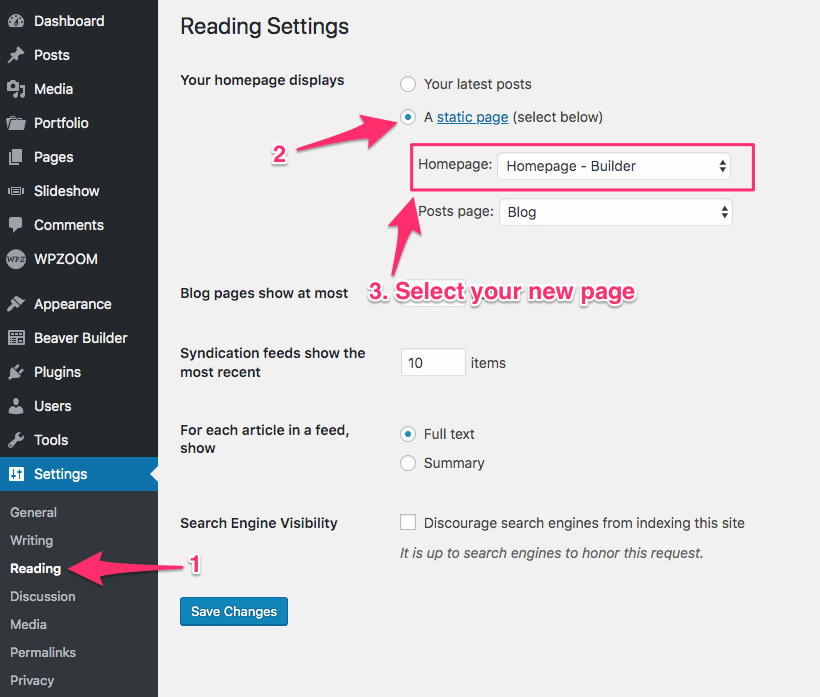
Once you’ve published or edited the page you want to use as your front page, go to Settings > Reading page and select your page in the option: “A static page > Homepage“:
Now that the right page with the right template is assigned as your front page, you can proceed with configuring the top slideshow or the sections below it.
The Slideshow at the top is a part of the theme, so the content can’t be edited or added using Elementor.`
You can find details to add images and videos in the Slideshow in this article.
If you want to use a different slideshow at the top and replace the one from the theme, you will need to use a different page template, like “Full-width (Page Builder)”.
If you selected to built your homepage using the Page Builder, go back to edit that page, and click on the blue button “Edit in Elementor“:
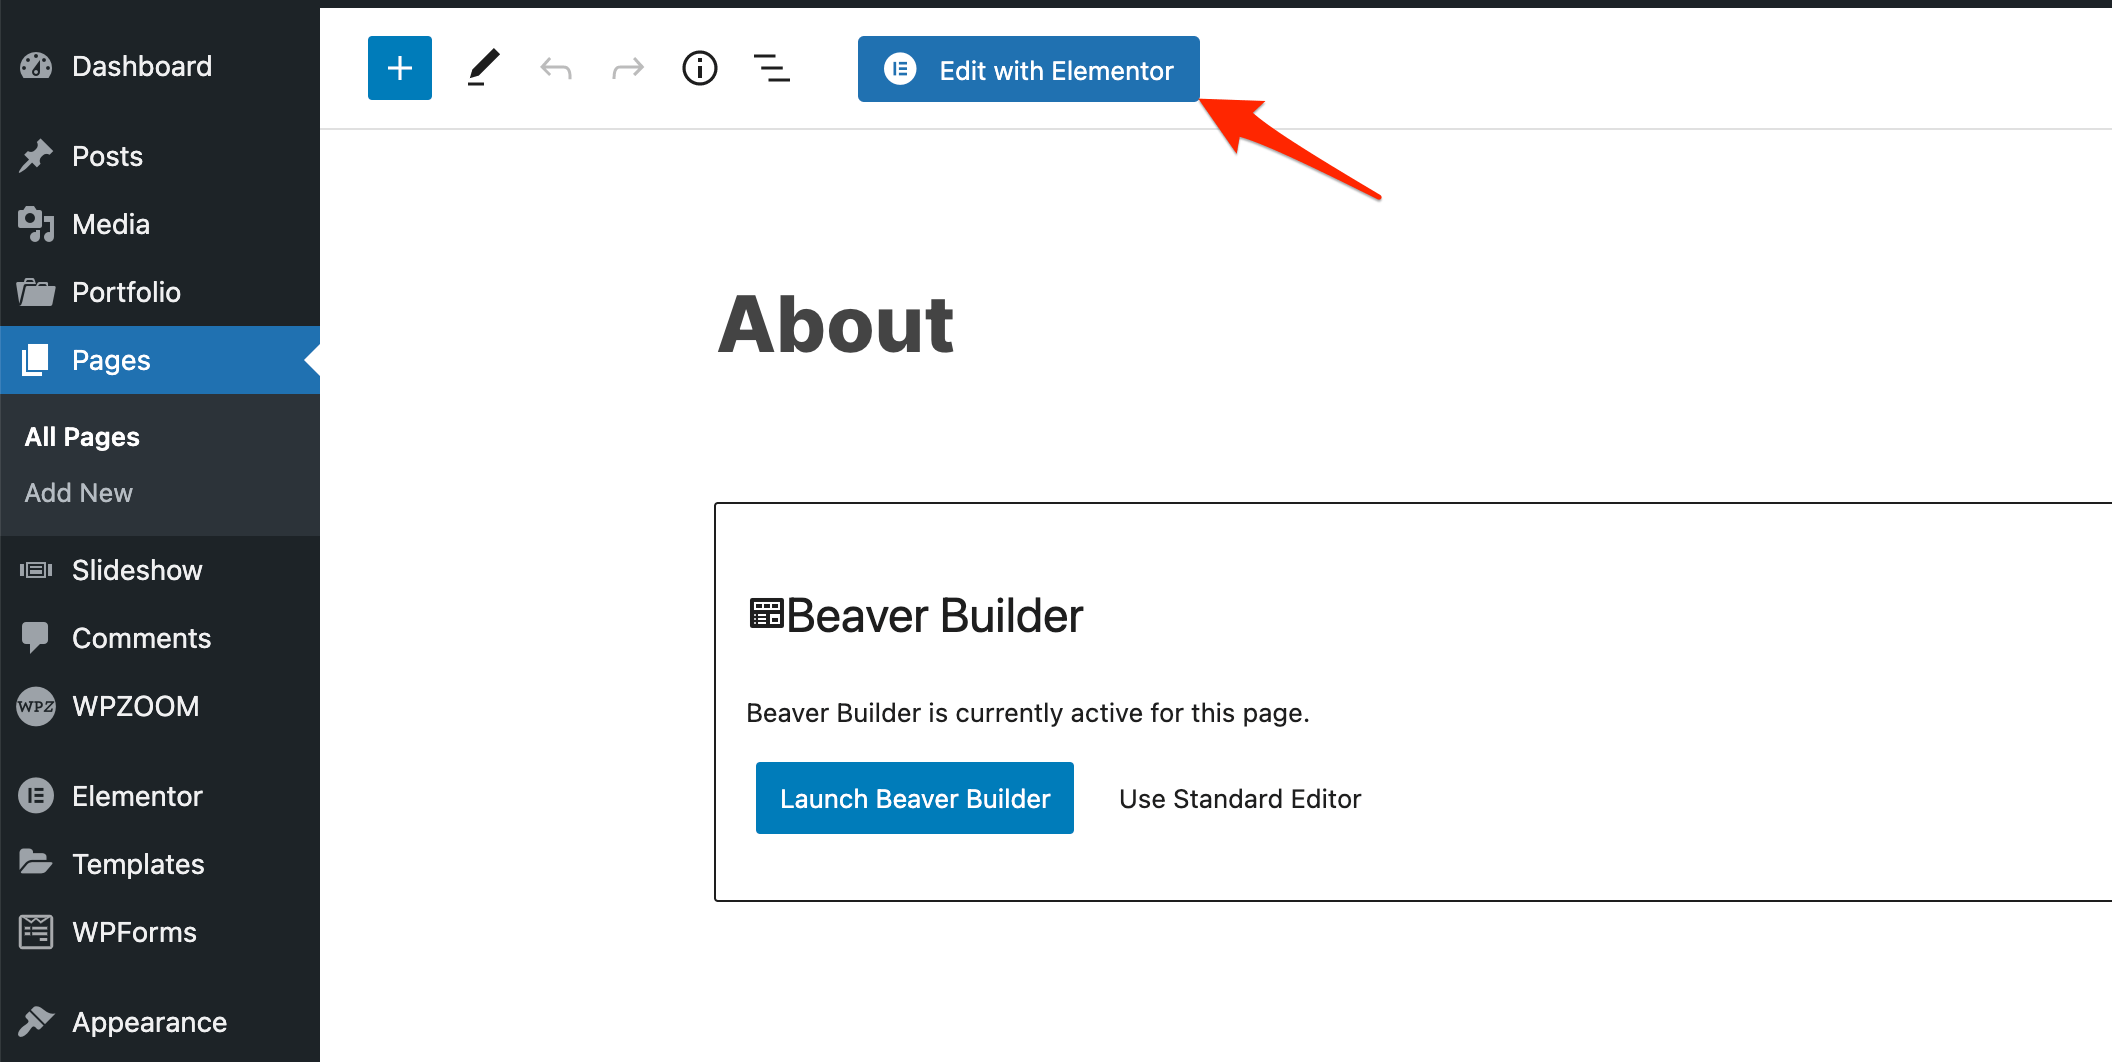
If you don’t see this button available, the Elementor plugin is probably not installed or active on your website.
Additional instructions and tutorials can be found in the Elementor support guides.
In this article you can find some useful instructions about the Page Builder integration in Inspiro theme.