Starting a travel blog combines the excitement of sharing your adventures with some technical knowledge. If you want to document and share your journeys with the world, this guide on how to start a travel blog is for you. We’ll walk you through everything from picking out a domain name to your first blog post and how to get your stories out to eager readers.
Whether you’re blogging to complement your business, share your experiences, or both, you’ll get practical tips to confidently enter the travel blogging scene.
Quick Guide on Starting a Travel Blog
Here’s a brief rundown of what it takes to start your travel blog on WordPress:
- Step 1: Choose a Domain Name
- Step 2: Pick a Web Hosting Service
- Step 3: Install WordPress
- Step 4: Choose a WordPress Travel Blog Theme
- Step 5: Adjust Your Blog’s Settings
- Step 6: Add Essential Plugins
- Step 7: Craft Your First Blog Posts
- Step 8: Spread the Word About Your Blog
- Step 9: Keep Your Blog Fresh and Updated
Let’s explore these steps to ensure your travel blog sets sail smoothly.
9 Steps to Create a Travel Blog: A Detailed Guide
Creating a travel blog is an adventure in itself. Here’s how to navigate through the setup smoothly.
1. Choose a Domain Name
Choosing the right domain name for your travel blog is like picking the perfect travel companion. It should be memorable and reflect the spirit of your adventures. You want a name that is easy for your followers to remember and type, avoiding any complicated spellings that might confuse them. Generally, securing a domain name will set you back around $14.99 a year – a small price to pay for establishing your blog’s home base in the online world.
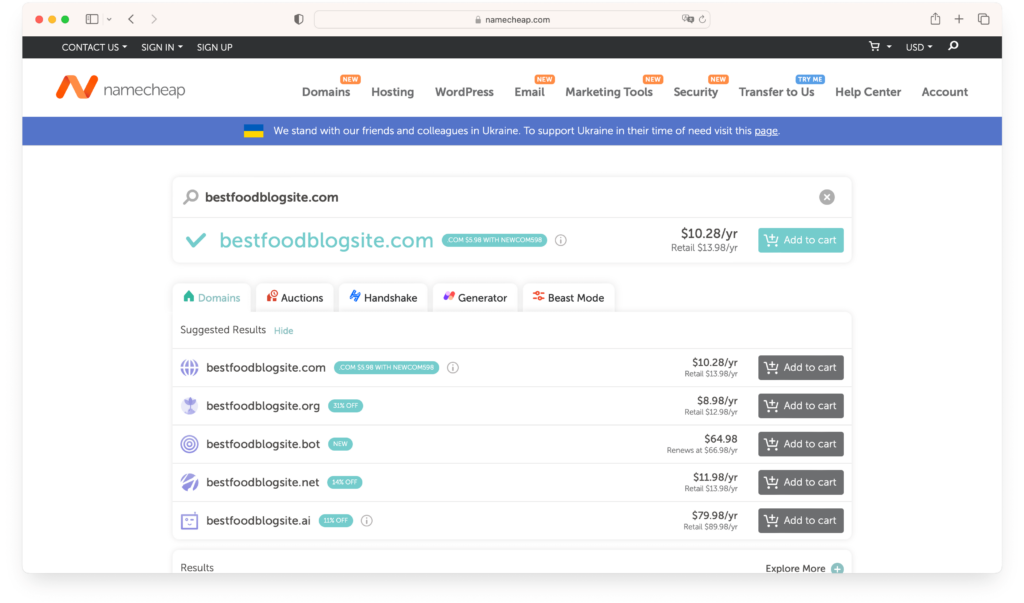
Before settling on a name, it’s wise to do some research. You can use domain registrars or web hosting services to see if your dream name is available. But it’s not just about grabbing any available name. You must ensure it doesn’t step on trademark toes or get mixed up with another site.
If you’re stuck on what to name your blog, why not try a domain name generator like DomainWheel? These tools are a lifesaver for travel bloggers, offering creative names based on your keywords. They’re great for sparking ideas and showing you what’s available, making the process fun.
2. Pick a Web Hosting Service
Selecting the right hosting provider for your travel blog is similar to finding the perfect spot for your base camp. You want a place that’s accessible, secure, and smooth-running.
When hunting for a hosting service, prioritize uptime reliability, outstanding customer support, and WordPress-friendly features. Budgeting is crucial, too. While the allure of free hosting is strong, it often comes with restrictions. Seek plans that balance cost and key features, such as a complimentary domain name, without sacrificing quality.
It’s wise to spend time reading reviews and gathering user experiences to assess the reliability of hosting services. Look for consistent positive feedback and see how the provider resolves issues.
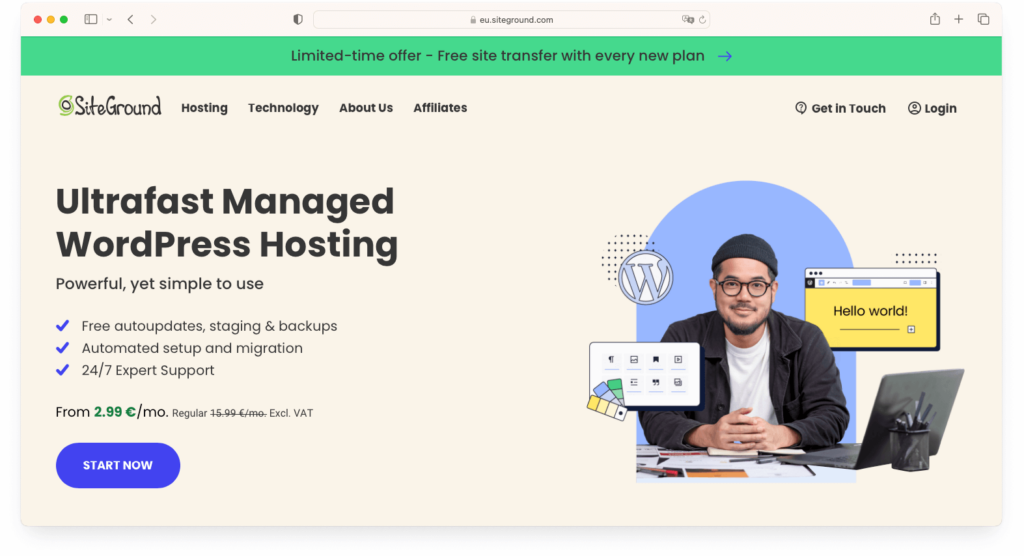
Providers like Siteground simplify blogging by offering domain registration and hosting services. This allows for easier management and a single point of contact for any domain or hosting issues.
3. Install WordPress
Regarding blogging platforms, what better way to launch your travel storytelling platform than WordPress? Known for its user-friendly interface and adaptable features, WordPress is the go-to for a professional travel blogger who wants to engage their readers in tales from distant lands, busy cities, and hidden gems.
Here’s a quick guide to getting WordPress up and running:
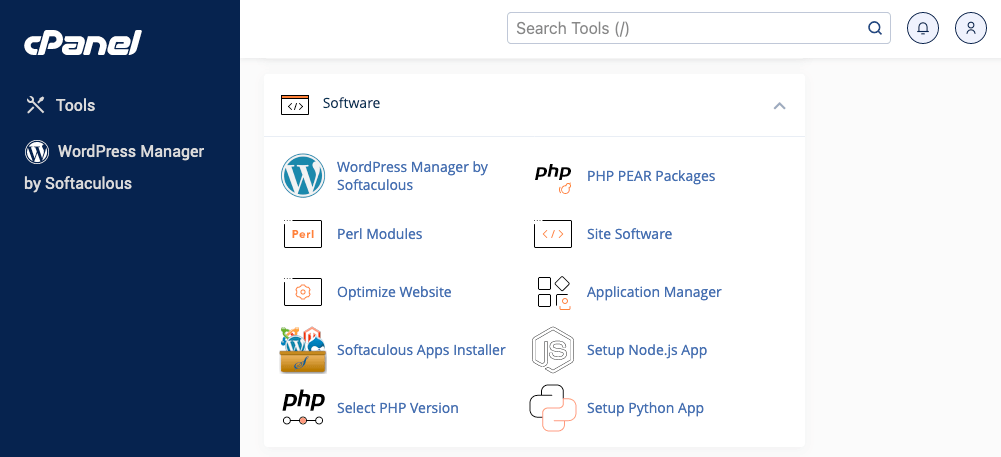
- Hop into your hosting control panel. You might find yourself in a cPanel, Plesk, or something uniquely designed by your hosting service. This is your command center, where the magic begins.
- Find the one-click WordPress installation feature. They’re usually under the tabs ‘Website’ or ‘Software and Services.’ You’ll likely bump into names like Softaculous, Fantastico, and QuickInstall — these are your friends in the installation journey.

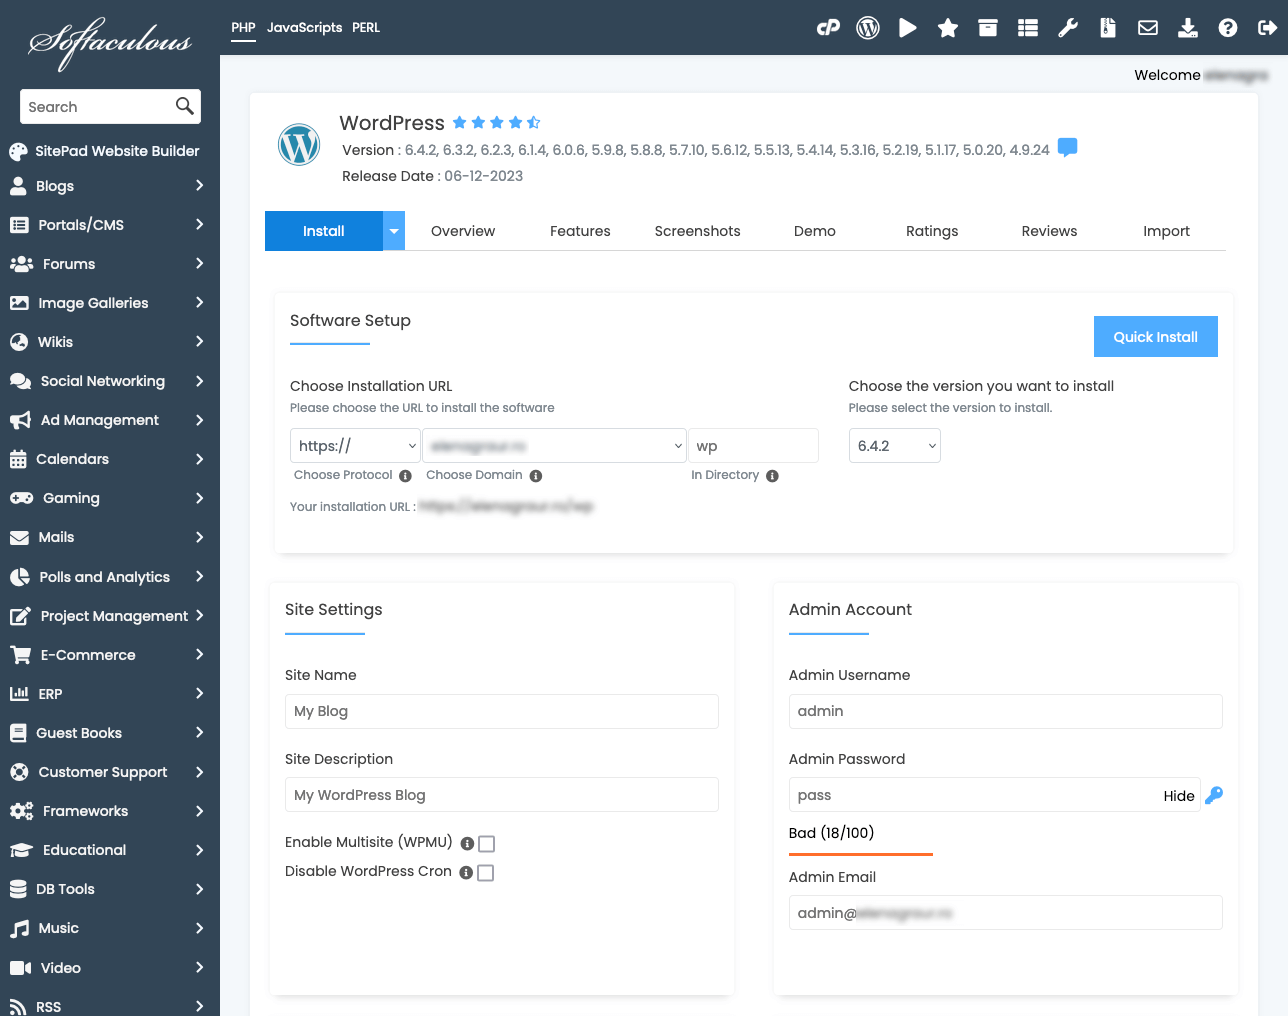
- Click that install button and let the adventure unfold. You’ll pick the domain where your travel stories will live.

- Fill in the blanks with your site’s name, your chosen admin username, password, and email.
- Dive into the advanced options. But if you’re more of a “let’s hit the road and see where it takes us” kind of traveler, the default settings are your best bet.
- Complete the setup, and before you know it, WordPress will be ready and waiting on your domain.
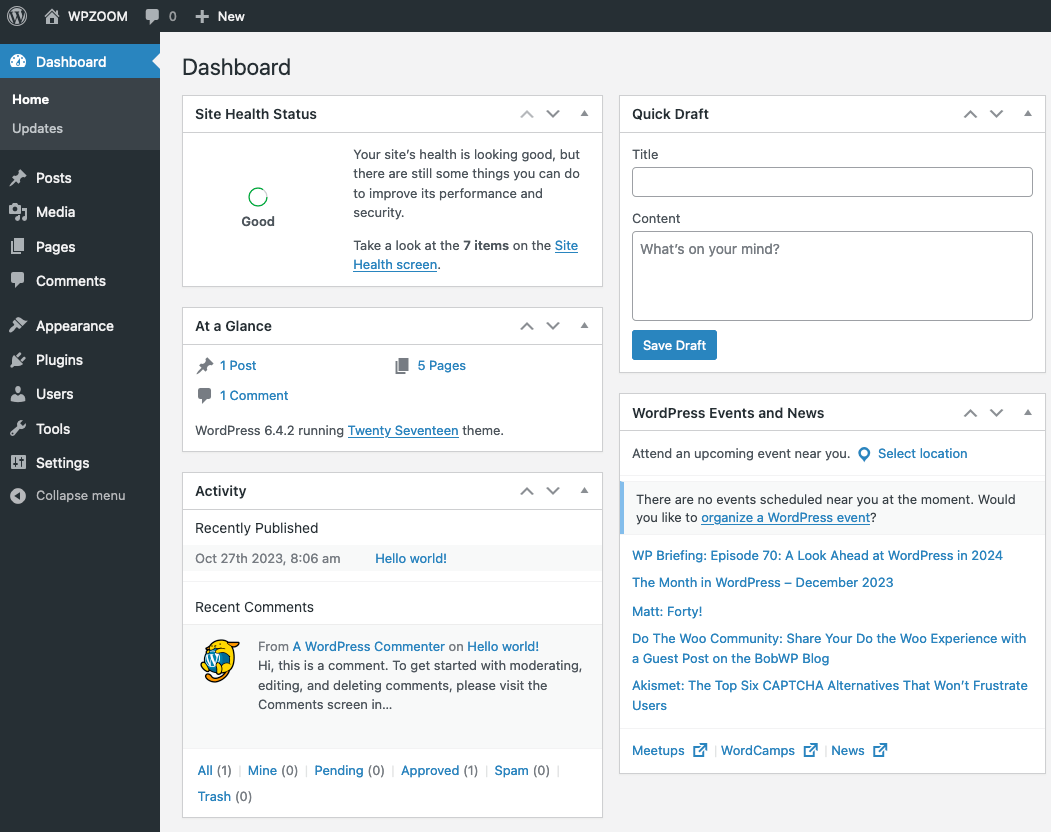
- Log in to your WordPress dashboard with the admin details you chose earlier. This dashboard is your cockpit, from which you’ll pilot your WordPress blog and share stories, photos, and travel tips.

- Familiarize Yourself: Upon your first login, take some time to explore the WordPress dashboard. Familiarizing yourself with the layout and the various settings will make your blogging journey smoother.
Should you hit a bump in the road, your hosting provider’s support team is like the friendly local ready to help you find your way.
4. Choose a WordPress Travel Blog Theme
Picking the suitable WordPress theme is like choosing the perfect travel companion. It sets the tone for your blog’s visual journey, ensuring that your stories are heard, felt, and experienced by your readers. A theme that balances beauty with functionality can turn travel blogs into a destination of its own.
Your readers are eager for adventure, and your blog’s design should invite them into a world of discovery. But it’s not all about looks; your blog needs to be easy for your readers to navigate and find their way around, just like a well-mapped travel guide.
If you spend your days chasing horizons and nights recounting tales of adventure, you’ll want a theme as dynamic as your travels. The Dérive theme could be just what you’re looking for.

Dérive is a travel blog theme to help you create outstanding visual stories. The theme’s flexibility makes it ideal for travel photographers, storytellers, and photojournalists who want to present their experiences online.
Integrated with a responsive map, Dérive offers an interactive way to showcase and arrange your posts geographically. You can tell your stories worldwide with the Responsive Vector Maps plugin by adding links to a customizable world or specific country map.
Suggested Reading:
5. Adjust Your Blog’s Settings
Tailoring your blog settings ensures your site mirrors your unique journey and meets your readers right where their desire to travel begins.
Here’s a friendly guide on making travel blogs a digital nomad’s dream:
- General Settings: Head over to the Settings area in your WordPress dashboard. This is where you can share your blog’s name and catchy slogan and set the correct time zone.

- Crafting a Navigation Menu: A navigation menu helps readers navigate your stories and find the treasures they seek. You can create and personalize your menu by going to Appearance > Menus.
- Choosing Your Homepage View: Decide what your readers first set eyes on when they land on your blog. Will it be your latest adventures or a welcoming static page? You can set this up under Settings > Reading.
- Managing Comments: Conversations with your readers can turn them from passersby into part of your travel tribe. Under Settings > Discussion, you can decide how to manage comments. Whether it’s approving them before they go live or closing comments on posts that are a bit older, it’s about making your blog a lively and safe space for sharing travel tales.
- Permalinks Settings: Permalinks are like the GPS coordinates for your posts and pages. Under Settings > Permalinks, WordPress lets you customize these. Opt for a structure that’s easy for readers and search engines to follow, making it more straightforward for them to discover your adventures.
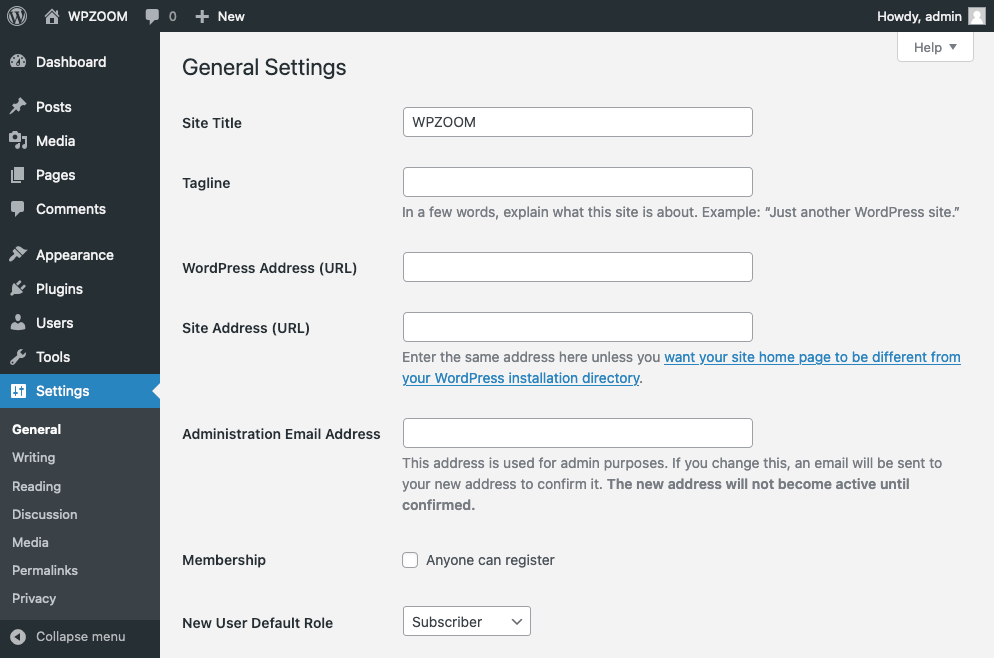
Each setting is crucial in how smoothly and engaging your travel blog runs.
6. Add Essential Plugins
Installing the right plugins can add new features and boost your blog’s functionality. With so many plugins available, picking those that add value to your travel blog without slowing it down is vital.
Start by identifying the features you want to bring into your blog. Whether it’s SEO optimization to increase your visibility, social media tools to share your journeys, security measures to keep your site safe, or even e-commerce solutions to sell your travel gear or ebooks, there’s a plugin for you. Each one has a setup process to get it up and running smoothly.
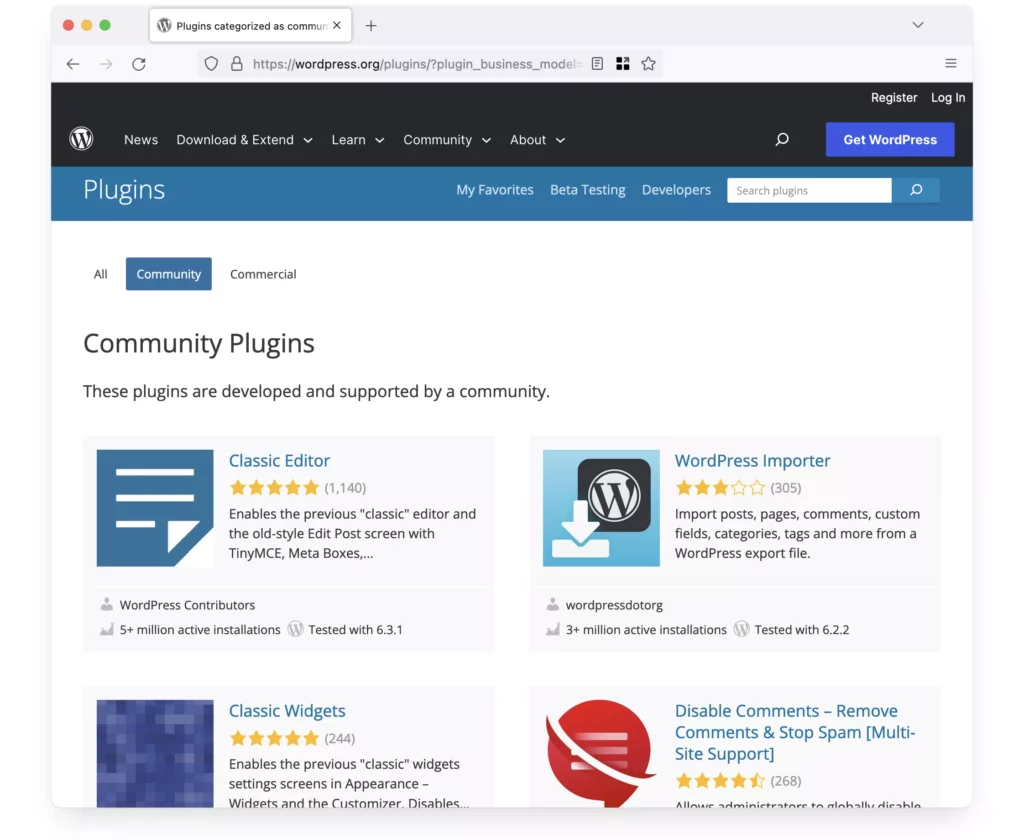
To help you navigate the vast options, we’ve compiled a list of indispensable plugins for a successful travel blogger. This selection spans various categories, ensuring you get access to reliable, quality plugins that are perfect for your needs.
Keeping your plugins up-to-date is a non-negotiable. Just like you wouldn’t venture into unknown territories with outdated maps, using old plugin versions can pose risks to your blog’s security and might need to work better with the latest WordPress updates.
While plugins can turn your blog into a powerhouse, packing too many into your WordPress site can slow it down, much like an overloaded backpack can slow you down on a hike. Choose wisely and stick to the essentials that genuinely enhance your travel blogging journey.
Suggested Reading:
7. Craft Your First Blog Posts
Now comes the thrilling part: writing your very first blog post. This is your stage to share those jaw-dropping experiences, hidden gems you’ve stumbled upon, and stories that made your journey unforgettable.
Here’s a little guide to help you navigate through creating and shaping your debut blog post.
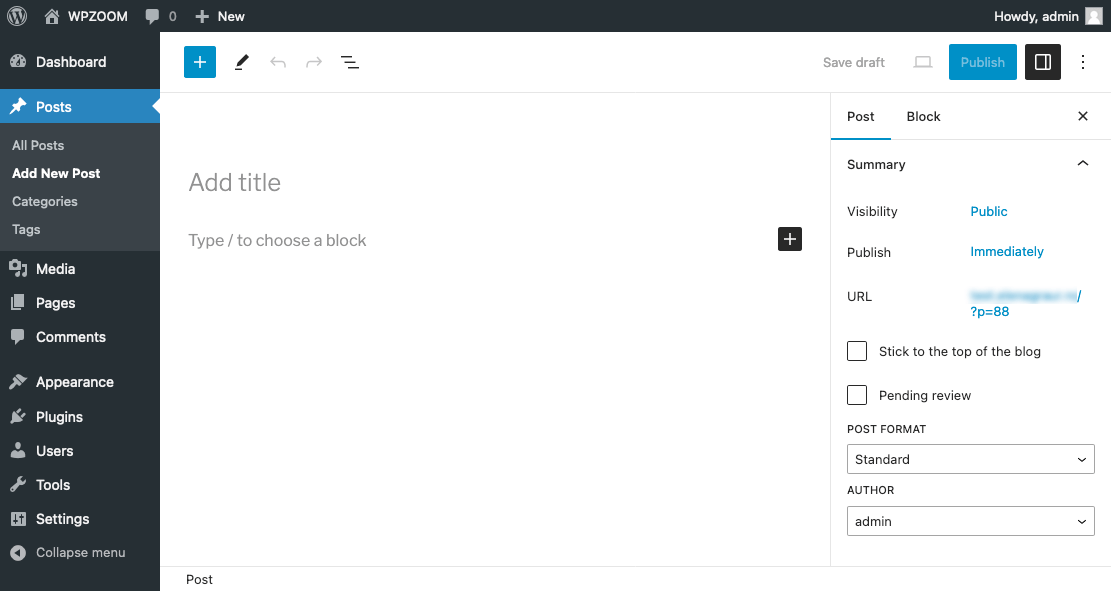
- Add a New Post: Head to the Posts section in your WordPress dashboard and click Add New. You’ll land in the WordPress editor. This is where your adventures come to life. Start by giving your post a catchy title that grabs attention.

- Make It Visually Appealing: The editor is your best friend here, allowing you to make your text easy to read and engaging. Break your story up with headings – it makes it easier on the eyes and helps fellow adventurers find the bits they’re most interested in. And what’s a travel story without pictures? Click Add Media to add your travel photos to your post. Feel free to use videos, quotes, and links to enrich your post.
- Preview and Go Live: Preview your post before you hit the Publish button. Make sure everything looks great and reads smoothly. Once you’re all set, press Publish to share your journey with the world.
It’s your chance to share the world through your eyes and connect with others who share your passion for exploration.
8. Spread the Word About Your Blog
The adventure begins when you start sharing your stories with a broader audience and build a community around your love for exploration. Growing a successful travel blog involves sharing your experiences and ensuring they reach fellow travel enthusiasts.
Here’s a friendly guide on how to broaden the horizons of your travel blog:
- Make Friends with Search Engines: Fine-tuning your blog for search engines can put your travel tales on the map. It’s all about helping people find your stories while they dream of their next adventure.
- Share the Journey on Social Media Channels: Your potential followers scroll through their feeds, looking for their next travel inspiration. Use social media posts to share your adventures on the platforms where the love for travel is strong.
- Keep in Touch via Email: Gather a crew of avid readers by encouraging them to subscribe to your newsletter. It’s like sending postcards from different parts of the world directly to their inbox.
- Chat with Your Fellow Travelers: The comment section is your campfire. Engage with your readers there or on social media platforms to keep the conversation going.
- Keep the Travel Tales Coming: The world is vast, and so should be your content. Staying consistent with your posts keeps your readers hooked and returning for more.
- Map Your Journey: Use tools like Google Analytics to see which of your stories are leading the way. It helps you understand what your readers love and where your blog is headed.
Growing a travel blog is a journey filled with learning and new connections. It takes time, but with these strategies, you’re setting the course for a thriving community of travel enthusiasts eager to follow in your footsteps. Keep sharing your adventures, and watch as your travel blog becomes a guide for those seeking their next incredible journey.
WPZOOM offers specialized social media tools to enhance social media integration:
- Social Icons Widget: A simple yet powerful tool for adding social media icons to your website, linking directly to your profiles.
- Instagram Widget: This widget is perfect for restaurants wishing to showcase their culinary creations. It allows you to display your latest Instagram posts directly on your website.
9. Keep Your Blog Fresh and Updated
Running a travel blog is an exciting journey, but it’s not just about sharing your latest adventures or the hidden gems you’ve discovered. Like any good trip, it requires planning and upkeep to ensure everything runs smoothly. Here’s how you can keep your travel blog up and running while also keeping it engaging and secure.
- Stay Updated: Make sure your blog’s core system, themes, and plugins are up to date. These updates often fix bugs and improve security, making your site safer and more efficient.
- Back It Up: Think of backups as your blog’s safety net. If something goes wrong, like a technical glitch or a hacker attack, having a backup means you will keep everything you’ve worked so hard to create.
- Keep It Safe: Use strong passwords, install security plugins, and perform regular malware checks. Staying one step ahead of threats can also help you keep up with the latest security tips from the blogging community.
- Speed Things Up: No one likes waiting for a flight or a webpage to load. Check your blog’s loading times and make improvements where you can. Compressing images, using caching plugins, and considering a content delivery network can all help make your blog faster, ensuring your readers stick around to see what you’ve got to share.
Maintaining a travel blog is an ongoing adventure. Keeping everything updated, secure, and running smoothly creates a welcoming and reliable space for your stories and insights. This helps you connect with your audience and ensures your blog stands the test of time, ready for whatever new experiences come your way.
Bottom Line
You’re all set to launch and grow your travel blog, where you can share your journeys, tips, and the world’s beauty with others. Each step — from choosing the right domain and hosting to crafting captivating posts and improving your site’s visibility — is a step closer to building a blog that resonates with fellow travelers.
Remember, the secret sauce to a blog that buzzes with activity is your consistent effort, ability to adapt, and undying love for exploring the world.
Keep trying new things, soaking up knowledge, and changing things as you dive into this thrilling adventure. The travel blogging niche constantly shifts, and staying curious and flexible is your best strategy. Connect with your readers, take their advice to heart, and let your unique perspective on travel light up your blog.
And hey, don’t hesitate to just go for it. Every popular travel blog begins with a single post; yours is no different. Enjoy the ride of expressing yourself and see your own blog evolve from a simple diary to a bustling hub for wanderlust enthusiasts.
So, pack your virtual bags and set off on this blogging journey. With a bit of patience and a lot of passion, your travel blog can become a beloved stop for those dreaming of their next adventure.