To back up your WordPress site, you have several straightforward options. The first option to consider is automatic methods like using backup WordPress plugins. They let you schedule backups and store them on cloud services like Dropbox or Google Drive.
You can also use cPanel or managed WordPress hosting services that offer their backup solutions, allowing for easy restoration. If you prefer manual methods, use an FTP client to select and save specific files.
By further exploring these methods on how to back up a WordPress site, you’ll guarantee your site’s safety and continuity.
Table of Contents
- Automatically Back-Up a WordPress Site Using Backup Plugins
- Automatically Back-Up a WordPress Site Using cPanel Backup Tools
- Automatically Back-Up a WordPress Site Using Managed WordPress Hosting
- Manually Back-Up a WordPress Site Using cPanel
- Manually Back-Up a WordPress Site Using FTP
- How to Restore a WordPress Site from Backup
How to Back Up Your WordPress Site Automatically
Automatically safeguarding your WordPress site guarantees you’re always ready for the unexpected. You’ve got several methods at your disposal. Each approach offers a streamlined way to secure your site’s data without needing daily manual intervention, giving you peace of mind and more time to focus on your content.
Method 1. Back-Up a WordPress Site Using Backup Plugins
Backup WordPress plugins might be the best way to back up a WordPress site. These tools simplify the process by enabling automatic scheduling of backups to remote locations. You can set the backup frequency to ensure you regularly save your site’s content without manual intervention.
Backup plugins usually support cloud storage options like Dropbox, Google Drive, and Amazon S3, providing a secure repository for your backups. They also offer backup retention settings, allowing you to decide how many backups to keep for disaster recovery.
Additionally, they include backup verification to ensure the integrity of each backup. This feature gives you peace of mind and lets you know you’re well-prepared in any emergency.
Top 3 WordPress Backup Plugins
Let’s explore the top 3 WordPress backup plugins that can protect your site against data loss and ensure easy recovery:
- UpdraftPlus: Its user-friendly interface and robust features make it popular for WordPress backups. It offers scheduled backups and cloud storage options.
- Duplicator: This WordPress backup plugin excels in backup capabilities, site migration, and duplication, making it a versatile tool for WordPress administrators.
- WP STAGING: This plugin is designed for creating staging sites and provides backup functionalities. It’s handy for testing changes in a safe environment before pushing them live.
How to Back Up Your Site Using the UpdraftPlus Plugin
Using the UpdraftPlus plugin, you can easily back up your WordPress website with just a few clicks:
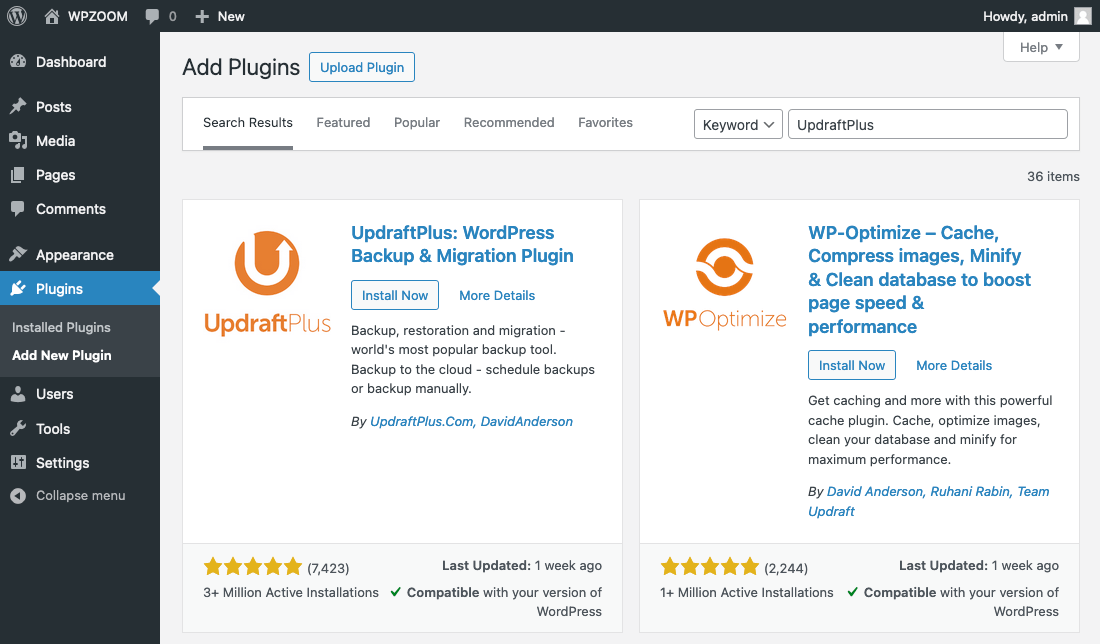
- First, install the UpdraftPlus plugin on your WordPress site by navigating to the Plugins section, clicking Add New Plugin, and searching for “UpdraftPlus.” Once found, click Install Now followed by Activate.

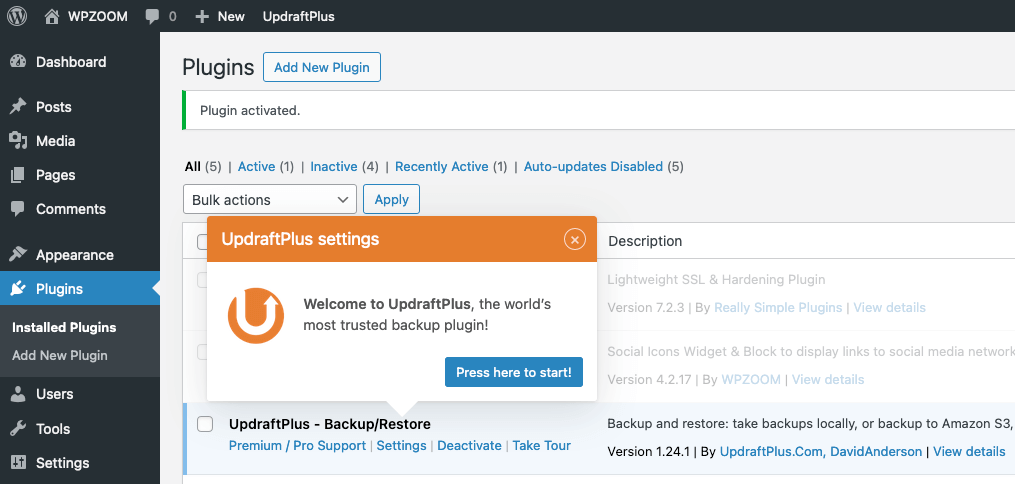
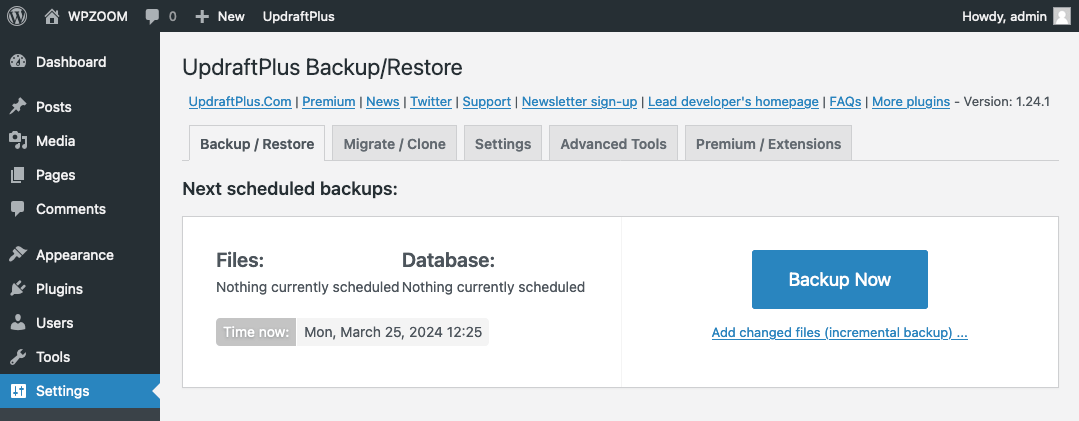
- After activation, click Press here to start! or go to Settings > UpdraftPlus Backups.

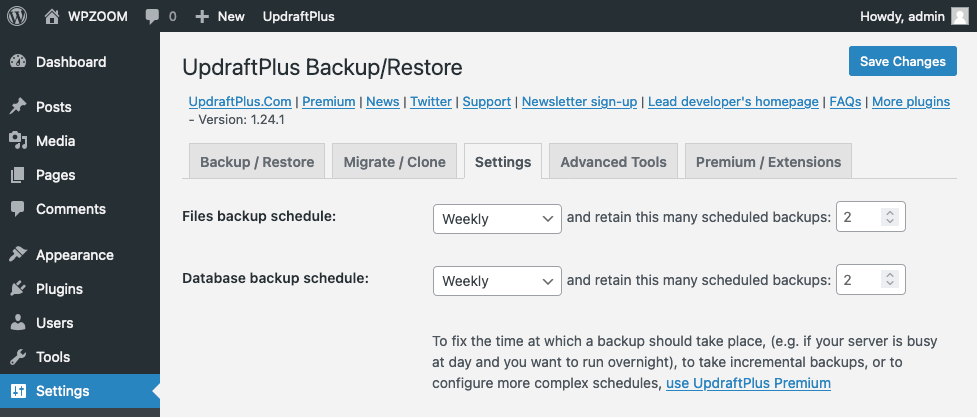
This will direct you to the plugin’s main dashboard. - Locate the Settings tab to set up automatic backups. Here, you can select your preferred backup frequency, such as daily, weekly, or monthly, and choose how many backup instances to keep.

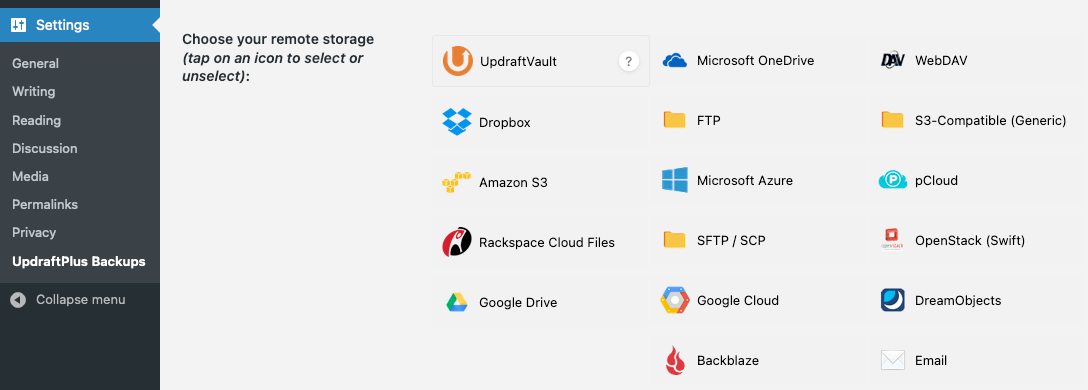
- Next, choose where to store your backups from various cloud storage options, such as Dropbox, Google Drive, or others.

- Once you’ve set up everything to your satisfaction, save your changes. UpdraftPlus will automatically start backing up WordPress according to your chosen schedule and settings.
- To manually initiate a backup anytime, return to the Backup / Restore tab on the UpdraftPlus dashboard and click the Backup Now button.

- You can select whether to include the database, files, or both and whether to send the backup to remote storage.

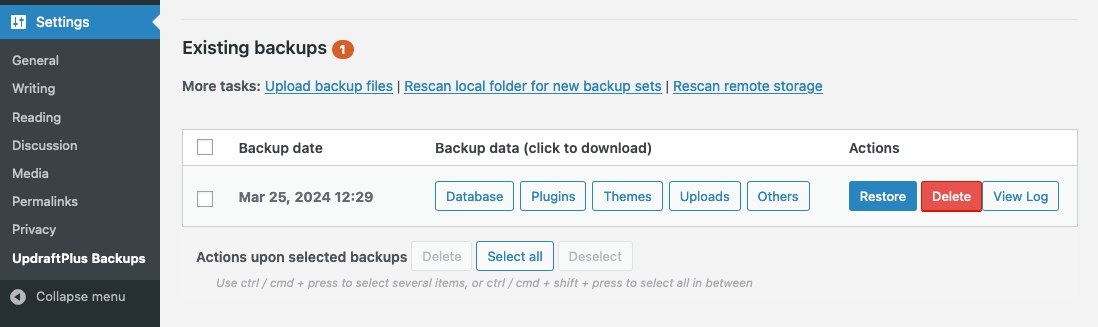
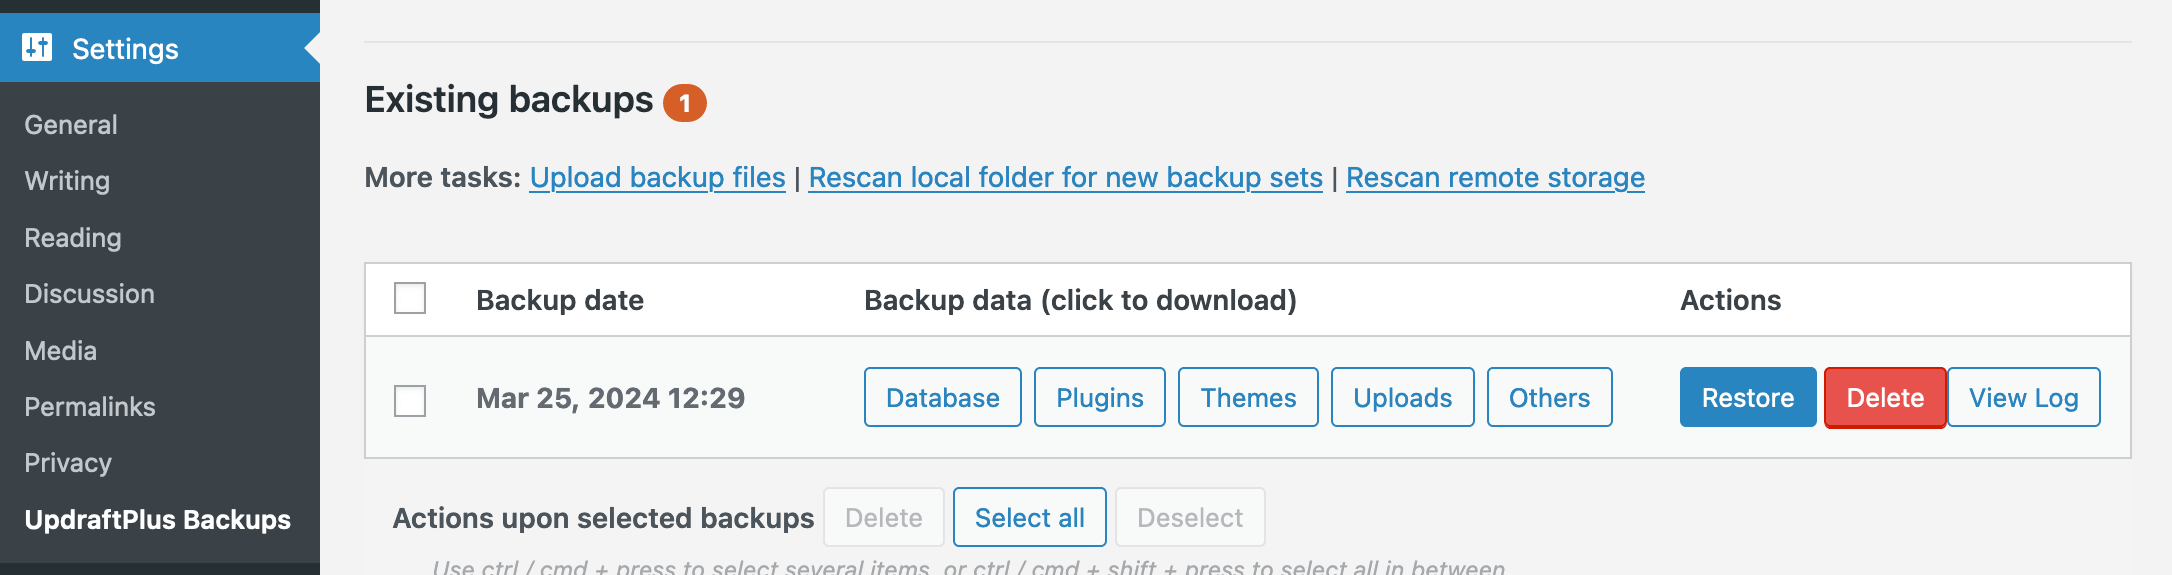
- You can manage and monitor your backups by checking the Existing Backups section. You can download, restore, or delete backups as needed from here.


Method 2. Back-Up a WordPress Site Using cPanel Backup Tools
Using cPanel’s backup tools, you can effortlessly automate the backup process for your WordPress site. With options to customize backup frequency, you control how often your site’s data is secured. You can opt for daily, weekly, or monthly backups, matching your site’s update frequency and traffic flow.
cPanel also offers various storage options, allowing you to keep backups on the server or download them for off-site storage. Data encryption adds an extra layer of data safety. File restoration is straightforward in case of data loss, ensuring minimal downtime.
Always perform backup verification to confirm the integrity and completeness of your backups, giving you peace of mind that your WordPress site is well-protected.
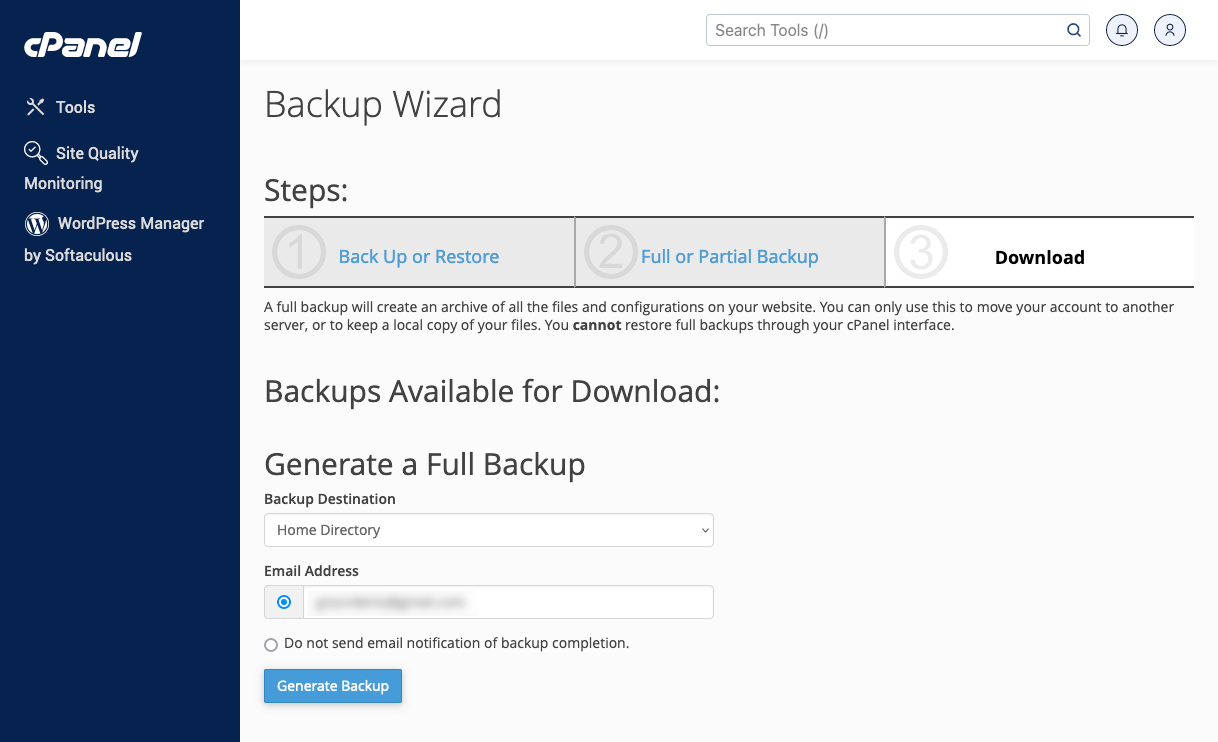
How to Back-Up Your Site Using the cPanel Backup Wizard
- Log in to your cPanel account. You can typically access it through your hosting provider’s dashboard.
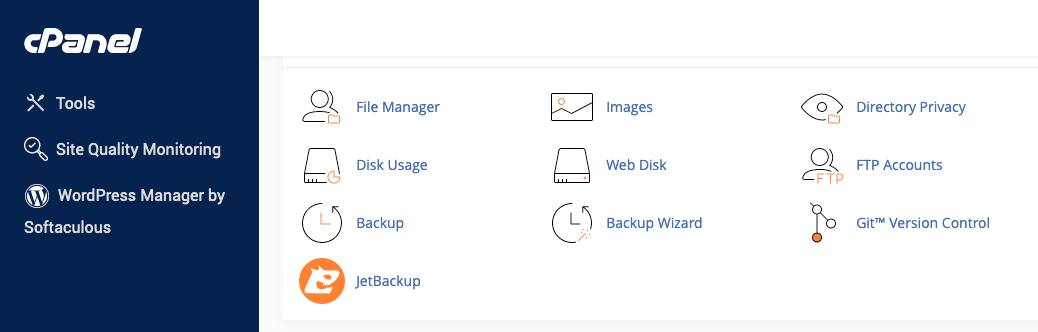
- Navigate to the Files section and click Backup Wizard.

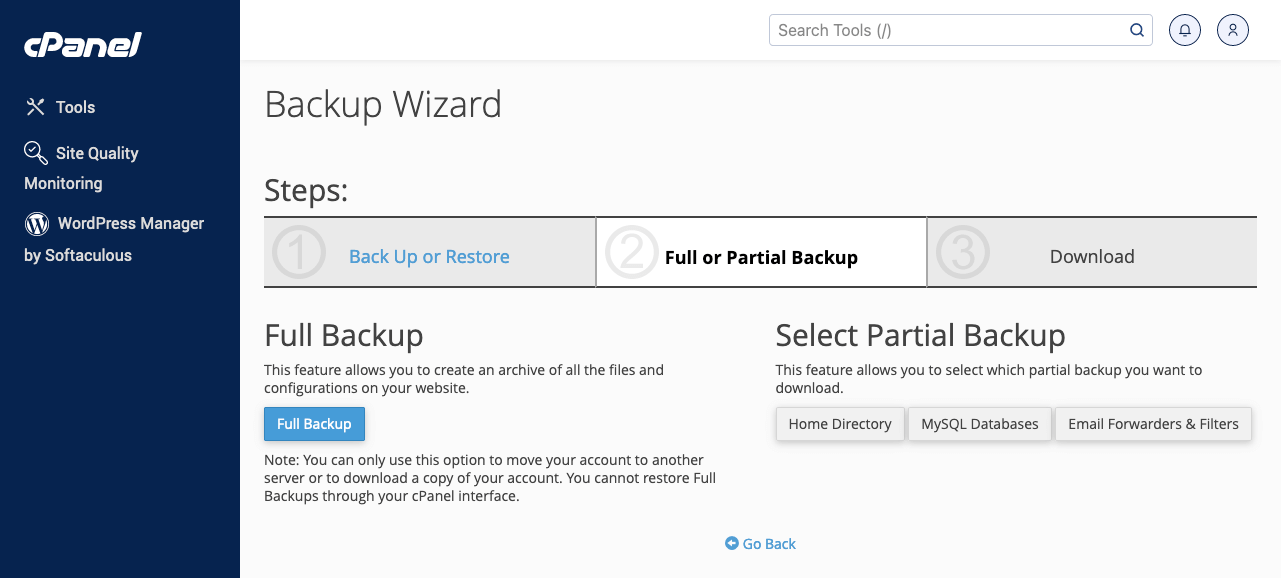
The naming may vary slightly depending on your hosting provider’s cPanel version. - To manually back up your site, click Back Up.

- To download a complete backup copy, click Full Backup.

You can also select a partial backup, choosing between Home Directory, MySQL Databases, Emil Forwarders & Filters. - Click Generate Backup to start generating a full backup.

When the backup is ready, you will be able to download it. - Verify that you’ve created the backups successfully and that the files aren’t corrupted. This ensures that your backups are ready to use when needed.

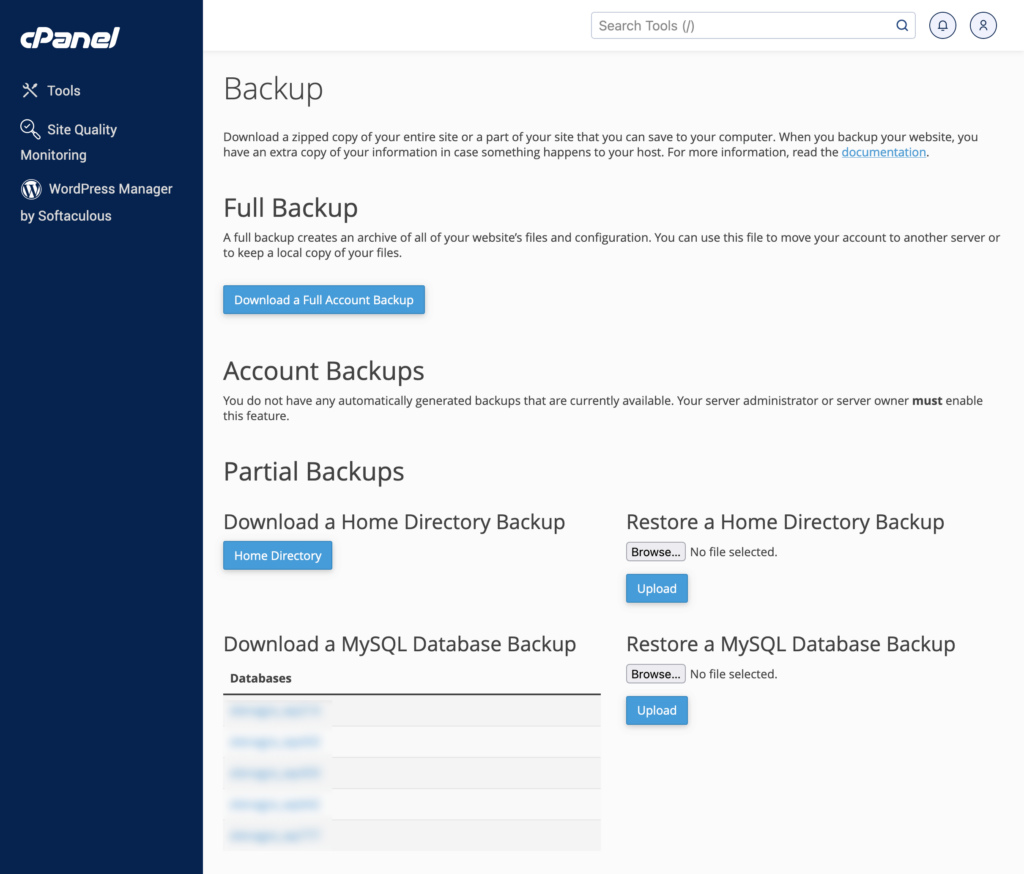
Other cPanel Backup Tools
You’ll discover analogous functionality within the Backup section.
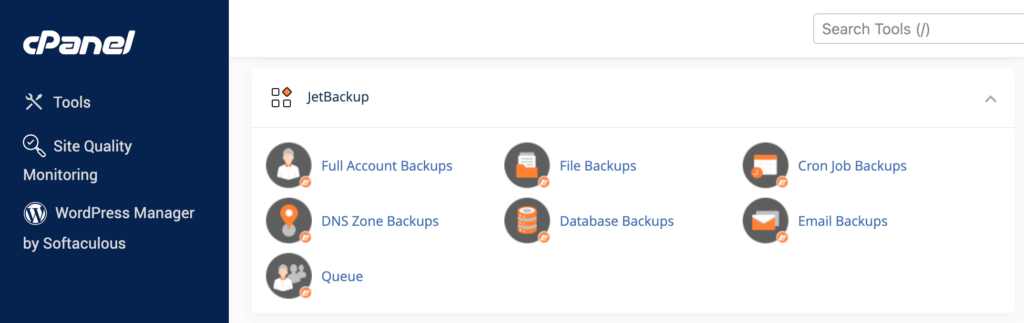
Your cPanel may also provide alternative backup options, such as JetBackup.
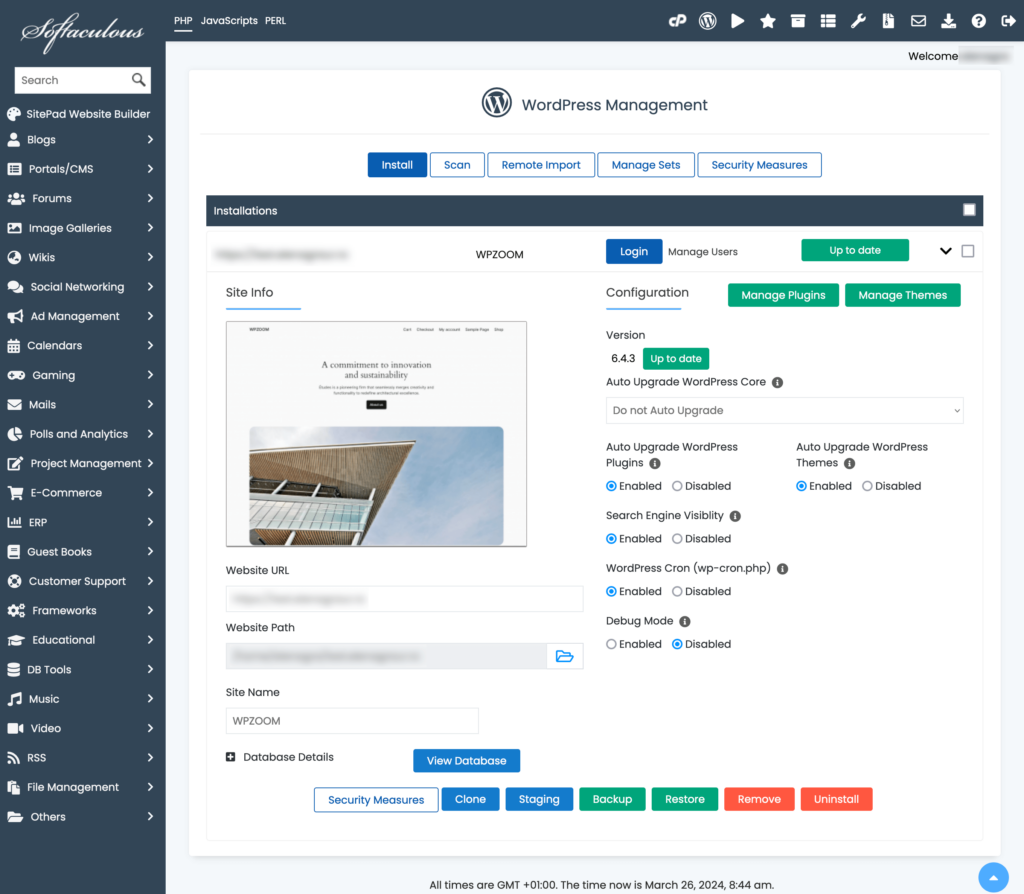
Another option is to back up your WordPress installation using cPanel tools like WordPress Manager by Softaculous. Simply select the installation and click the Backup button.
Method 3. Back-Up a WordPress Site Using Managed WordPress Hosting
Managed WordPress hosting services often provide WordPress automatic backup capabilities, guaranteeing your site’s data remains secure without manual intervention. While the steps may vary slightly from host to host, the general process involves:
- Log into your managed hosting dashboard. Here, you’ll find various site management tools, including backup options.
- Look for a backup feature within your dashboard. Managed hosts like SiteGround and WP Engine typically offer one-click backup solutions.
- Select the backup option to start the process automatically. These backups are often stored on the hosting provider’s cloud storage, providing a hassle-free and secure backup solution.
You’ll enjoy peace of mind knowing your site’s backups happen seamlessly in the background. Additionally, should the need arise, site restoration is merely a few clicks away.
How to Back Up a WordPress Site Manually
Now, let’s explore how to do a manual backup of your WordPress site, giving you more control over the process.
To manually back up your WordPress site, you must handle and store the files and databases that make up your website directly.
You can use cPanel or FTP for a hands-on approach, offering different methods to safeguard your site’s data.
Method 1: Manually Back Up a WordPress Site Using cPanel
cPanel, a widely used web hosting control panel, provides tools to manually back up WordPress files and databases with precision.
Backing Up the WordPress Files
Backing up your site files involves downloading a copy of everything in your WordPress directory, including themes, plugins, media, and other files.
- Log in to your hosting account and access cPanel.
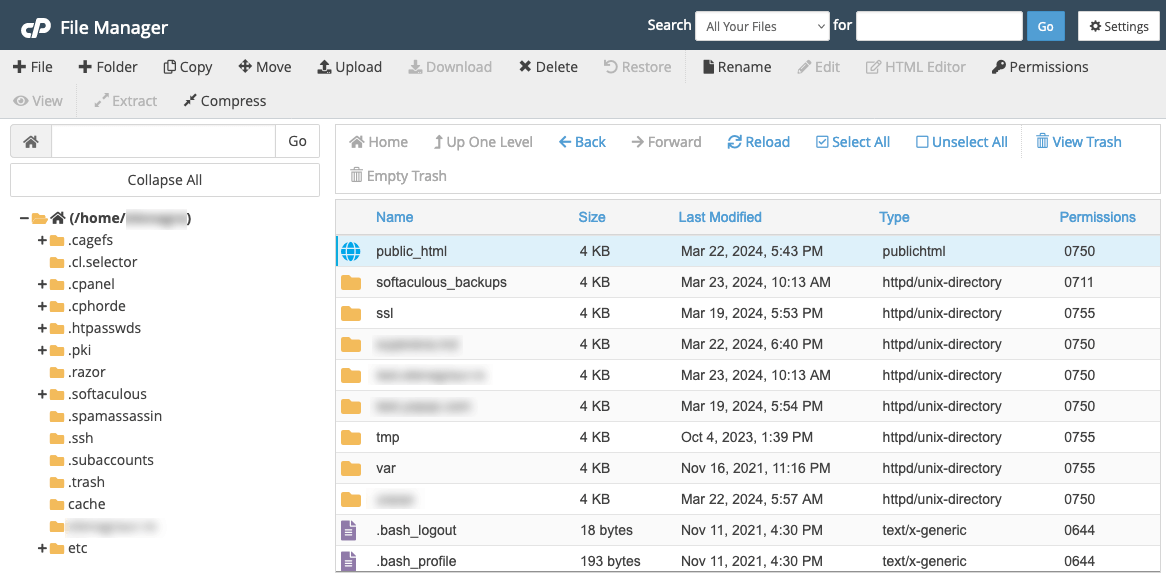
- Navigate to the File Manager.
- Select your WordPress site’s root directory. This is typically a folder named public_html.

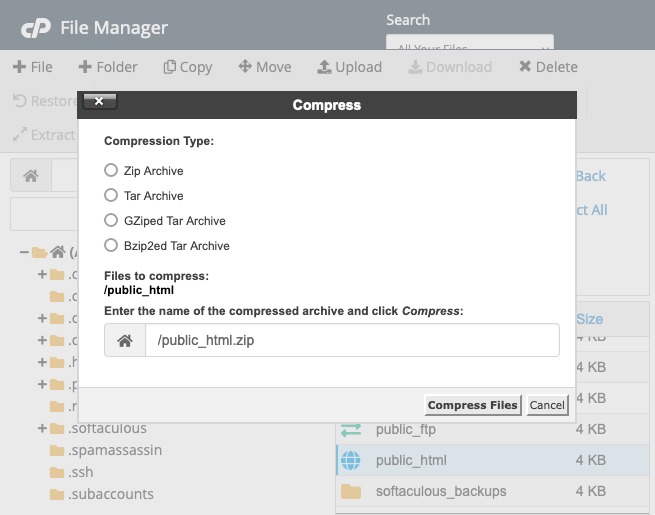
- Look for a Compress option in the menu and click on it to compress the selected items into a ZIP file.
- Click Compress Files.

Once compressed, you can download this ZIP file to your computer, serving as your site’s files backup.
Backing Up the WordPress Database
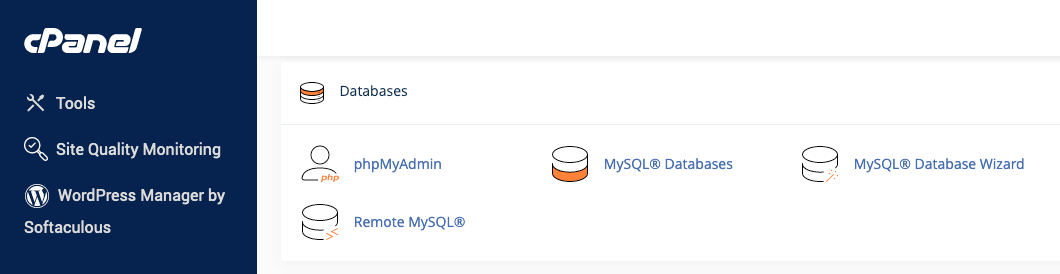
Your WordPress database contains your site’s posts, comments, and settings. phpMyAdmin, a free software tool intended to handle the administration of MySQL over the Web, offers a straightforward way to export your WordPress database:
- Within cPanel, find and open phpMyAdmin. You can commonly find this tool in the databases section of your hosting dashboard.

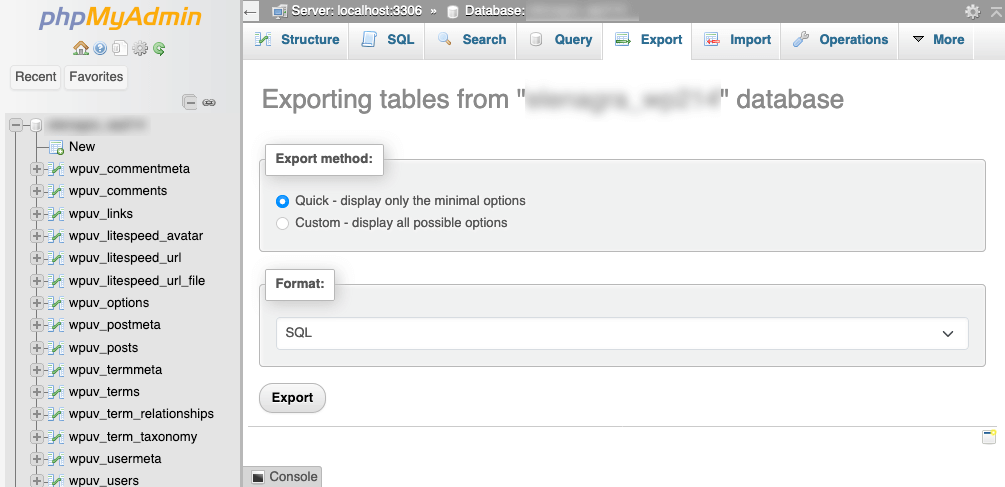
- Select the database that corresponds to your WordPress site. If unsure of the database name, check the wp-config.php file in your WordPress root directory.
- With the database selected, click on the Export tab at the top of the page. You will see two options: Quick and Custom. The Quick option is sufficient for most users; it automatically selects all tables within your database for export. Ensure that you set the format to SQL.
- Click the Export button to export.

phpMyAdmin will generate a .sql file containing your database’s data, which you can download to your computer. Store this file in a safe and secure location, as it includes all the vital information of your WordPress site.
Method 2: Manually Back Up a WordPress Site Using FTP
You can use an FTP client instead of cPanel’s File Manager to back up your WordPress files manually.
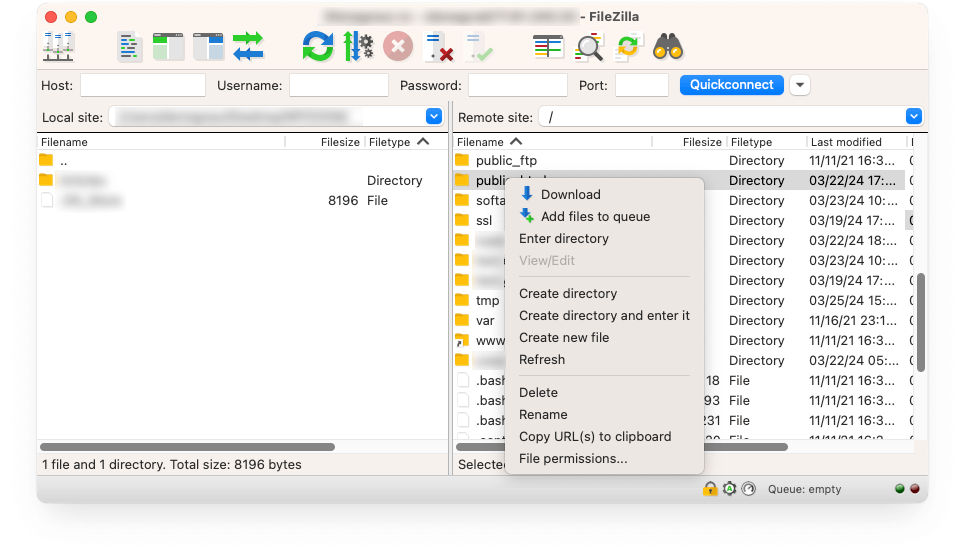
- Start by selecting an FTP client, like FileZilla, and install it on your computer.
- Open your FTP client and enter your website’s FTP credentials (host, username, and password), which you can obtain from your web hosting provider. Once entered, connect to your server.
- Navigate to your WordPress site’s root directory.
- Select key WordPress folders and files you wish to backup.
- Right-click on the selected items and choose the option to download.

The FTP client will transfer these files from your web server to your local computer. - Once the download is complete, navigate to the local folder where you saved the files. Verify that all selected files and folders are present and accounted for.
How to Restore a WordPress Site from Backup
Restoring your WordPress site involves reversing the backup process and applying the saved files and databases to return your site to its previous state. The restoration process will vary depending on how the backup was created — via a plugin, cPanel, or manually using FTP and phpMyAdmin.
Here’s how to approach restoration using these methods.
Restoring from Plugin Backups
If you’ve backed up your site using a plugin like UpdraftPlus, the restoration process is straightforward:
- Navigate to the Backup / Restore section within the backup plugin for WordPress.
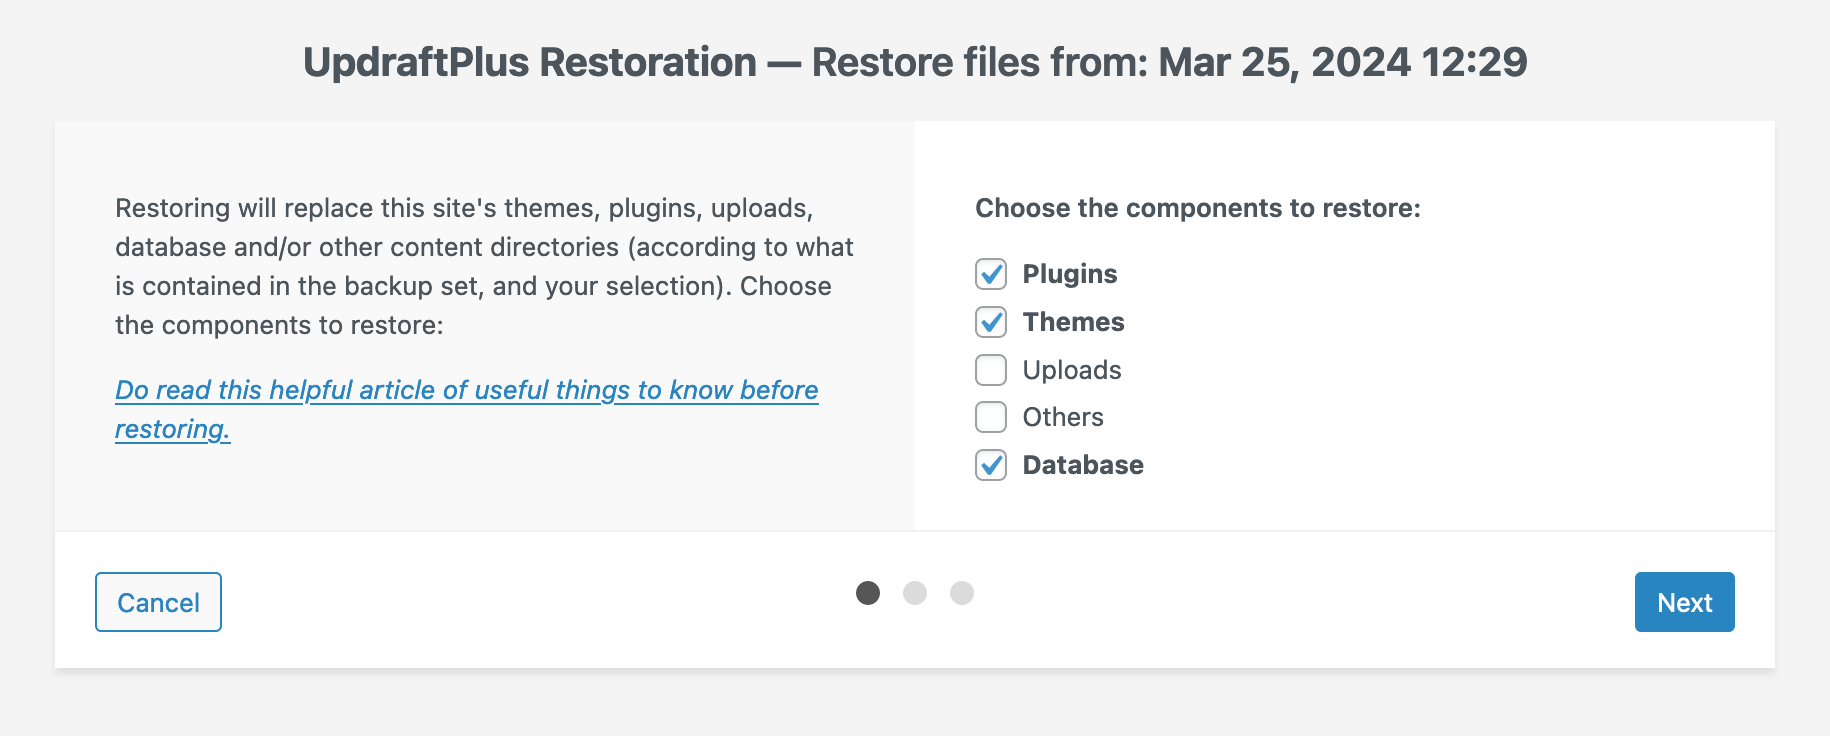
- Choose the backup you wish to restore, click Restore, and follow the plugin’s instructions.

The plugin will typically allow you to select which components (files, database, plugins, themes) you want to restore.
Restoring from cPanel Backups
To restore backups created through cPanel:
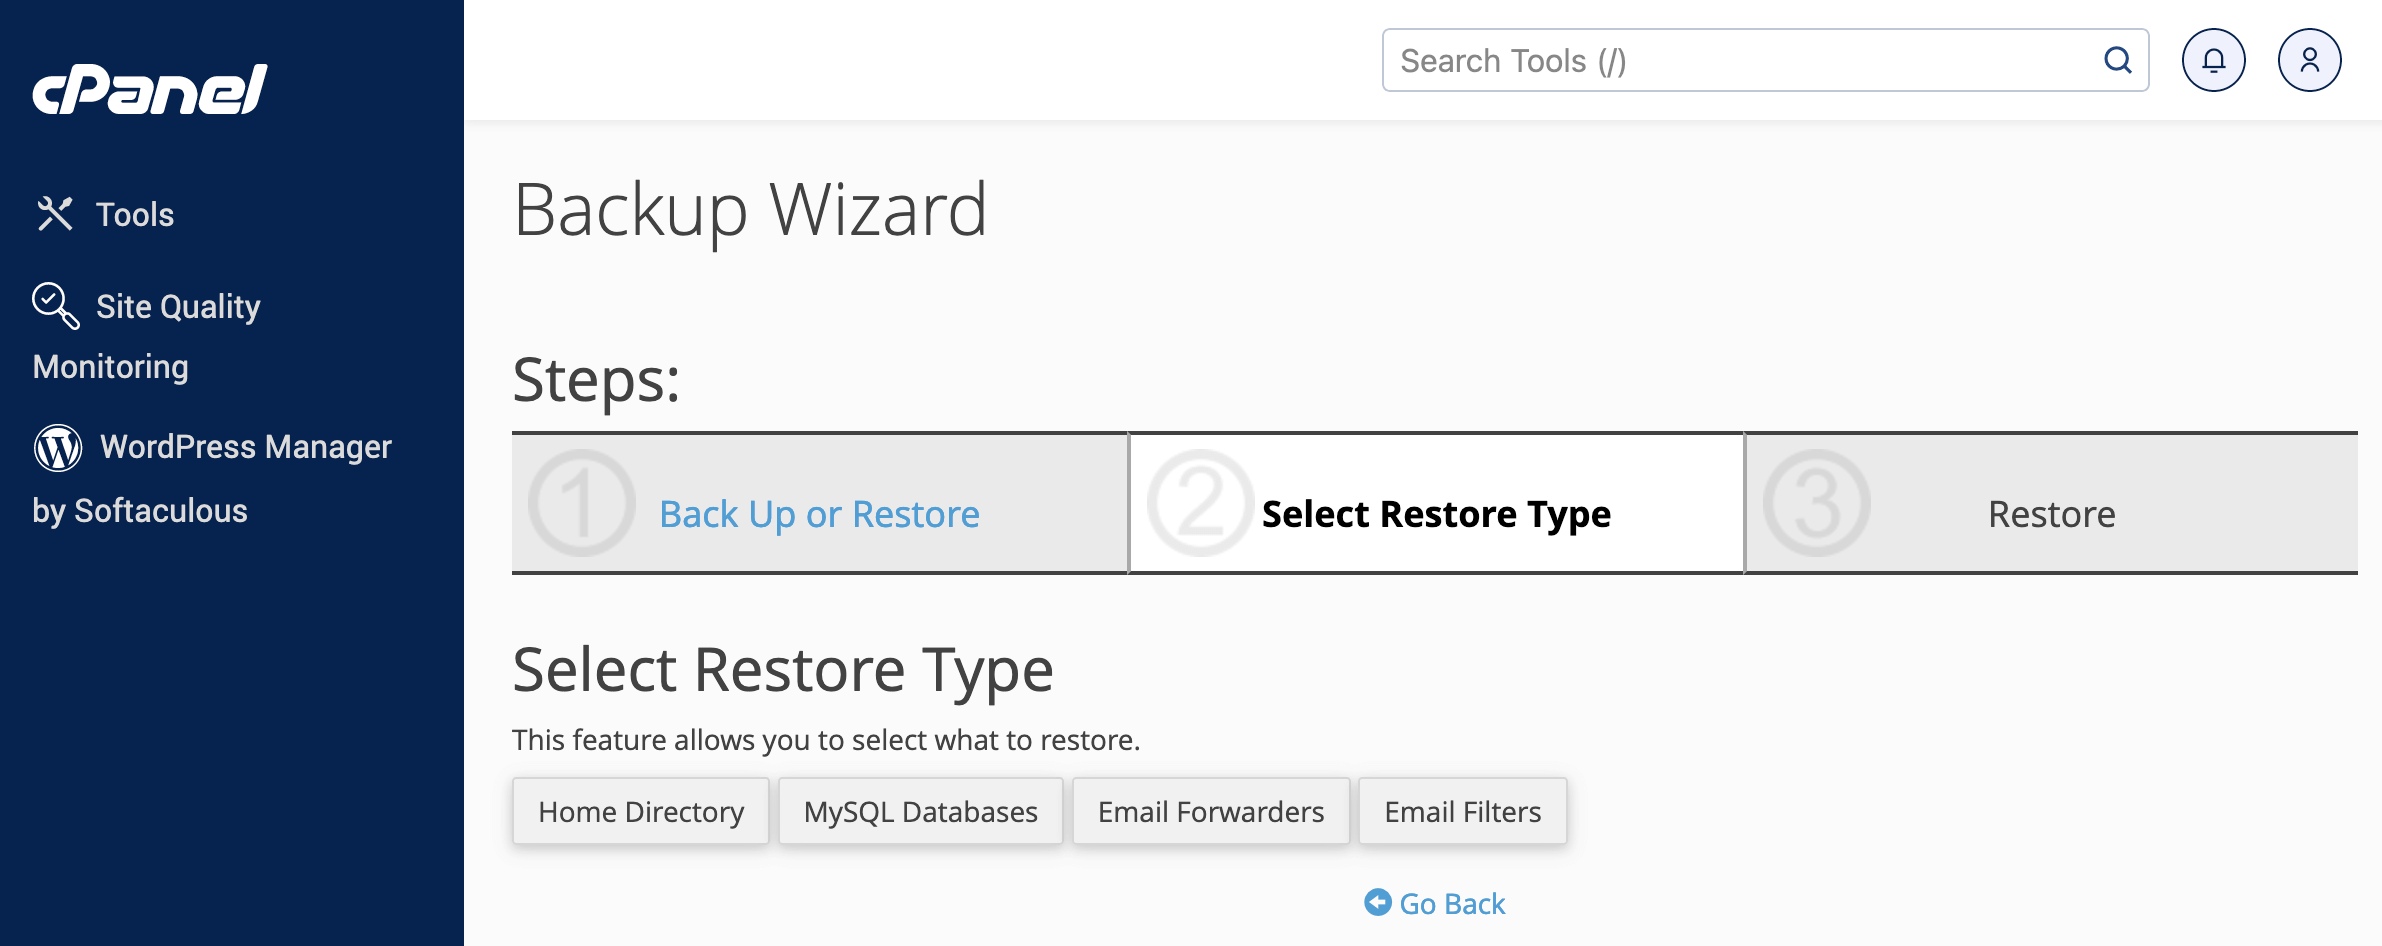
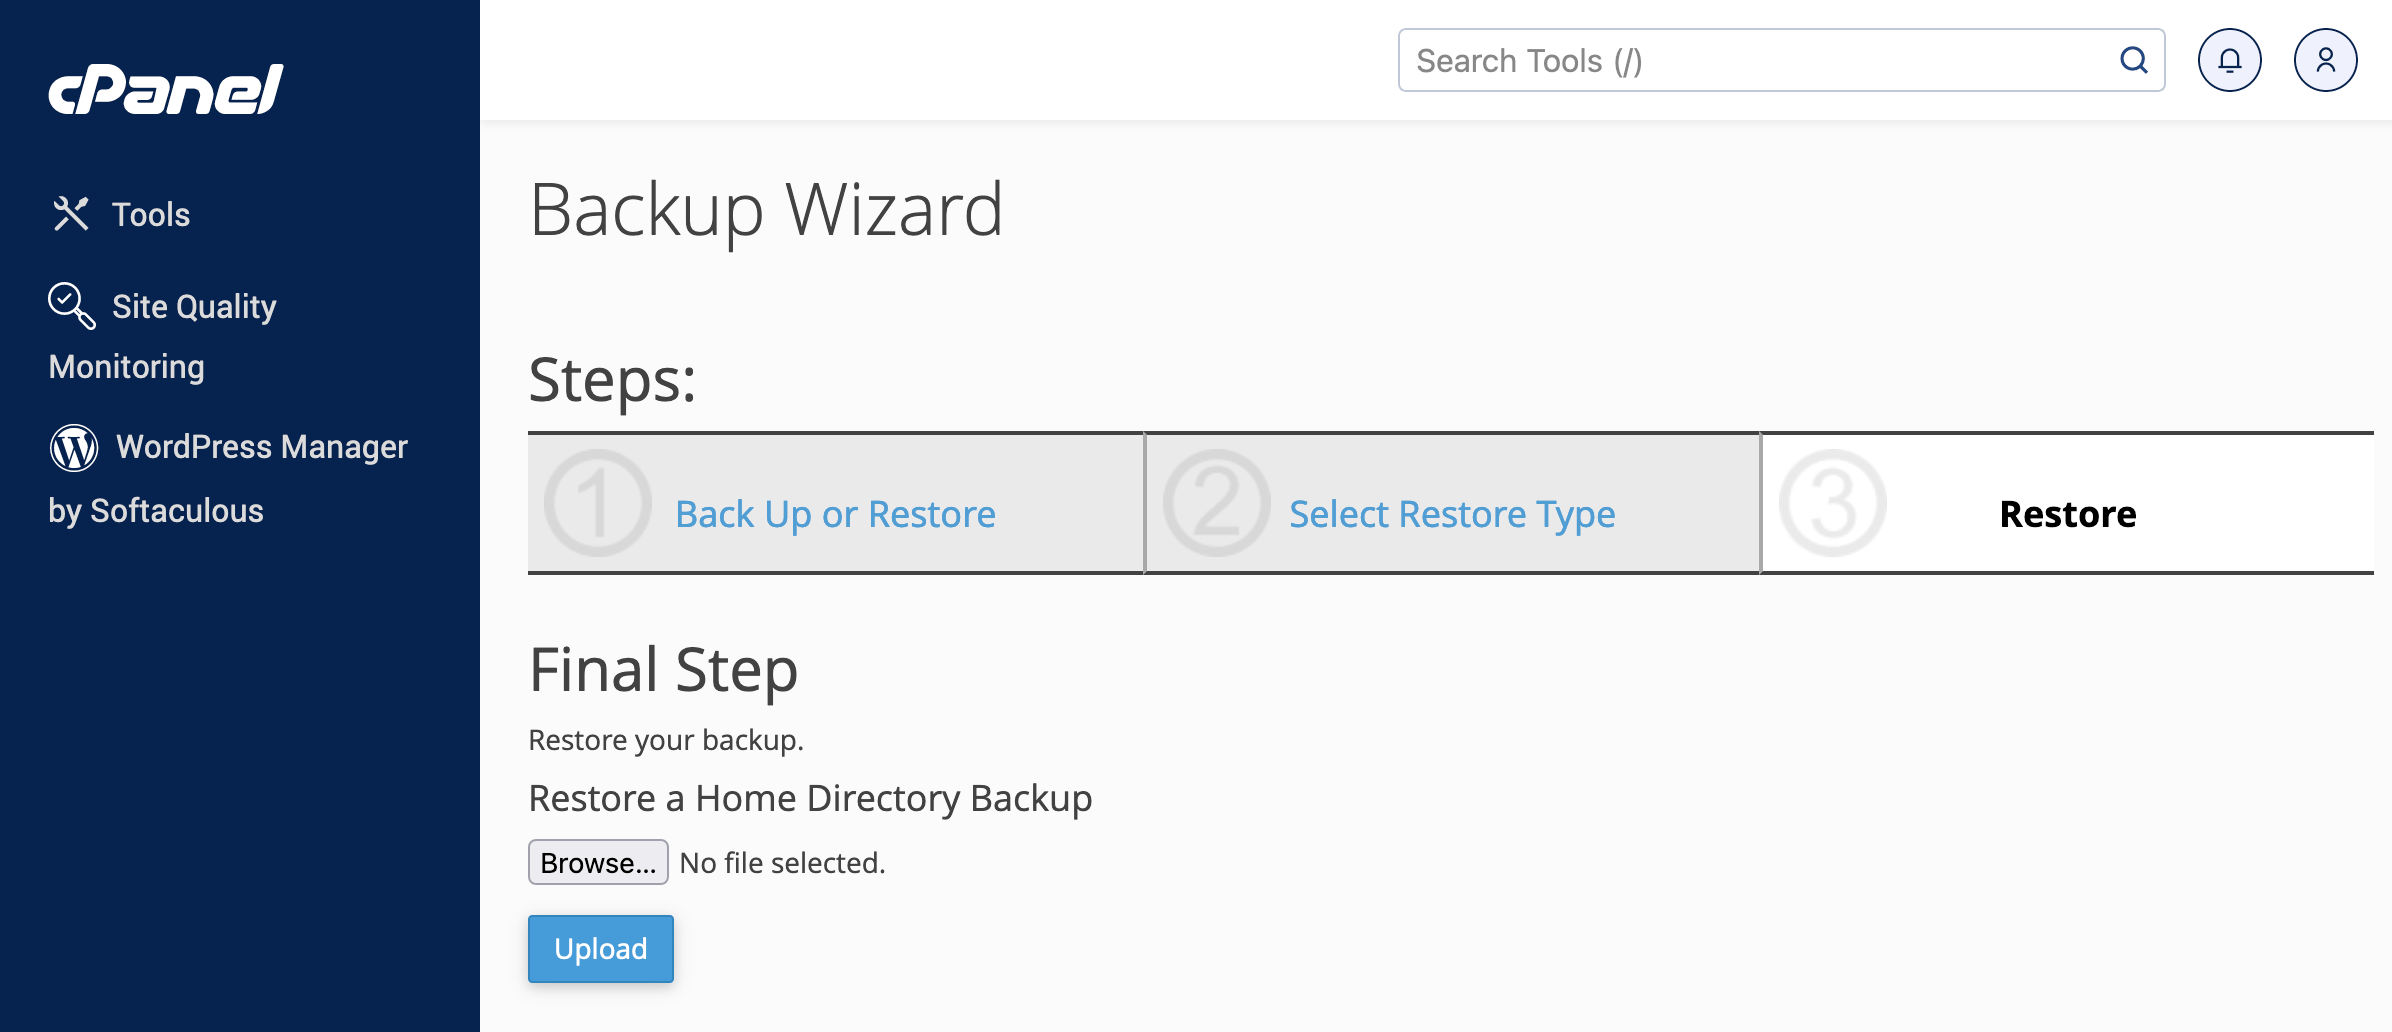
- Access cPanel and open the Backup Wizard.
- Click Restore.
- Choose what you want to restore – Home Directory, MySQL Databases, Email Forwarders, or Email Filters.

- Click Browse… to choose the backup file you’ve downloaded when you have created the backup and click on Upload.

Restoring Files from Manual FTP Backups
If you backed up your site files manually using FTP:
- Connect to your server using an FTP client like FileZilla.
- Delete the existing files and folders in the root directory of your WordPress site (after ensuring you have a backup).
- Upload the files from your backup by dragging them from your computer to the server.
Restoring the Database Manually
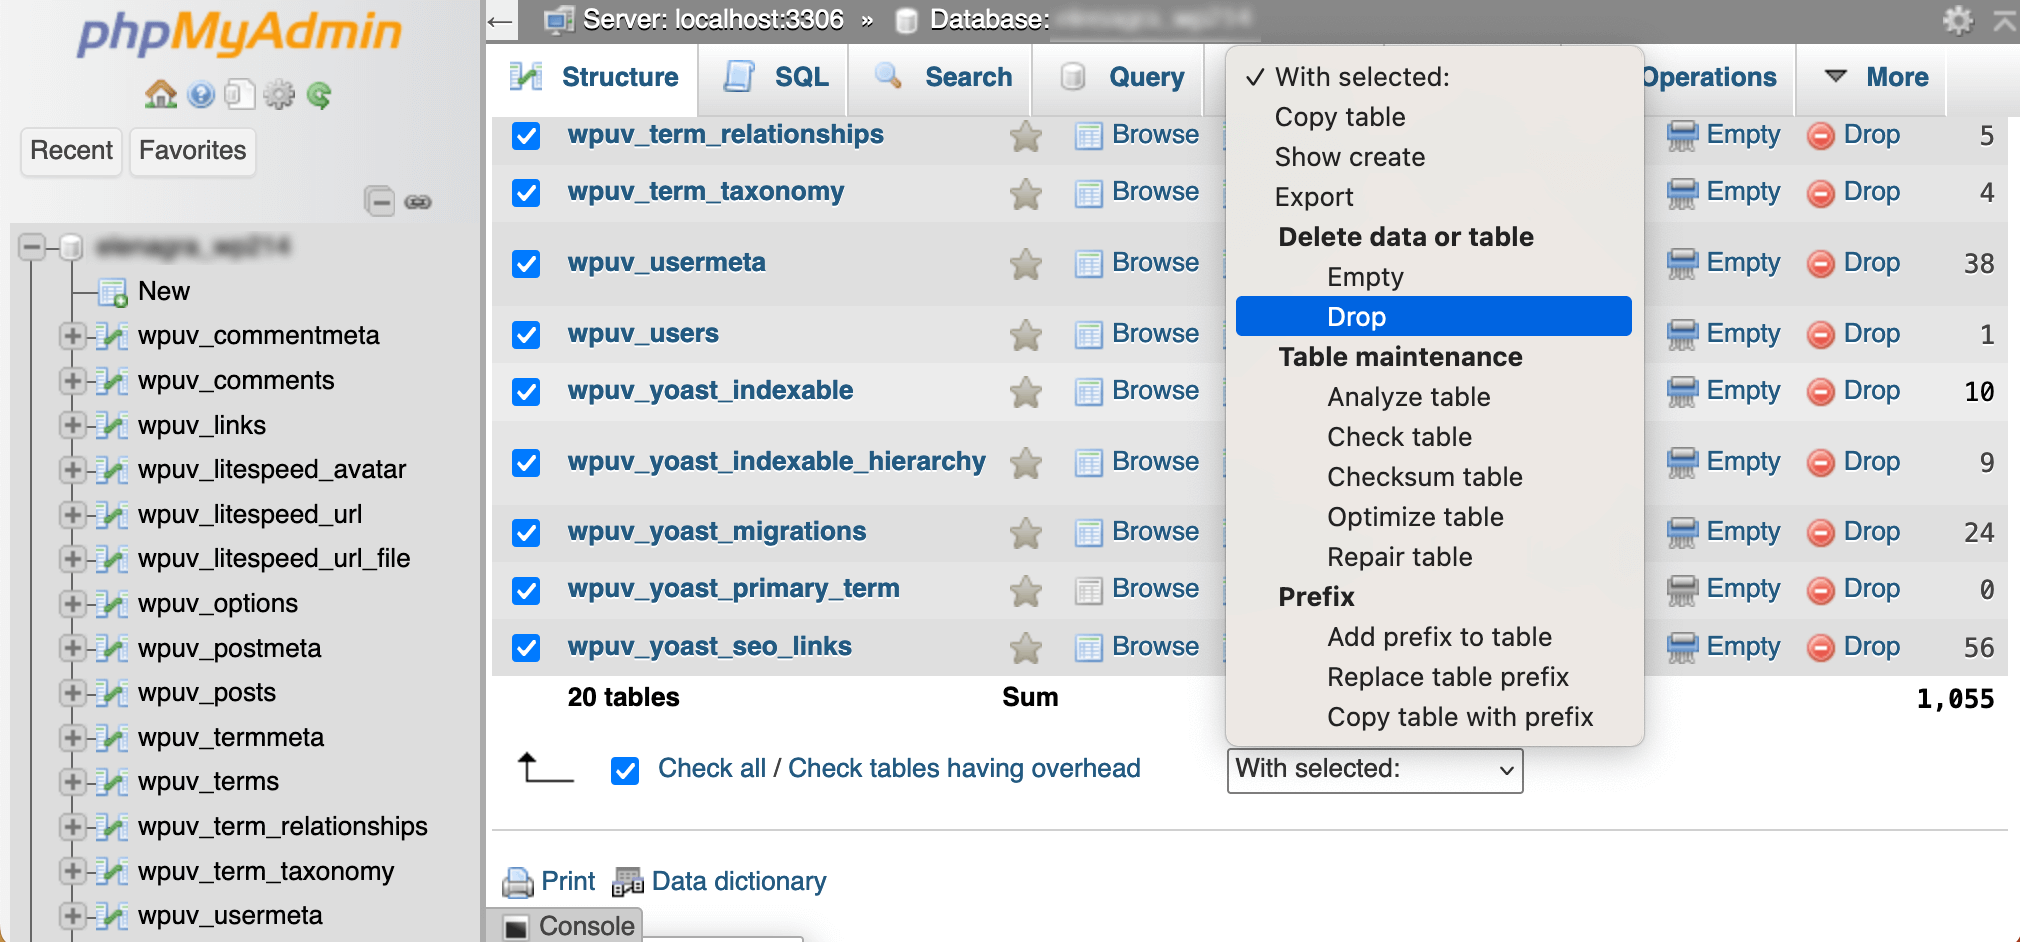
- Go to phpMyAdmin in cPanel.
- From the left column, select the database you wish to restore.
- Tick the Check all checkbox to select all the existing tables and select Drop from the With selected: drop-down menu to delete them.

- Click the Import tab, click Browse… to select your backup SQL file, and click the Import button to execute the import.

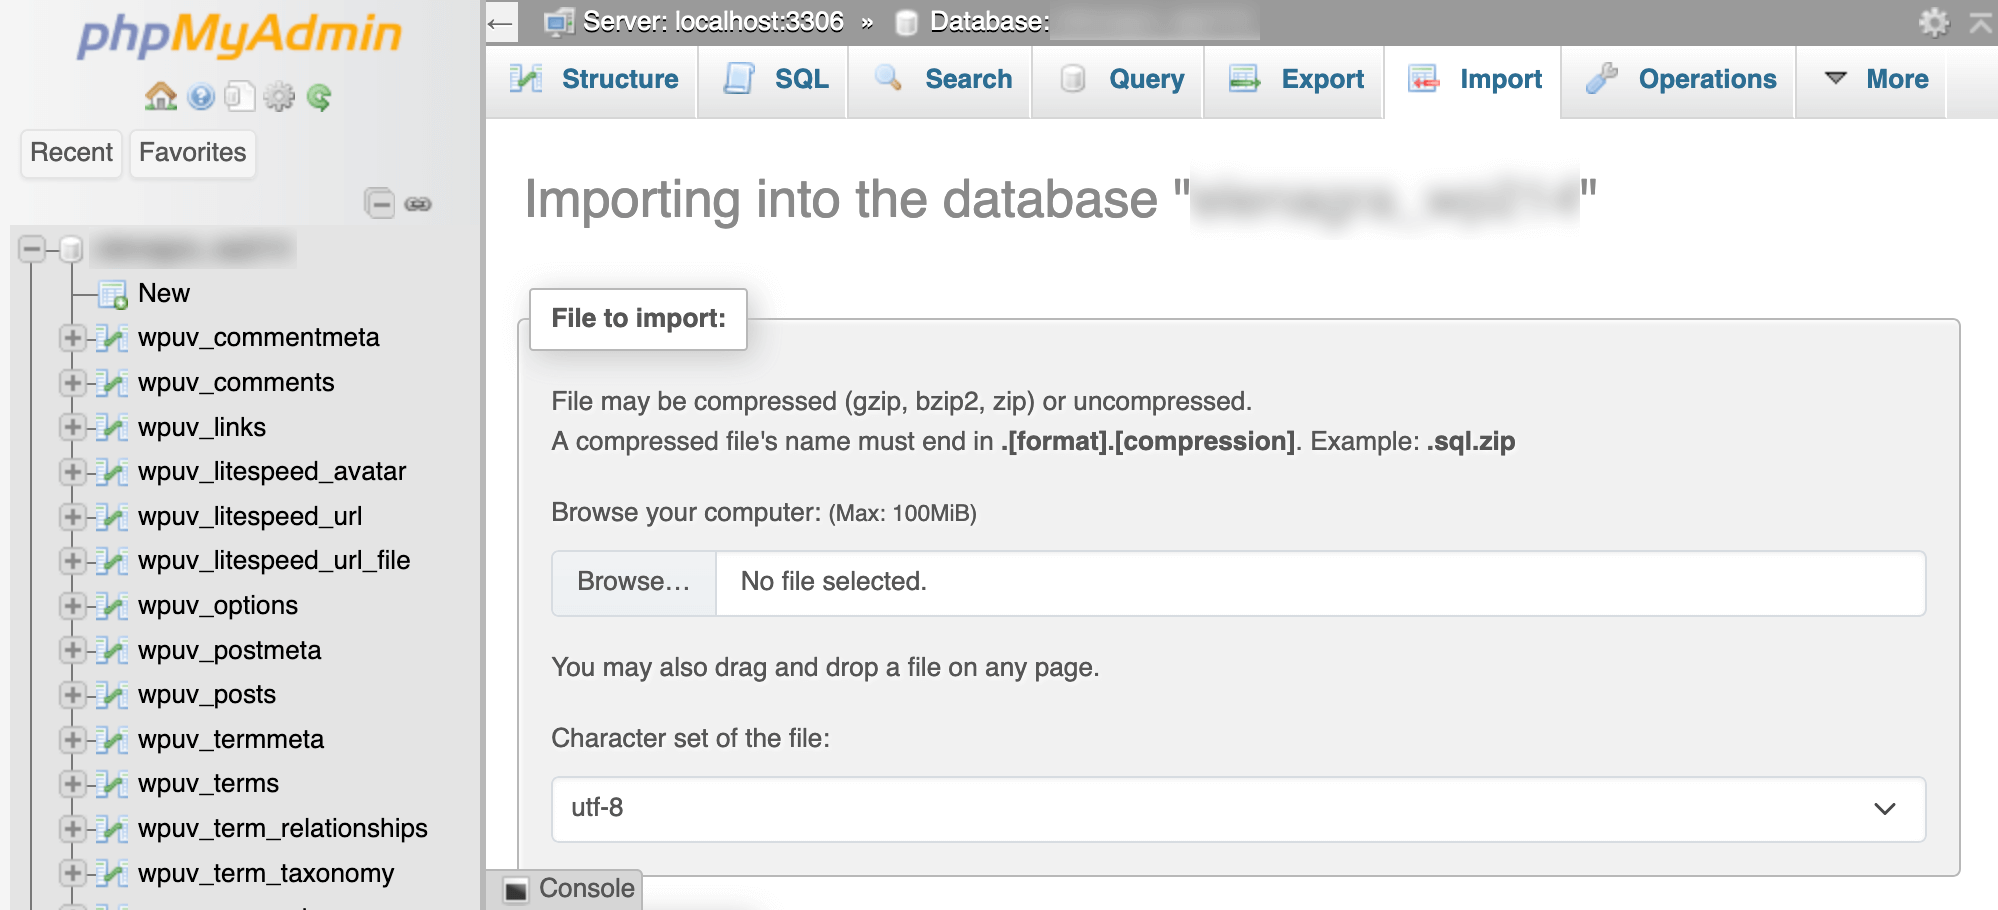
This will repopulate your database with the backed-up data.
General Tips for Restoration
- Check Site Functionality: After restoring, thoroughly check your site’s functionality to ensure everything works as expected.
- Back-Up Before Restoring: Create a new backup before restoring, even if your site is compromised. This acts as a safety net if the restoration process does not go as planned.
- Maintenance Mode: Consider putting your site in maintenance mode during restoration to prevent visitors from encountering errors.
Bottom Line
It is better to think about backups before you need them, not after.
Backups are a safety net, essential for recovering from unforeseen events that could otherwise result in significant data loss.
By incorporating regular backups into your website maintenance routine, you protect your website’s data and ensure a quick recovery pathway should the need arise.