Creating a restaurant website might seem overwhelming initially, but it’s a manageable and rewarding task with the right tools and guidance.
This article will walk you through the step-by-step process of building a restaurant website that looks professional and drives customer engagement and sales.
From planning your site to choosing a platform, designing your layout, adding key features like a digital menu and online ordering system, and promoting your website, we’ve got you covered.
So, let’s get started and discover how to create a restaurant website.
Quick Guide to Building a Restaurant Website
Here’s a quick summary of the critical steps involved in creating a restaurant website:
- Step 1: Plan Your Restaurant Website
- Step 2: Choose a Website Platform
- Step 3: Select a Hosting Provider and Register a Domain Name
- Step 4: Install WordPress
- Step 5: Designing a Restaurant Website
- Step 6: Add a Digital Menu
- Step 7: Add an Online Ordering and Delivery System
- Step 8: Add an Online Reservations System
- Step 9: Promote and Grow Your Website
Now, let’s explore each aspect in more detail to ensure you’re well-equipped to launch your restaurant website successfully.
9 Steps to Create a Restaurant Website
Whether you’re looking to create a website from scratch or revamp an existing one, these steps will help you build a restaurant website that attracts new customers.
Step 1. Plan Your Restaurant Website
Before exploring the technicalities of creating a website for a restaurant, it’s crucial to lay a solid foundation by planning your site. This initial phase is about setting clear objectives and understanding your audience, which will guide every decision you make.
- Define Your Website’s Purpose. Ask yourself: What do I want to achieve with my restaurant’s website? Common goals include increasing awareness, showcasing the menu, facilitating online reservations or orders, and providing essential information like location and opening hours. Your website’s purpose will influence its design, content, and functionality, so it’s necessary to have a clear vision from the start.
- Understand Your Target Audience. Who are your customers, and what do they expect from your website? A family-friendly diner, a romantic cafe, and a high-end gastronomic restaurant will attract different demographics with distinct preferences. Consider factors like age, tech-savviness, and dining habits. This understanding will inform how you structure your site, produce content, and engage with visitors online.
- Map Out Content and Features. Based on your goals and audience, decide on the key features and content your website will need. A user-friendly online menu, an online reservation system, and a gallery of mouth-watering food photos are often essential. Additional features include a blog for sharing news and events, social media integration, and customer reviews. Sketching a rough site map can help visualize the structure and ensure a seamless user experience.
With a clear strategy in place, you’re now ready to choose the best platform to build a website for your restaurant.
Step 2. Choose a Website Platform
Selecting the right platform to build your restaurant website is a critical decision that impacts the development process and the ease of managing your site in the long run. The market offers a variety of website builders and Content Management Systems (CMS) that cater to different needs, skill levels, and budgets.
WordPress, Squarespace, and Wix are popular choices for restaurant websites, each with unique features.
WordPress
WordPress stands out for its flexibility and extensive customization options, making it a preferred choice for many. It’s a powerful CMS that can accommodate everything from a simple blog to a full-fledged restaurant website with online ordering systems.
Coupled with WooCommerce e-commerce capabilities, WordPress transforms into an e-commerce powerhouse, allowing for seamless integration of online ordering and reservations.
Pros:
Cons:
- Requires a learning curve for beginners.
- You’re responsible for maintaining updates and security.
Squarespace
Squarespace is known for its sleek templates and user-friendly interface, ideal for those looking for simplicity and elegance. It offers a range of features for building a visually appealing restaurant website without much technical hassle.
Pros:
- Intuitive drag-and-drop interface.
- Beautiful, responsive design templates suited for restaurants.
- Hosting and domain registration included simplifying the setup process.
Cons:
- WordPress is more customizable.
- Limited third-party integrations compared to WordPress.
Wix
Wix is another drag-and-drop website builder that prides itself on simplicity and ease of use. With a wide selection of templates and the ability to customize your site without touching a line of code, Wix is great for restaurant owners who want a hands-on approach to website building.
Pros:
- User-friendly platform suitable for beginners.
- A variety of restaurant-specific templates.
- Includes hosting and offers a free basic plan.
Cons:
- Limited functionality for complex feature requirements.
- It can become costly as you add premium features or apps.
Recommendation: WordPress with WooCommerce
For restaurants looking to maximize their online potential, WordPress combined with WooCommerce offers unparalleled flexibility and control. While it may require more effort to set up, the investment pays off with a powerful, scalable website tailored to your specific needs.
Choosing the right platform balances your immediate needs with your future goals. With its robust ecosystem and flexibility, WordPress provides a solid foundation for restaurants aiming to expand their online presence beyond a basic website.
Step 3. Select a Hosting Provider and Register a Domain Name
Once you’ve decided on WordPress as your platform for your restaurant website creation, the next steps are to choose a hosting provider and register a domain name. These decisions affect your site’s performance, reliability, and overall brand identity.
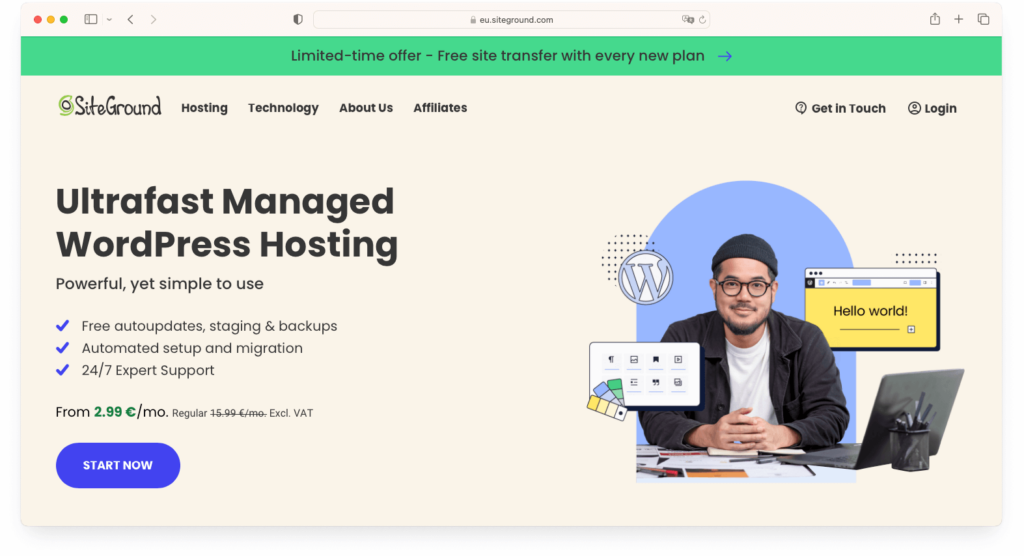
Choosing a Hosting Provider
A reliable hosting service is the backbone of your website, ensuring that it’s accessible to your customers around the clock.
Registering a Domain Name
Your domain name is your website’s address on the internet and plays a crucial role in branding and making your site easily identifiable.
Choose a domain name that matches your restaurant’s name, is easy to remember, and is simple to spell.
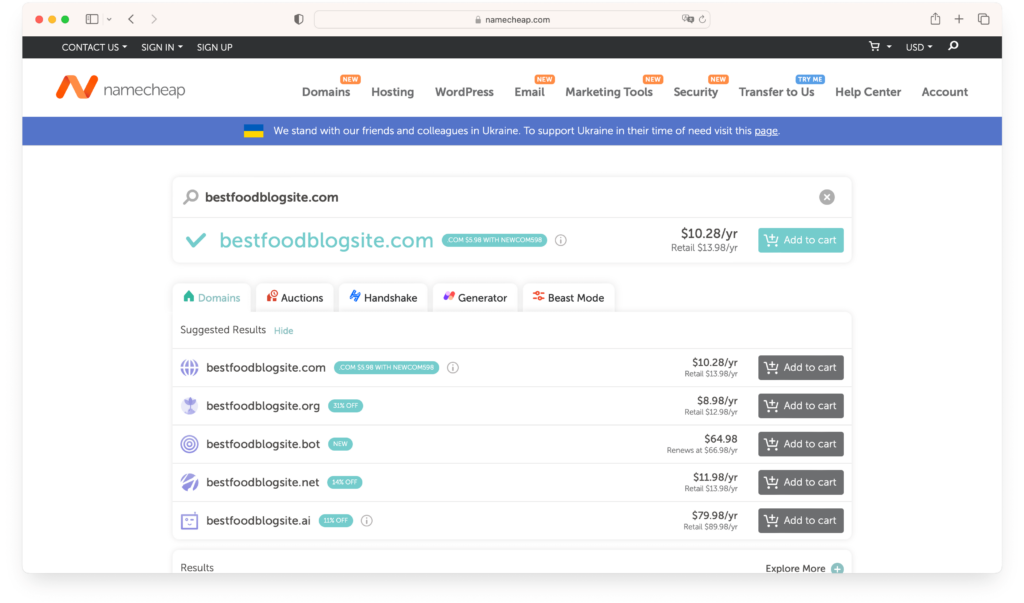
With Siteground and Namecheap, you have a robust foundation for your WordPress website, ensuring that your restaurant’s online presence is secure, reliable, and reflects your brand identity.
Step 4. Install WordPress
Installing WordPress can be seamless, regardless of your hosting provider. Most modern hosting services offer easy, one-click WordPress installation options.
Here’s a generalized step-by-step guide to installing WordPress, applicable to almost any hosting environment:
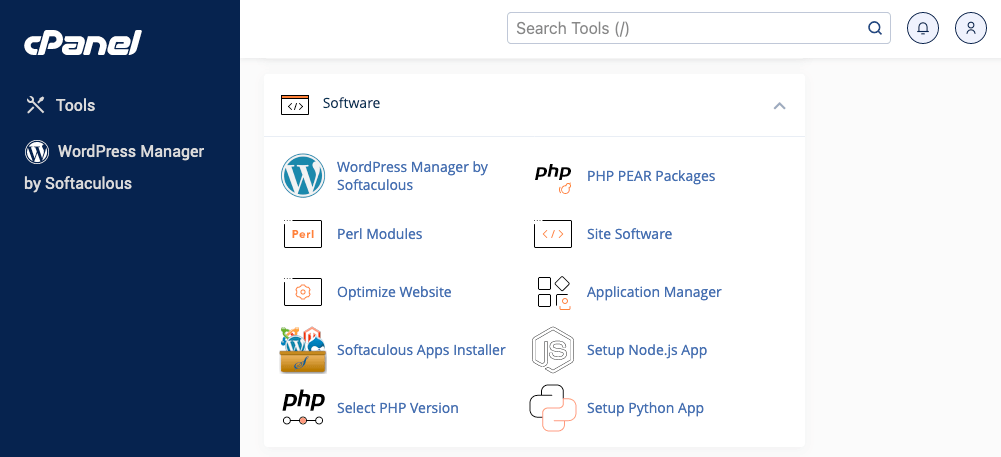
- Log In to Your Hosting Account. This is where you manage all aspects of your web hosting, including domain management, email setups, and installing WordPress.
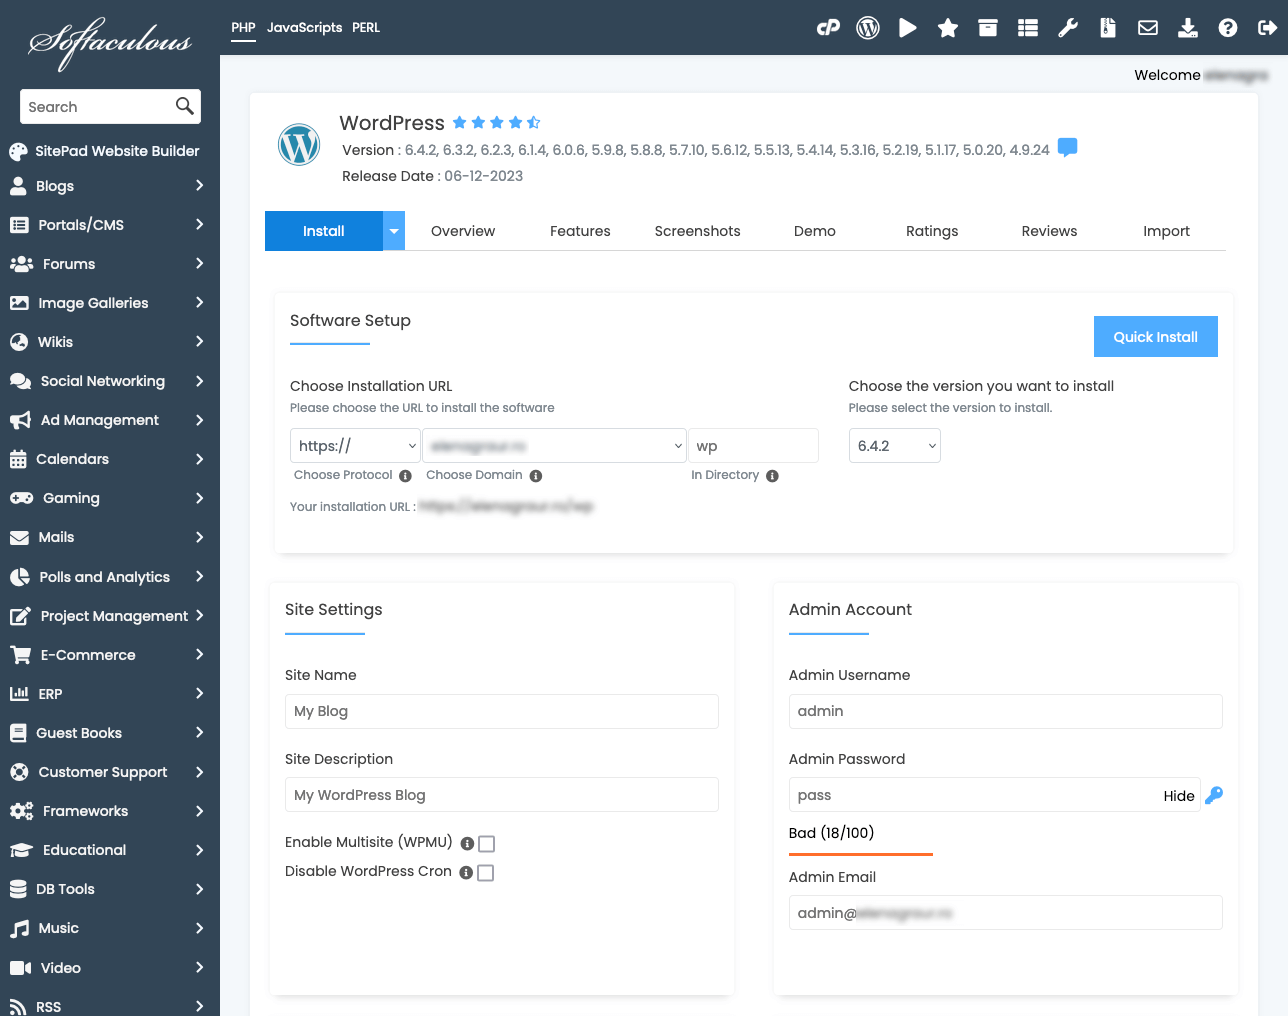
- Find the WordPress Installer. Look for a section in your hosting control panel dedicated to website installation or website builders. Many hosts use interfaces like cPanel, which typically include a software installation tool like Softaculous.

This tool simplifies the process of installing WordPress and other applications. - Start the WordPress Installation Process. Within the installation tool, you’ll find an option for WordPress. Click on it to start the installation process.

- Enter Site Details. The installer will prompt you to fill in details about your site, such as the site name, a description, and administrative login credentials (username and password).
- Complete the Installation. After configuring your settings, proceed with the installation. The installer will take a few minutes to upload the WordPress files to your server and set up your database. Once completed, you will receive a confirmation message with a link to your WordPress site’s URL and the admin login page.
- Access Your WordPress Dashboard. Click on the admin URL to log in to your WordPress dashboard using the credentials you set up earlier. This dashboard is the control center for your WordPress site, where you can customize your site’s appearance, add content, and install plugins.

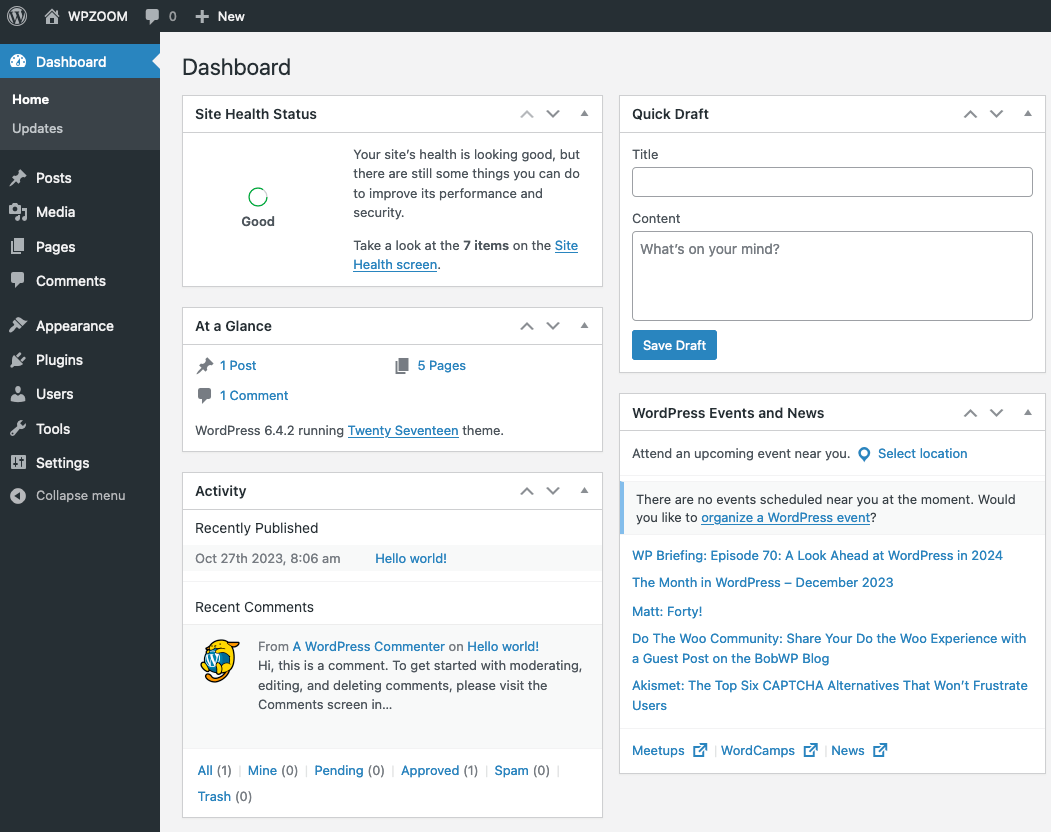
Congratulations! You’ve successfully installed WordPress. From here, you can start building your restaurant website using themes and plugins to match your brand and meet your needs.
Step 5. Designing a Restaurant Website
With WordPress installed, the next step is designing your restaurant website. This involves selecting a theme that aligns with your restaurant’s brand and customizing it to create a unique online presence.
The restaurant web design needs to be visually appealing, user-friendly, and mobile-responsive to effectively meet customers’ needs.
While thousands of free and premium themes are available, our Delicio theme stands out as an exceptional choice for restaurants. We designed this theme with restaurants in mind, featuring a stylish, responsive design that looks great on all devices.
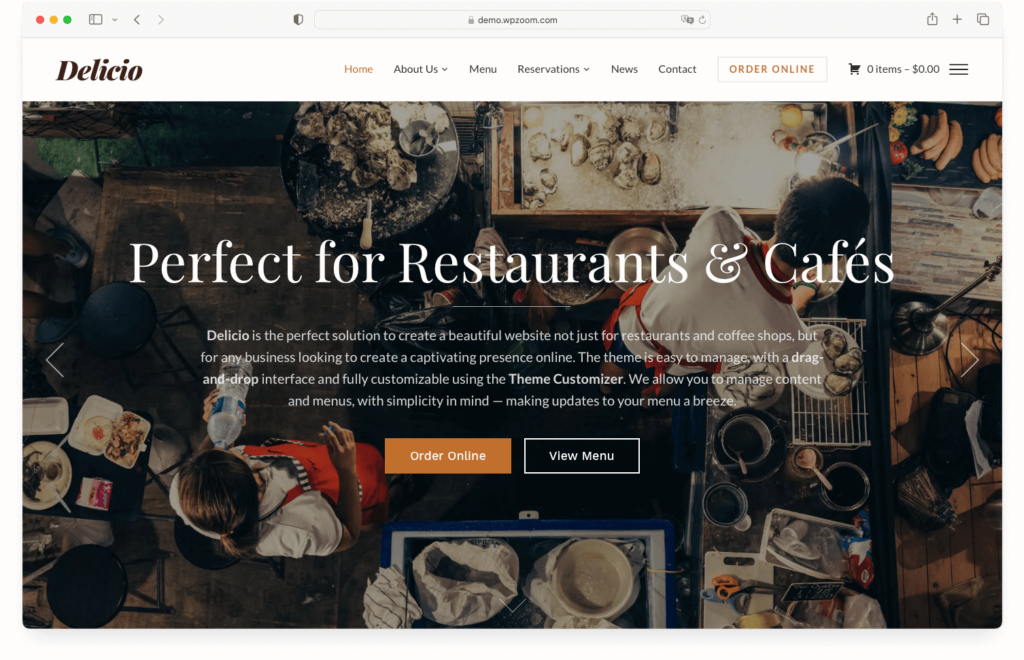
After installing the Delicio theme, customize it to match your restaurant’s branding.
- Upload your restaurant’s logo and use your brand colors to create a consistent visual identity across your website.
- Display your restaurant’s location, hours of operation, and contact details to encourage visits and inquiries.
- Use professional photos of your dishes, restaurant interior, and team to create a welcoming and delicious online experience.
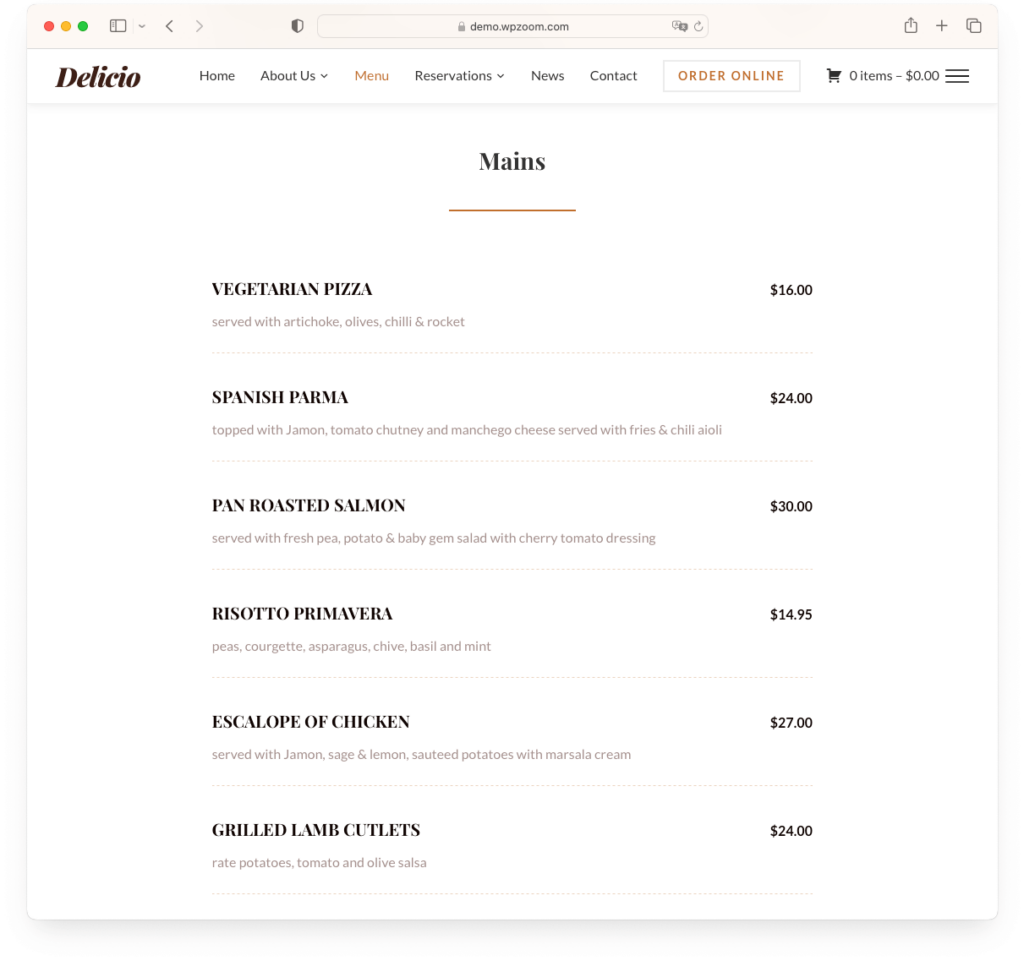
Step 6. Add a Digital Menu
A digital menu is a cornerstone of any restaurant’s website. It allows potential customers to explore your offerings before they decide to visit or order. With a suitable theme and plugins, WordPress makes creating an attractive and functional online menu straightforward.
Using our Delicio theme, you already have an excellent starting point for creating your digital menu. The theme is designed with restaurant needs in mind and features built-in functionalities for menu creation.
We recommend installing the Jetpack plugin to create a page showing your food menu items. You will need to connect Jetpack with a WordPress.com account.
Once the Jetpack is connected, a new Food Menus section will appear in the WordPress admin menu. Here, you can add your food menu items, labels, or sections.
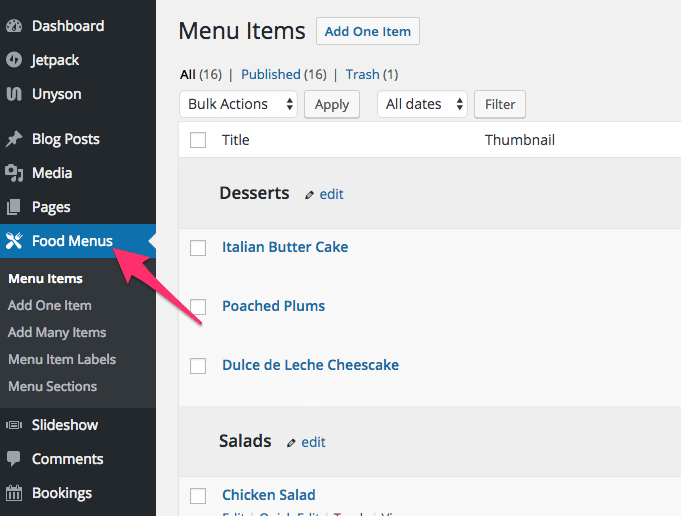
Once you have enough menu items, you can create the Menu page.
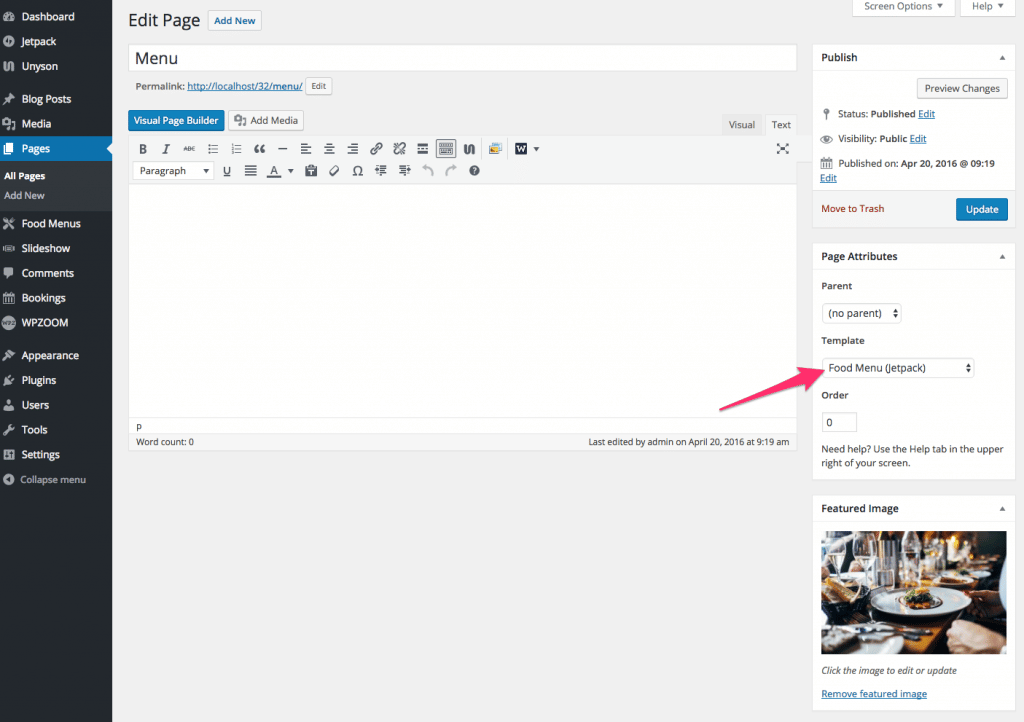
Create a new page and assign the Food Menu (Jetpack) page template.
Step 7. Add an Online Ordering and Delivery System
Incorporating an online ordering and delivery system into your restaurant’s website can significantly enhance your service offerings. With its vast ecosystem of plugins, WordPress makes adding such functionalities relatively straightforward.
WooCommerce is the leading e-commerce plugin for WordPress. It provides the basic framework for online sales, including payment processing and order management.
To tailor WooCommerce for a restaurant setting, you’ll want to add extensions like Product Add-Ons for customization options (e.g., extra toppings, side dishes) or Iconic Delivery Slots for customers to choose delivery times.
Here is how to set up the online ordering:
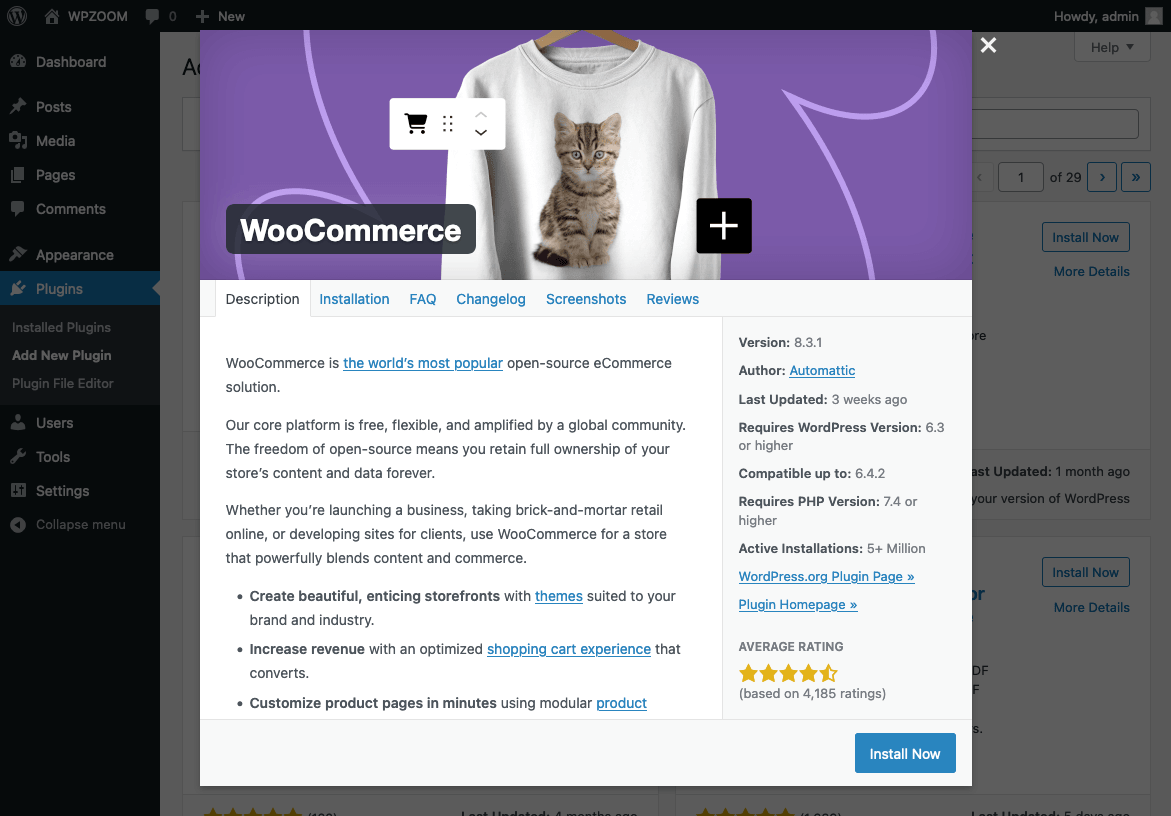
- Install WooCommerce: Navigate to your WordPress dashboard, go to Plugins > Add New Plugin, and search for WooCommerce.

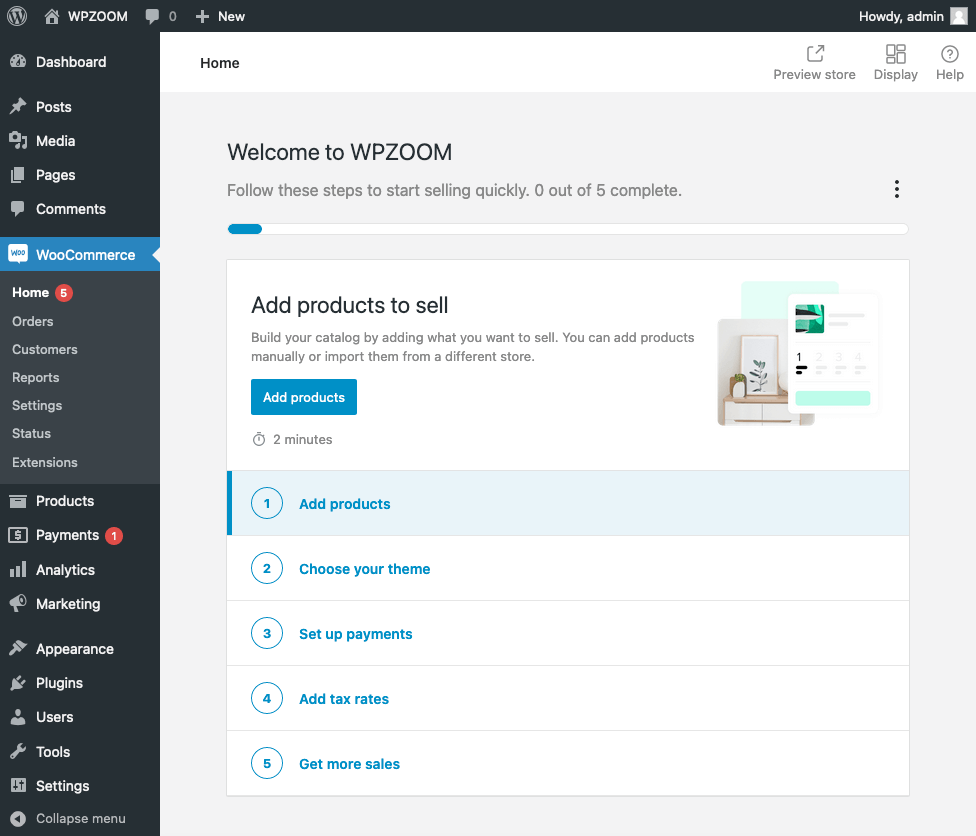
Install and activate the plugin, then follow the setup wizard to configure your store settings.
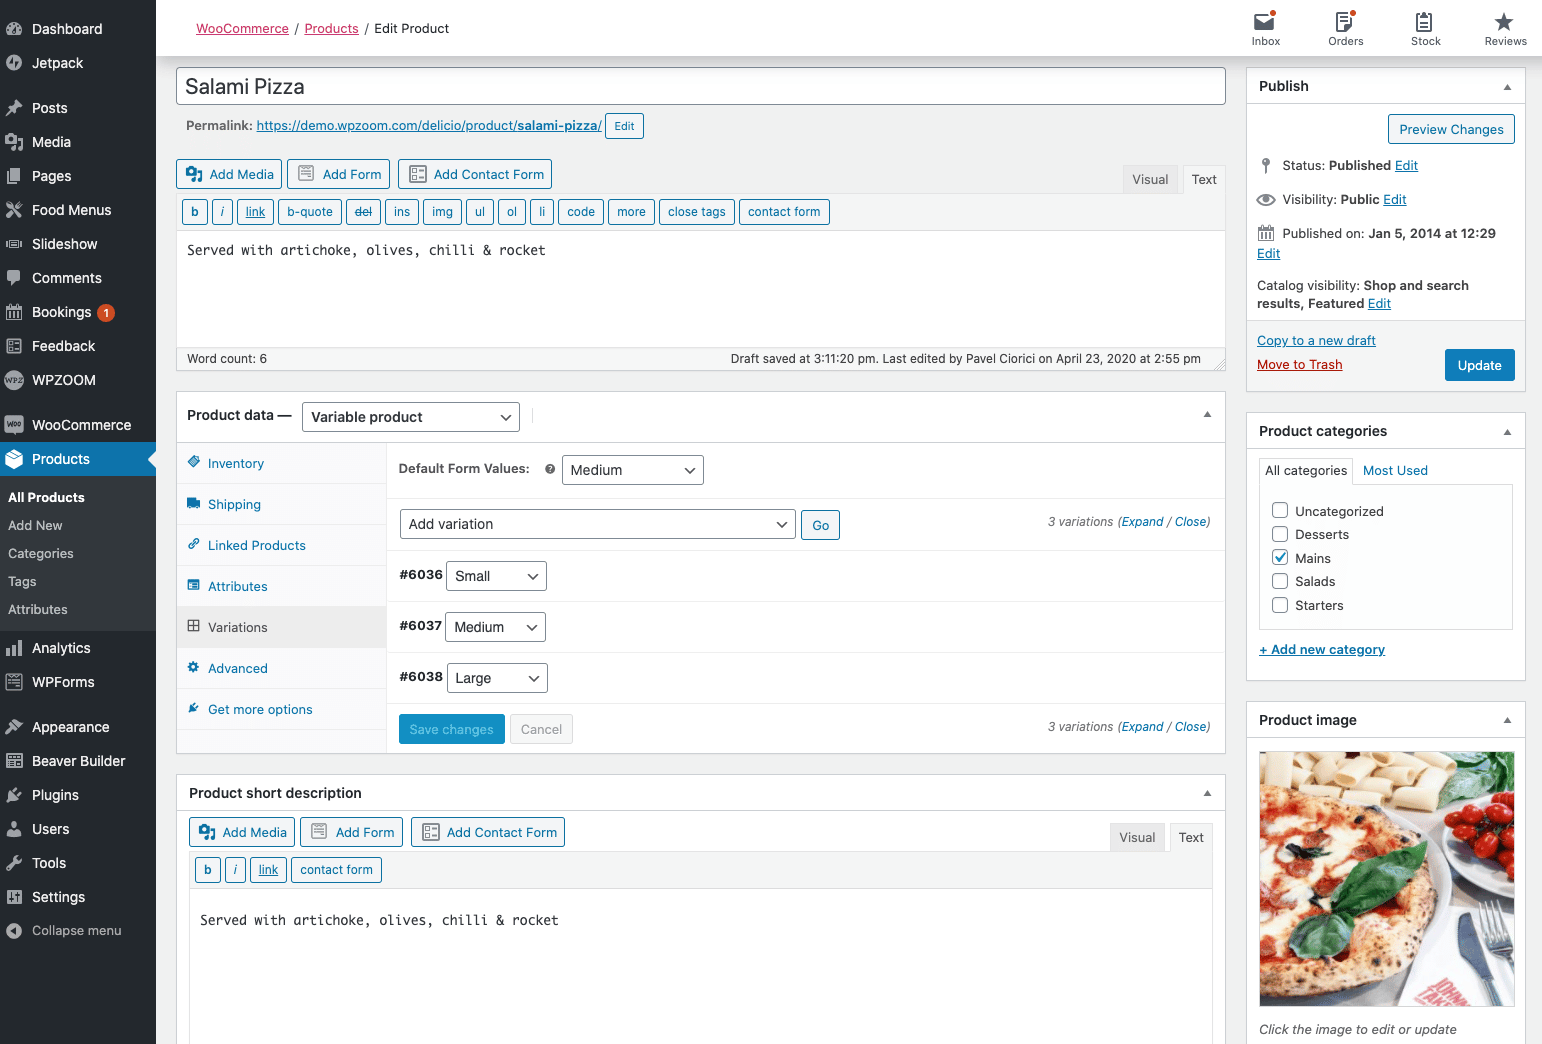
- Add Your Dishes as Products: Each menu item will be a product in WooCommerce. Include descriptions, prices, and high-quality images. Use categories to organize your menu (e.g., appetizers, entrees, desserts).

- Configure Delivery Options: Use plugins like Iconic Delivery Slots to allow customers to select delivery times. Set delivery areas and fees in the WooCommerce settings to ensure clear communication about where and when you deliver.
- Payment Gateways: WooCommerce supports various payment gateways, including credit cards, PayPal, and cash on delivery. Choose the options that best suit your business and your customers’ preferences.
For more detailed instructions, follow our guide on How to Create an Online WooCommerce Restaurant Ordering Page.
Step 8. Add an Online Reservations System
Integrating an online reservations system into your restaurant’s website offers a convenient way for customers to book a table, reducing the workload on your staff and improving the overall customer experience. Thanks to its flexibility and a vast array of plugins, WordPress simplifies adding such a system to your site.
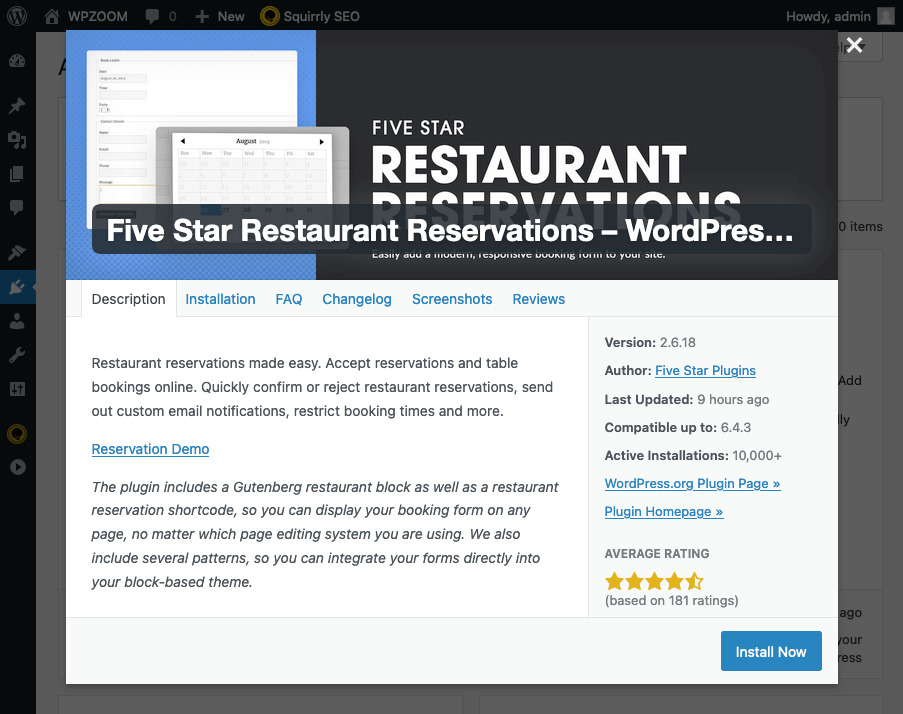
Taking reservations via your website is simple to set up using the Delicio theme and the free Five Star Restaurant Reservations plugin.
- Go to your WordPress dashboard, navigate to Plugins > Add New Plugin, search for Five Star Restaurant Reservations, and install and activate the plugin.

- Create a new page and give it a title. For example, you could name it “Make a reservation,” then click Publish.

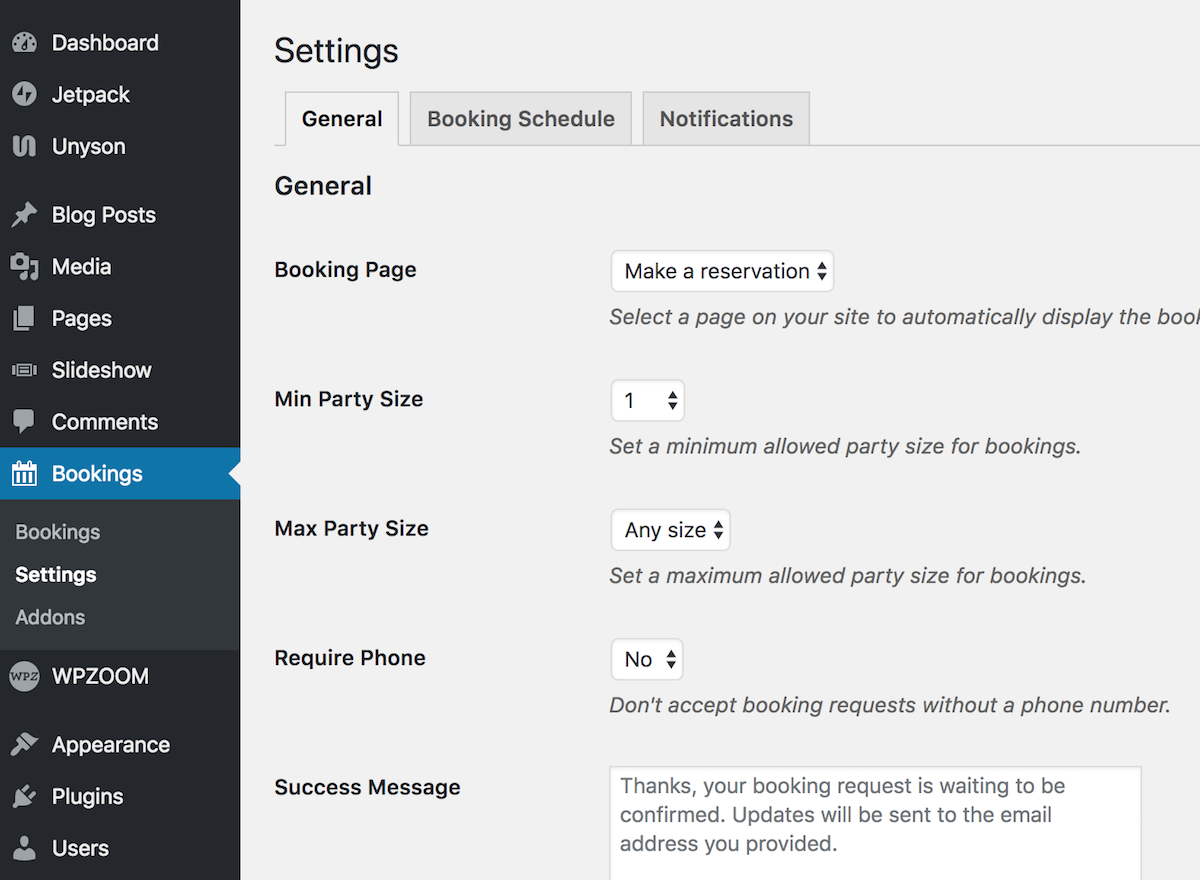
- Now we just need to tell the Restaurant Reservations plugin which page we want to take booking on. To do that, go to Bookings > Settings. Next to the Booking Page, choose the page you just created (e.g., Make a reservation) and then edit the remaining settings as you like.

- Scroll down and click Save Changes.
- We must add this new page to our website navigation menu (not to be confused with a food menu!) so it’s easy to access. To do this, go to Appearance > Menu.

- Before going live, test the booking system thoroughly to ensure that it works correctly and that you receive notifications for new bookings.

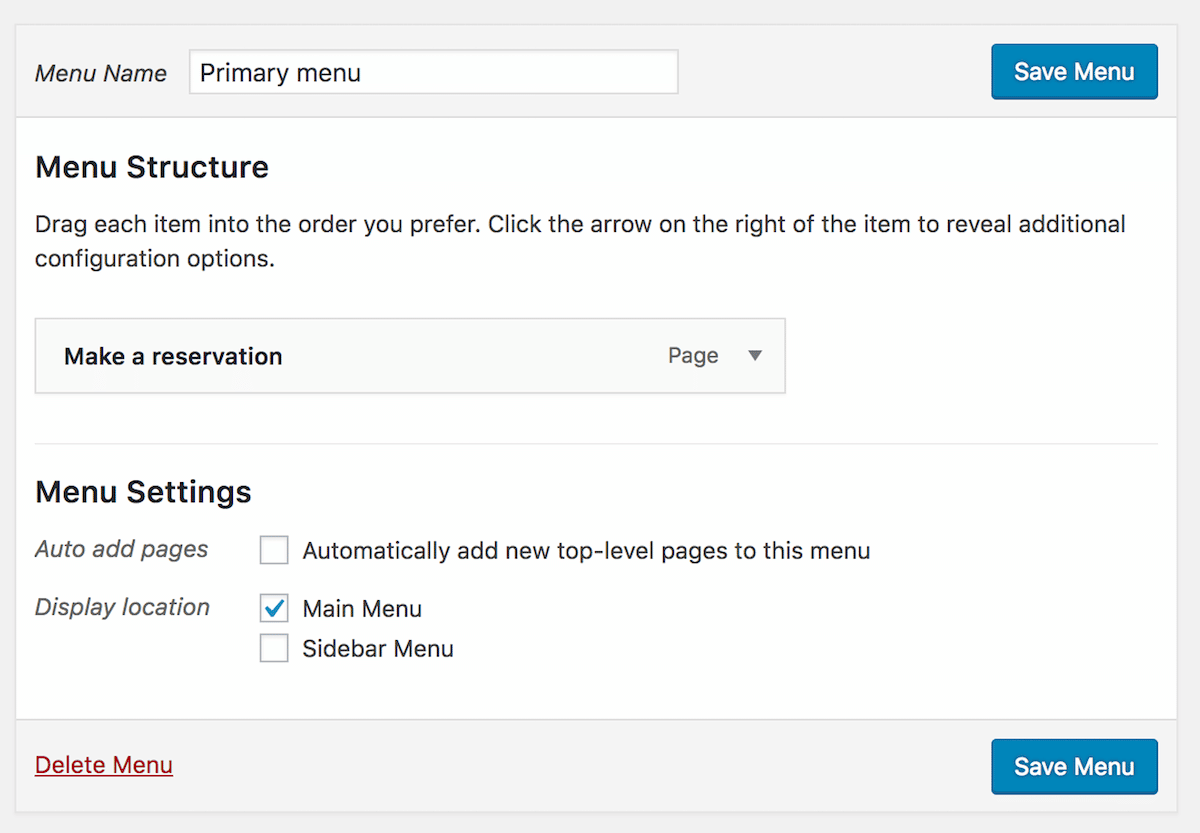
Ensure that the reservation option is easily visible and accessible from anywhere on your site. Consider adding a dedicated Reserve a Table button in your main navigation menu.
Set up automatic confirmation emails or messages to reassure customers that their reservation has been successfully booked. This is also an excellent opportunity to provide them with additional information, such as your location, contact details, and parking options.
Step 9. Promote and Grow Your Website
After successfully building your restaurant website, the next crucial step is to promote your site and attract visitors. Effective promotion increases your website’s visibility and helps to grow your customer base. Here’s how you can start promoting and growing a great restaurant website:
- Use Social Media. Share updates, special offers, and behind-the-scenes content to engage your audience. Platforms like Instagram and Facebook are perfect for showcasing high-quality images of your dishes and restaurant ambiance. Use social media posts and stories to direct followers to your website for reservations, online orders, or to check out your menu.
WPZOOM offers specialized social media tools to enhance social media integration:
Social Icons Widget: A simple yet powerful tool for adding social media icons to your website, linking directly to your profiles.
Instagram Widget: This widget is perfect for restaurants wishing to showcase their culinary creations. It allows you to display your latest Instagram posts directly on your website. - Leverage Local SEO. Claim and optimize your Google Business Profile listing to improve your restaurant’s visibility in local search results and Google Maps. Incorporate local SEO keywords into your website’s content, such as “best Italian restaurant in [City Name]” or “[City Name] sushi delivery.” This helps your website rank higher in Google search results for local queries.
- Encourage Reviews. Encourage satisfied customers to leave positive reviews on Yelp, TripAdvisor, and your Google Maps listing. Positive reviews can significantly enhance your restaurant’s online reputation and SEO. Display positive customer testimonials on your website to build trust with potential customers.
- Email Marketing. Use your website to collect customer email addresses through online orders, reservations, or a newsletter sign-up form. Keep your subscribers engaged with email newsletters featuring restaurant menu updates, special events, and exclusive offers.
- Blogging. Start a blog on your website where you post about topics related to your restaurant, such as recipes, staff profiles, or the story behind your dishes. This helps with Search Engine Optimization and provides valuable content visitors and social media followers can engage with.
- Paid Advertising. Consider using paid advertising options like Google Ads or social media advertising for an immediate boost in visibility. Target your ads based on location, interests, and more to reach potential customers in your area.
Implementing these promotional strategies can increase the visibility of your restaurant website, attract more site visitors, and ultimately grow your business.
Bottom Line
For those looking to explore more design options, WPZOOM offers a collection of WordPress restaurant themes tailored to meet various styles and functional needs. Each theme is designed with restaurants in mind, ensuring that your website looks professional and provides visitors with a user-friendly experience.
To ensure your website not only looks good but also performs well in search engines, we recommend the following articles:
- WordPress SEO Essentials: Explore the strategies for optimizing your restaurant website for search engines, improving your visibility, and attracting more traffic.
- WordPress Speed Optimization: Learn about the best practices for speeding up your WordPress site, ensuring a smooth and fast browsing experience for your customers.
- Secure Your WordPress Site: This article covers essential tips and practices for keeping your WordPress site secure against threats.