You can change your WordPress theme without losing content. Your posts, pages, and media all live in the WordPress database, completely separate from the theme. The switching process itself takes about two minutes, but a few preparation steps will make sure nothing breaks along the way.
This guide walks you through everything: what actually happens when you change a WordPress theme, what to check before switching, the step-by-step process for both classic and block themes, and a post-switch checklist to verify everything looks right.
Table of contents
What Happens When You Change Your WordPress Theme?
A WordPress theme controls your site’s visual design: the layout, colors, typography, and the way your content is displayed. It does not store your content. Your posts, pages, and images are saved in the WordPress database, and they stay there no matter how many times you change themes.
That said, themes do more than just styling. Some themes register their own widgets, shortcodes, custom post types, and page builder layouts. Those features are tied to the theme, and they’ll stop working when you switch.
Here’s a clear breakdown of what’s safe, what needs attention, and what you could lose:
| ✅ Safe (Stored in Database) | ⚠️ May Need Reconfiguration | ❌ May Be Lost |
|---|---|---|
| Posts and pages | Widget assignments | Theme-specific shortcodes |
| Media library (images, videos, files) | Navigation menu locations | Built-in page builder layouts (Divi Builder, Avada Builder, etc.) |
| Comments | Homepage settings | Theme-registered custom post types |
| Users and roles | Header and footer layout | Theme-bundled widget types |
| Plugin data and settings | Sidebar configurations | Built-in slider content |
| Core WordPress settings | Custom CSS added via theme files | Theme-specific design elements |
The simplest rule: if a feature comes from a plugin, it persists. If it comes from the theme, it probably won’t.
So yes, you can change your WordPress theme without losing content like posts, pages, and images. But “content” in the broader sense includes things like widget configurations and menu assignments, and those may need your attention.
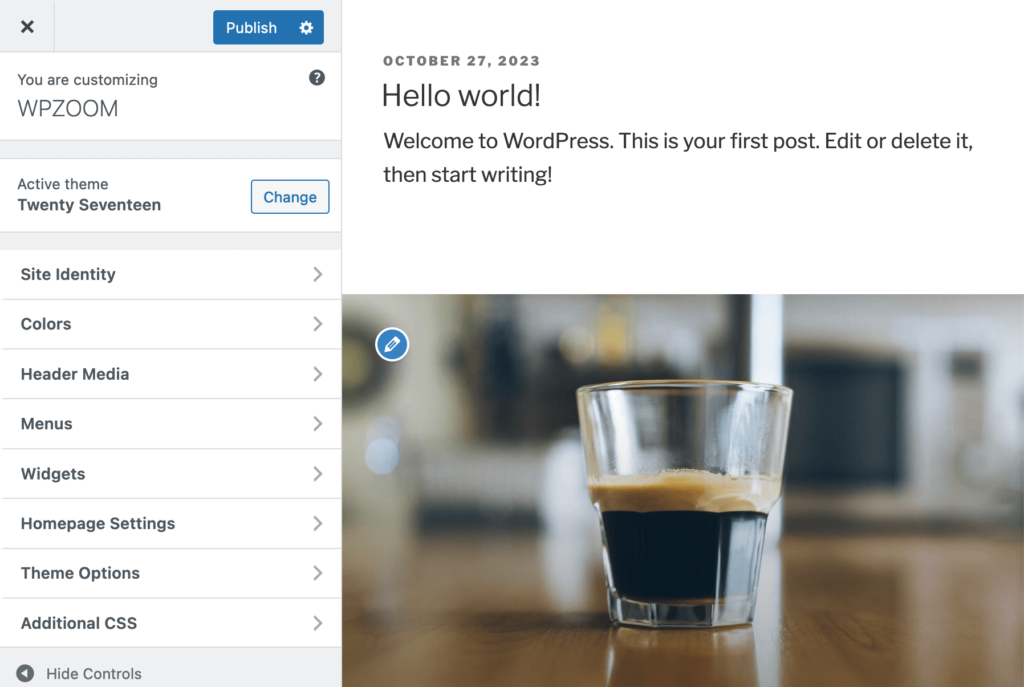
One more thing to keep in mind: the process for changing themes works a bit differently depending on whether you’re using a classic theme or a block theme. Classic themes use the Appearance > Themes screen and the Customizer. Block themes use the Full Site Editor (Appearance > Editor). We’ll cover both workflows in the step-by-step section below.
Before You Switch: Pre-Change Checklist
Don’t skip the prep work. Spending 15 to 20 minutes on these steps can save you hours of troubleshooting later.
Back Up Your Entire Site
This is non-negotiable. A full backup gives you a restore point if anything goes wrong during the switch.
Use a backup plugin like UpdraftPlus, Duplicator, or WP STAGING to create a complete backup that includes your database, WordPress files, themes, plugins, and uploads. Many hosting providers also offer automatic daily backups through their control panel.
For a detailed walkthrough, see our guide on how to back up your WordPress site.
Document Your Current Customizations
Before you switch, take a snapshot of how your site looks and works right now:
- Screenshot your homepage, key pages, and widget areas. These give you a visual reference to compare against after the switch.
- Copy your custom CSS. If you’ve added styles through Appearance > Customize > Additional CSS, copy that code to a text file. Custom CSS added through the Customizer is typically preserved across theme changes, but it’s safer to have a backup.
- Note any code snippets you’ve added to your theme’s functions.php file. These will need to be re-added to the new theme (or better yet, moved to a plugin like WPCode so they survive future theme changes).
- List your active plugins and what each one does. This helps you spot conflicts with the new theme.
Check for Theme-Dependent Features
This is where most problems happen. Ask yourself:
- Does your theme include its own shortcodes? If you see shortcode tags like [theme_button] or [theme_slider] in your content, those will stop rendering when you switch.
- Did you build pages with a theme-specific page builder? Content created with the Divi Builder, Avada Builder, or similar theme-bundled builders won’t carry over. You’ll need to rebuild those pages. (Content built with standalone page builder plugins like Elementor or Beaver Builder will transfer fine.)
- Does your theme register custom post types? Some themes add portfolio, testimonial, or team member post types. The data stays in your database after switching, but you’ll need the new theme or a plugin to display it.
If your site is heavily dependent on theme-specific features, carefully weigh whether switching is the right call.
Test Your Current Site Speed
Run your site through Google PageSpeed Insights or GTmetrix and save the results. Record your page load time, performance score, and Core Web Vitals. After switching themes, you’ll compare these numbers to make sure the new theme performs at least as well.
If the new theme turns out to be slower, check out our WordPress speed optimization guide for ways to bring those numbers back up.
Set Up a Staging Site (Recommended)
A staging site is a private copy of your live website where you can test changes without affecting what visitors see. It’s the safest way to change a WordPress theme because you can catch problems before they reach your live site.
You can create a staging site with a plugin like WP STAGING or through your hosting provider’s built-in staging tools (many managed WordPress hosts include this feature). Install and activate the new theme on your staging site, then review every important page before pushing the changes live.
For a step-by-step walkthrough, see our guide on how to create a WordPress staging website.
Upgrade Your Website with a Premium WordPress Theme
Find a theme that you love and get a 20% discount at checkout with the FLASH20 code
Choose your theme
How to Change a WordPress Theme (Step by Step)
There are three ways to change your WordPress theme. Most people will use Method 1. If you’re working with a block theme, Method 2 gives you more preview options. Method 3 is a fallback for emergencies.
Method 1: Change Your Theme via the WordPress Dashboard
This is the standard approach and works for both classic and block themes.
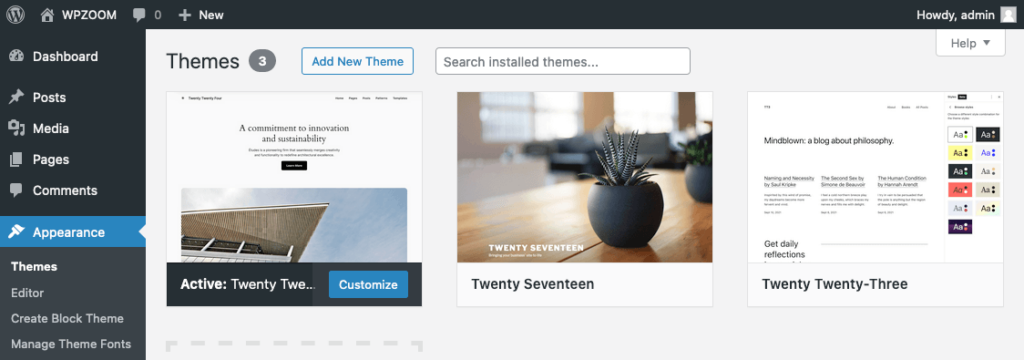
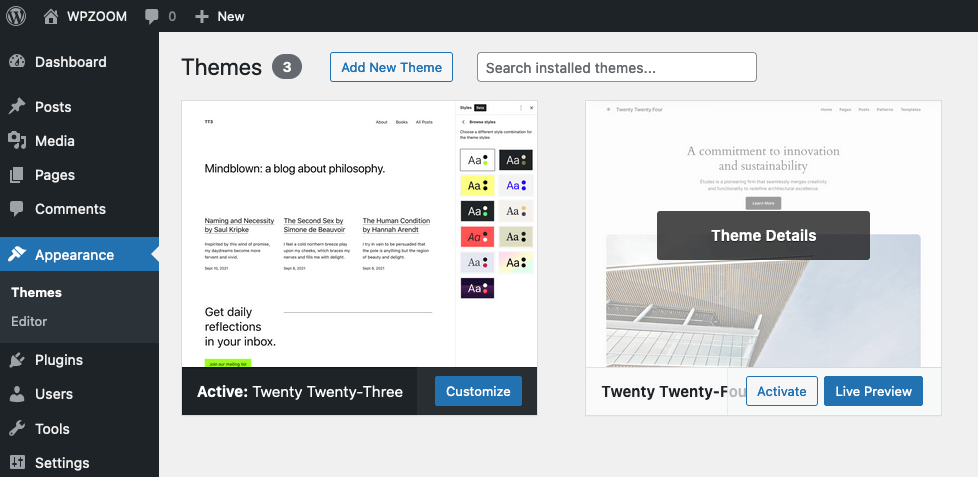
Step 1: Log in to your WordPress dashboard and go to Appearance > Themes.
You’ll see your currently active theme listed first with an “Active” label. Any other installed themes appear alongside it.
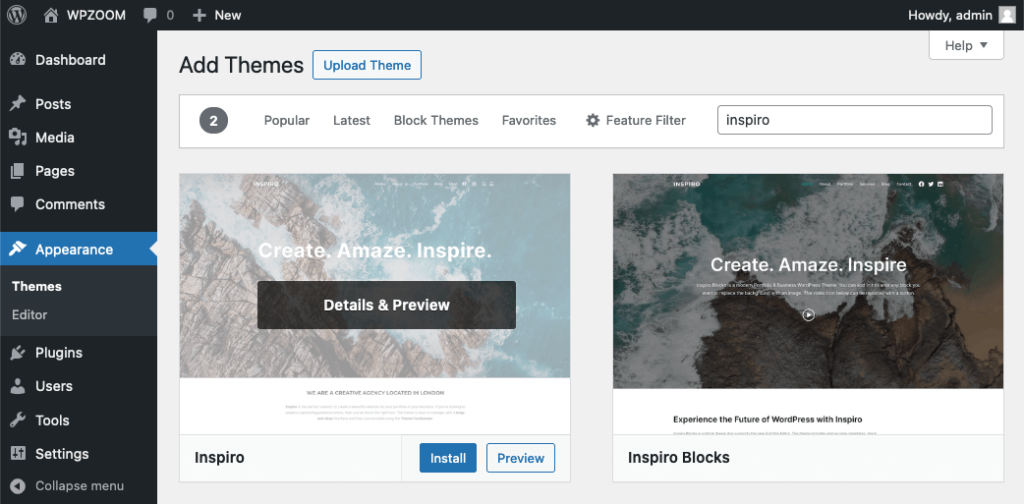
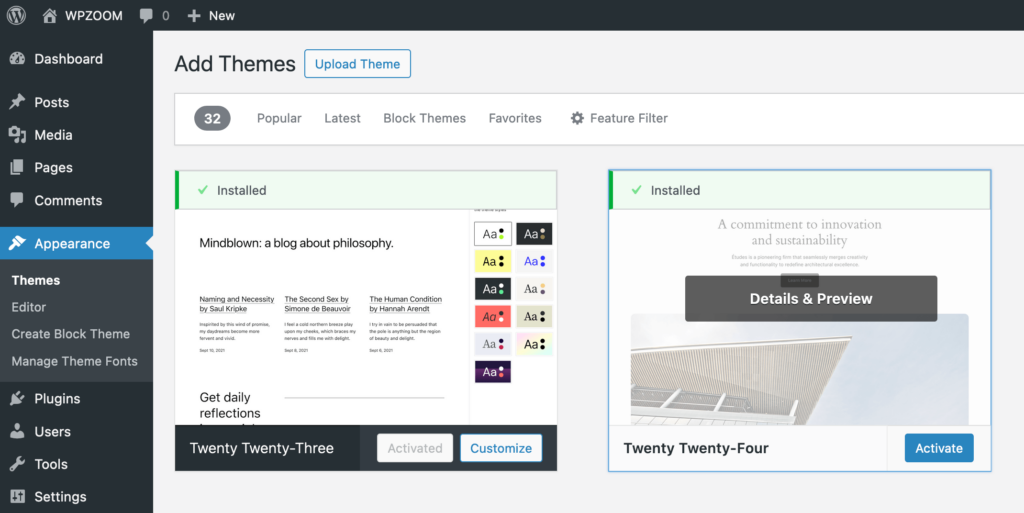
Step 2: If the theme you want is already installed, hover over it and click Activate. If not, click the Add New button at the top of the page.
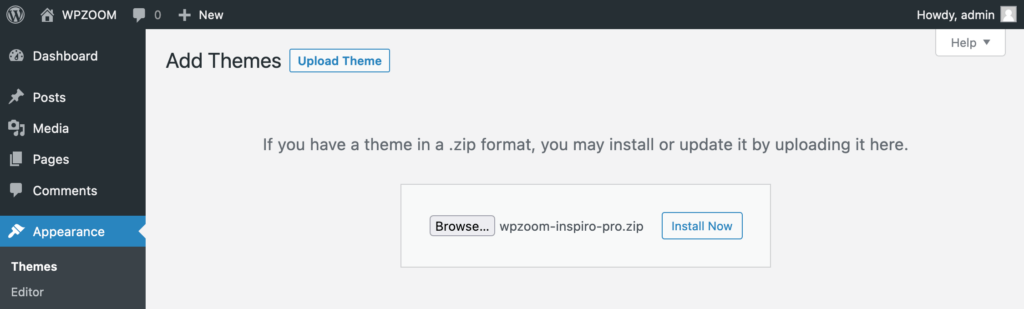
Step 3: Browse themes from the WordPress.org directory by using the search bar and feature filters. If you purchased a premium theme, click Upload Theme and select the .zip file from your computer, then click Install Now.
Step 4: Before activating, click Live Preview to see how the theme looks with your actual content. This opens the WordPress Customizer with the new theme applied temporarily. Browse through your pages to check how things look.

Step 5: If you’re satisfied, click Activate & Publish in the Customizer. If you skipped the preview, just click Activate on the Themes page.
That’s it. Your WordPress theme is now changed.
Method 2: Preview and Switch Block Themes in the Site Editor
If you’re switching to (or between) block themes, WordPress 6.6 and later offers a more powerful preview option through the Full Site Editor.
Block themes work differently from classic themes. Instead of using the Customizer, they use the Site Editor (Appearance > Editor), which lets you customize every part of your site with blocks: headers, footers, templates, and global styles.
Here’s how to preview and switch to a block theme:
Step 1: Go to Appearance > Themes and find the block theme you want to try.
Step 2: Click Preview. You’ll see a dropdown with two options:
- Preview with demo content: Shows the theme with the designer’s sample content.
- Preview with your content: Shows the theme applied to your actual posts, pages, and media.
Choose Preview with your content for the most accurate look.
Step 3: The Site Editor opens with the new theme applied. Browse your site, review templates, and adjust Styles (colors, fonts, spacing) if needed. None of these changes affect your live site until you activate.
Step 4: Click Activate (or Save and Activate if you made changes).
Important: If you’re switching from a classic theme to a block theme, be aware that widgets and classic menus won’t carry over directly. Block themes use the Navigation block instead of traditional menus, and blocks instead of widgets. You’ll need to rebuild those elements in the Site Editor.
Method 3: Change Your Theme via FTP (When You Can’t Access the Dashboard)
If a broken theme is causing a white screen of death or preventing you from logging in, you can switch themes through your server’s file system.
Step 1: Connect to your server using an FTP client (like FileZilla) or your hosting provider’s File Manager in cPanel.
Step 2: Navigate to wp-content/themes/.
Step 3: Find the folder for the broken theme. Rename it to something like theme-name-broken. This deactivates the theme.
Step 4: WordPress will automatically fall back to the latest default theme installed on your site (such as Twenty Twenty-Five). If no default theme is installed, upload one from WordPress.org to the themes folder.
Step 5: Go to your site’s login page. You should now be able to access the dashboard and activate whatever theme you want from Appearance > Themes.
After You Switch: Post-Change Checklist
Your new theme is active. Now make sure everything actually works. Go through this checklist:
Homepage and key pages: Load your homepage, blog page, contact page, and any important landing pages. Check that the layout looks right and no content is missing. If your homepage appears wrong, go to Settings > Reading and verify that your static page assignment is correct.
Navigation menus: Head to Appearance > Menus (classic themes) or Appearance > Editor (block themes). Your menus are still in WordPress, but they may need to be reassigned to the new theme’s menu locations. Each theme defines its own locations (Primary, Footer, etc.), and these don’t automatically match up.
Widget areas: Classic themes display widgets in sidebars and footers. If the new theme has different widget areas, your existing widgets may appear under “Inactive Widgets” in Appearance > Widgets. Drag them to the new theme’s active areas. Block themes don’t use traditional widgets at all, so you’ll recreate these sections using blocks in the Site Editor.
Forms and CTAs: Test every contact form, email signup, and call-to-action button. Form plugins usually work across themes, but layout changes can occasionally break form display.
Custom CSS: If you had custom styles, check whether they still apply correctly. CSS added through the Customizer’s “Additional CSS” panel typically carries over. CSS added directly to theme files does not.
Site speed: Run PageSpeed Insights or GTmetrix again and compare results to your pre-switch baseline. If performance dropped, check whether the new theme loads heavy scripts, uses unoptimized images, or lacks lazy loading.
Mobile responsiveness: Pull up your site on a phone (or use your browser’s device emulator). Check that menus collapse properly, text is readable, and buttons are tappable.
SEO settings: Verify that your meta titles, descriptions, and structured data are intact. If you use an SEO plugin like Yoast or Rank Math, these settings are plugin-based and should persist. But check your heading hierarchy (H1, H2, H3 structure) to make sure the new theme doesn’t break it.
Analytics and tracking codes: Confirm that Google Analytics (or whatever tracking tool you use) is still active. If you added tracking code directly to the old theme’s files, you’ll need to re-add it. Using a plugin for analytics avoids this problem entirely.
Cache: Clear your caching plugin (WP Super Cache, W3 Total Cache, LiteSpeed Cache, etc.) and flush your CDN cache if you use one. This ensures visitors see the new theme instead of a cached version of the old one.
Cross-browser testing: Open your site in Chrome, Firefox, Safari, and Edge. Each browser renders CSS slightly differently, and the new theme may have quirks you need to address.
How to Choose the Right WordPress Theme
If you haven’t settled on a new theme yet, here are the essentials to look for:
Responsive design. Your theme needs to look good on phones, tablets, and desktops. Test the demo on multiple screen sizes before installing.
Regular updates and active support. Themes that haven’t been updated in over a year are a red flag. Check the changelog and support forums to make sure the developer is responsive.
Good reviews. User reviews reveal issues that demos won’t, such as slow load times, buggy features, or poor documentation.
Plugin compatibility. Make sure the theme works well with your essential plugins, especially your page builder, SEO plugin, and any e-commerce tools like WooCommerce.
Performance. A lightweight, well-coded theme loads faster. Run the demo through PageSpeed Insights before committing.
You’ll find thousands of free themes in the WordPress.org theme directory. For premium options, WPZOOM’s theme collection includes themes for portfolios, business sites, food blogs, and video sites, all regularly updated and optimized for speed.
For a deeper look at what to evaluate, see our full guide on how to choose a WordPress theme.
FAQ
No. Your posts, pages, media, and comments are stored in the WordPress database, completely separate from the theme. They remain untouched when you switch. However, theme-specific features like custom shortcodes, built-in page builder layouts, and theme-bundled widgets may stop working after the change.
Yes. WordPress keeps all previously installed themes available under Appearance > Themes. Click Activate on your old theme to switch back. Your content will still be there, though you may need to reassign your navigation menus and reconfigure widgets.
Use a staging site. It’s a private copy of your website where you can install and test the new theme without visitors seeing any changes. Once everything looks good, push the staging site live. Most managed WordPress hosts include one-click staging.
Changing a theme means replacing one theme with a completely different theme. Updating a theme means installing a newer version of the same theme you’re already using. Updates preserve your current settings and customizations (especially if you’re using a child theme). Switching themes may require you to reconfigure menus, widgets, and custom CSS.
Not necessarily. Most themes let you adjust colors, fonts, and layout through the WordPress Customizer (classic themes) or the Full Site Editor (block themes). You only need to switch themes if you want a fundamentally different design structure or features that your current theme doesn’t support.
It can. A new theme may change your site’s loading speed, heading structure, schema markup, and mobile responsiveness, all of which affect search rankings. Test the new theme on a staging site and compare performance metrics before going live. If you manage your SEO through a plugin like Yoast or Rank Math, those settings are plugin-based and will carry over.
No. Changing your theme only changes the visual design and removes theme-specific features. All your posts, pages, images, users, comments, and plugin data remain in the WordPress database. Nothing is deleted.
Wrapping Up
Changing a WordPress theme without losing content is straightforward, but it does require some preparation to go smoothly. Here’s what matters most:
- Back up your site before making any changes.
- Test on a staging site to catch problems before they affect visitors.
- Check widgets, menus, and custom CSS after switching, as these are the most common things that need reconfiguration.
- Compare site speed before and after to make sure performance didn’t take a hit.
Whether you’re switching for a fresh design, better performance, or access to modern block theme features, the process is straightforward when you follow these steps.