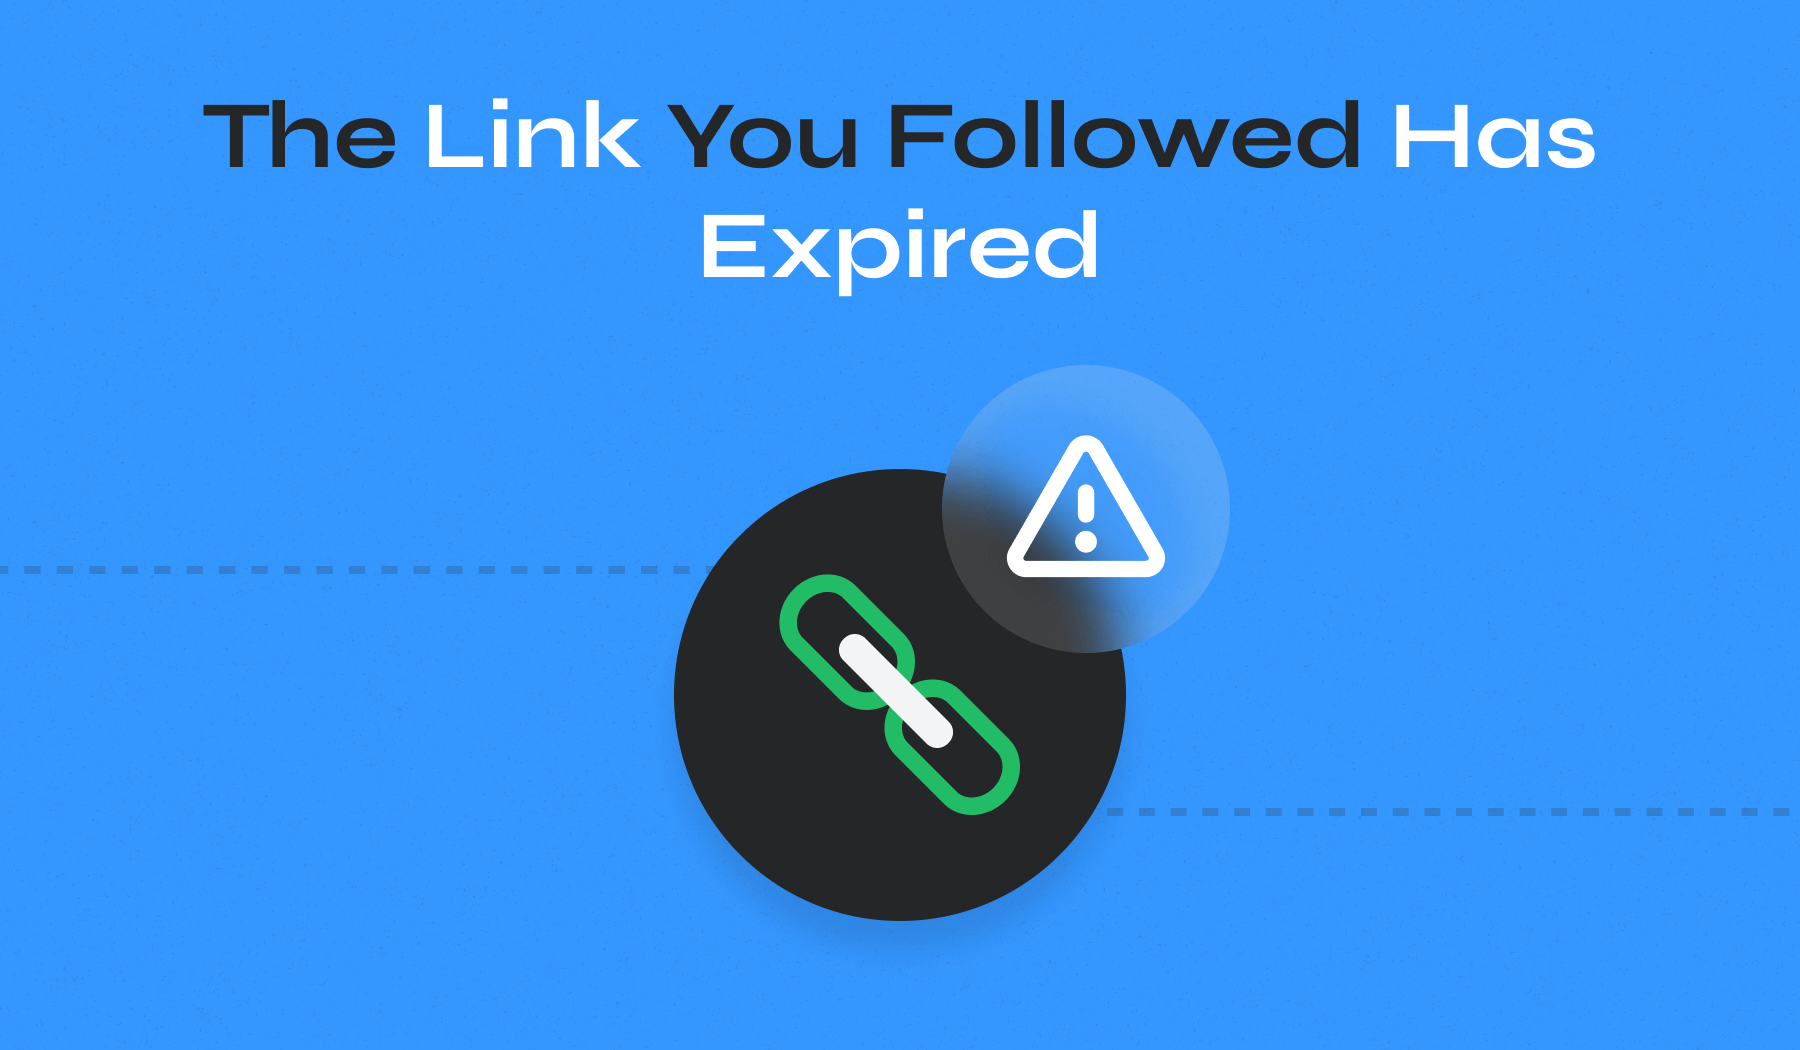
When managing a WordPress site, encountering errors can disrupt your workflow and affect your website’s functionality. One common issue is the “The Link You Followed Has Expired” error, which typically occurs when trying to upload themes or plugins.
Let’s explore how to resolve this issue, ensuring your site’s operations run smoothly.
Table of Contents
- What Causes “The Link You Have Followed Has Expired” Error?
- Method 1: Seeking Assistance from Your Hosting Provider
- Method 2: Increasing Limits in the functions.php File
- Method 3: Increasing Limits via cPanel
- Method 4: Increasing Limits in the .htaccess File
- Method 5: Increasing Limits in the php.ini File
- Method 6: Update Your PHP Version
- Method 7: Check for Plugin Conflicts
What Causes “The Link You Have Followed Has Expired” Error?
This error usually appears when server settings limit the size of the files you can upload or the duration of your session.
When these limits are too low for the file size or a process’s execution time, WordPress cannot complete the action, resulting in the “The Link You Have Followed Has Expired” error.
These limits are meant to ensure web security and efficiency but can inadvertently interfere with user activities.
Fixing “The Link You Have Followed Has Expired” Error
Several methods can resolve this error by adjusting server settings to accommodate larger uploads or longer processes. Below are the most effective solutions:
Method 1: Seeking Assistance from Your Hosting Provider
Before exploring the technical solutions, consider contacting your hosting provider for assistance.
This can save you effort, especially if you are uncomfortable making technical changes yourself. Hosting providers are equipped to handle issues related to server settings and can often resolve them quickly and efficiently.
Prepare details about the error, including screenshots of the error message and descriptions of what you were attempting when the error occurred. Describe the issue clearly and provide all the gathered information to help the support team understand the context and specifics of the problem.
It’s the easiest method, but it depends on the support team’s response time. If you want to do it yourself instead of waiting, try the methods suggested below.
Method 2: Increasing Limits in the functions.php File
When encountering the “The Link You Followed Has Expired” error in WordPress, one effective remedy is to modify your server’s PHP settings directly through the WordPress theme’s functions.php file.
This can be safely and conveniently done using the WPCode plugin, which allows you to add custom code without directly editing theme files.
Here’s how to implement this solution:
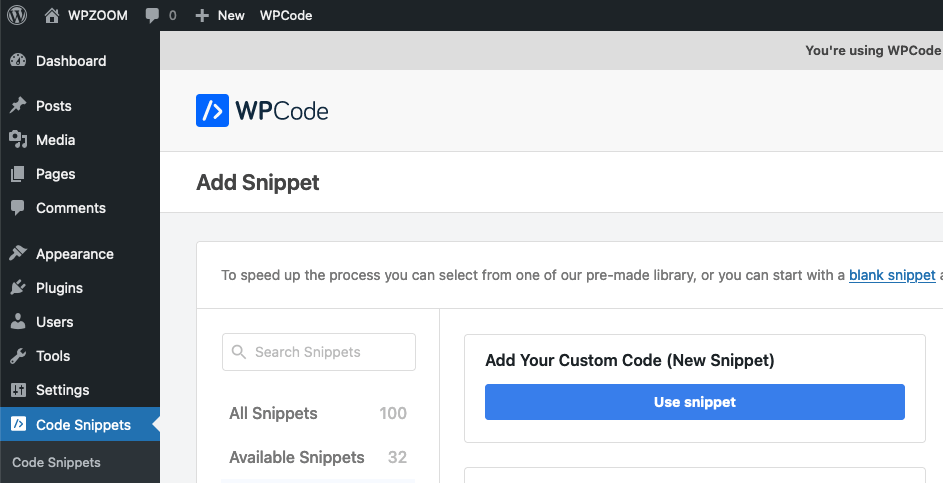
1. Install and activate the WPCode plugin from the WordPress dashboard.

2. Navigate to the Code Snippets > + Add Snippet section on your WordPress admin sidebar.
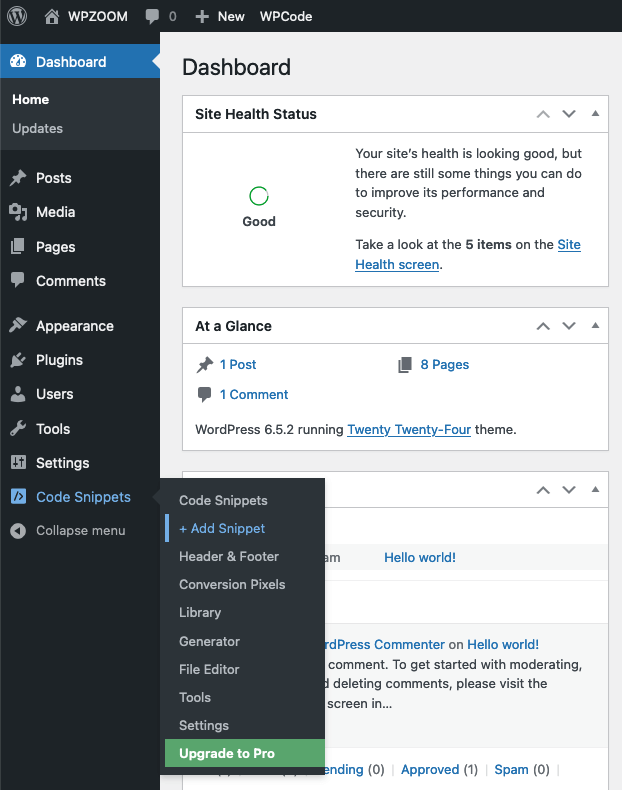
3. Mouse over the Add Your Custom Code (New Snippet) box and click Use Snippet.
4. Enter a name for your snippet and choose PHP Snippet from the Code Type drop-down menu.
5. Copy and paste the following code in the Code Preview field:
@ini_set('upload_max_size' , '64M');
@ini_set('post_max_size', '64M');
@ini_set('max_execution_time', '300');
These lines command the server to increase the maximum file upload size to 64MB, the maximum size of POST data that PHP will accept to 64MB, and the maximum execution time of PHP scripts to 300 seconds. Adjust these values as needed.
7. Click Save Snippet and toggle the Inactive switch to activate the snippet.
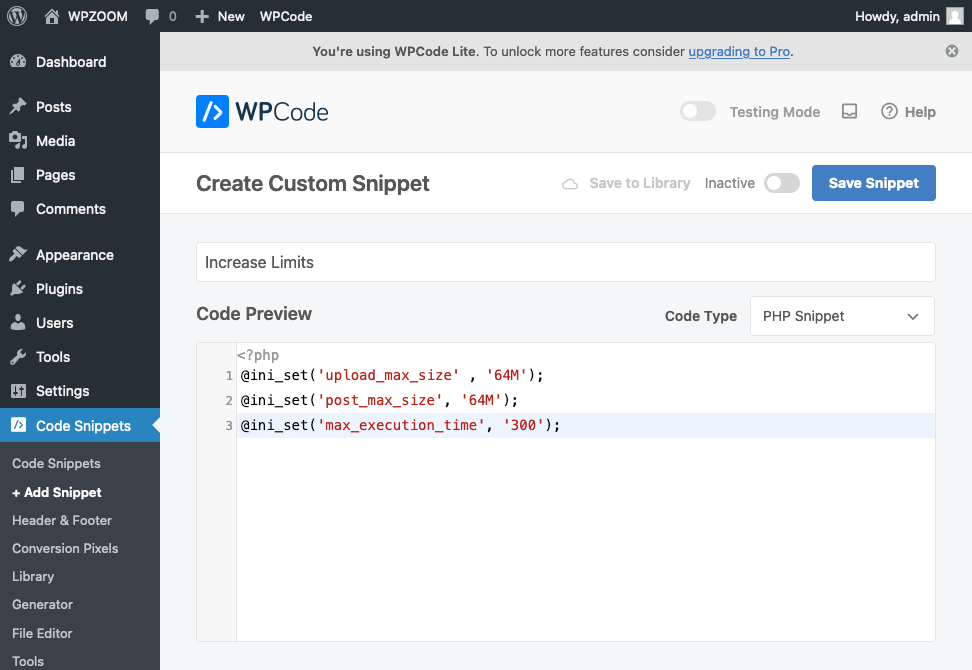
This code increases the upload limits and execution time, which should help bypass the error.
This method is especially beneficial because it does not require deep server knowledge or direct access to server files, making it accessible for users of all skill levels. Plus, using WPCode ensures that your modifications are preserved even when you update or change your theme.
Test the changes by trying to upload a file or complete an action that previously triggered the error. If the settings are appropriate, the error should no longer occur.
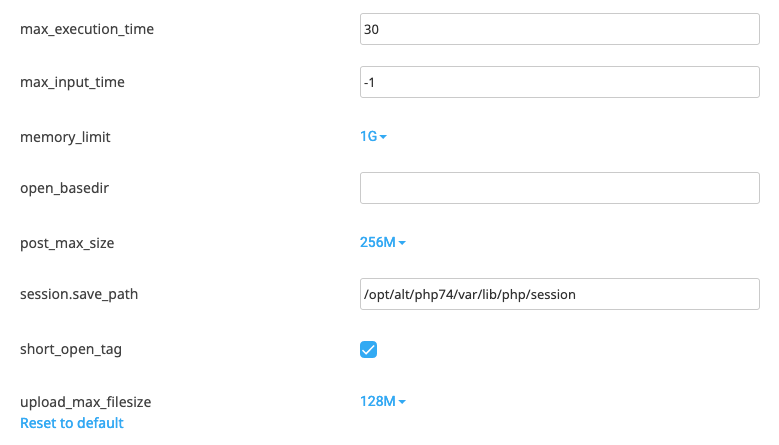
Method 3: Increasing Limits via cPanel
Using cPanel is a straightforward process that allows you to adjust necessary server settings through a graphical interface. Here’s how you can use cPanel to address the issue:
1. Log into cPanel. Your hosting provider usually provides the URL, such as http://yourdomain.com/cpanel.
2. Navigate to the Software section and click on Select PHP Version.
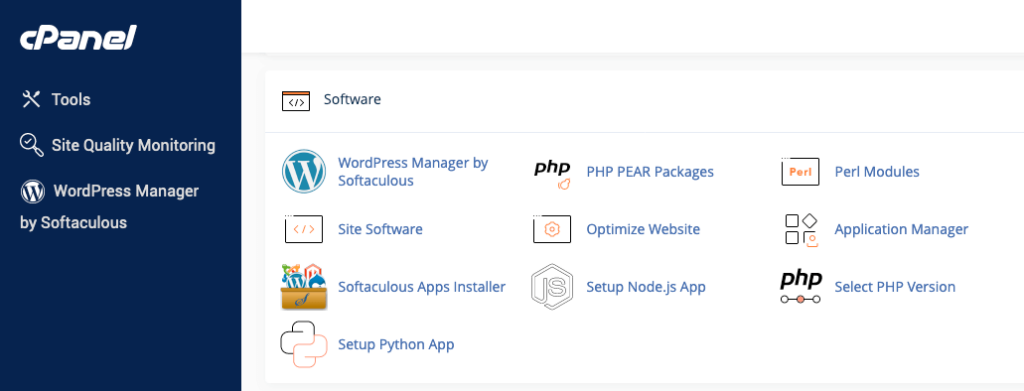
3. Click on Options or find the PHP Settings area.
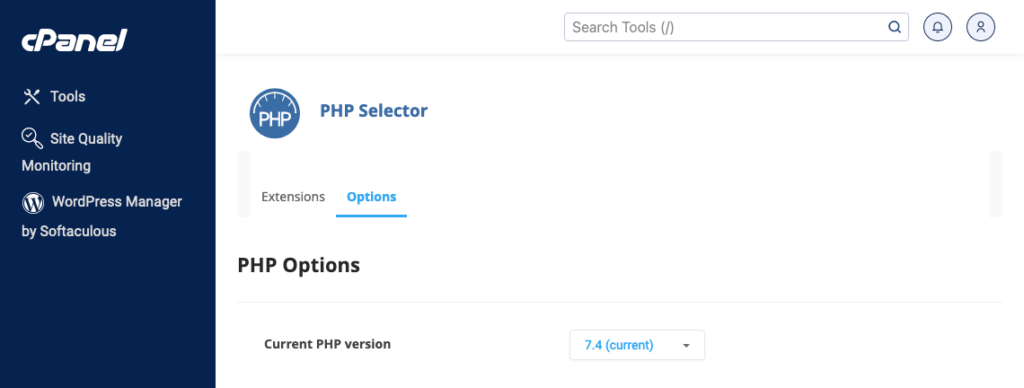
Increase the upload_max_filesize, post_max_size, and max_execution_time settings by entering higher values (e.g., 64M for file size and 300 for time).
After making these changes, go back to your WordPress site and attempt to upload a file or install a plugin/theme to see if the error persists.
This method benefits users who prefer not to interact directly with code or file systems manually.
Method 4: Increasing Limits in the .htaccess File
The .htaccess file in WordPress is a powerful configuration file for managing server directives. By editing this file, you can increase limits that affect your site’s functionality, potentially resolving the “The Link You Followed Has Expired” error.
Here’s a step-by-step guide to modifying your .htaccess file:
1. Use an FTP client or the File Manager in your web hosting control panel to access your website’s root directory. This is typically named public_html or www.
2. Locate the .htaccess file. If you can’t find it, ensure hidden files (dotfiles) are visible in your FTP client or file manager settings.
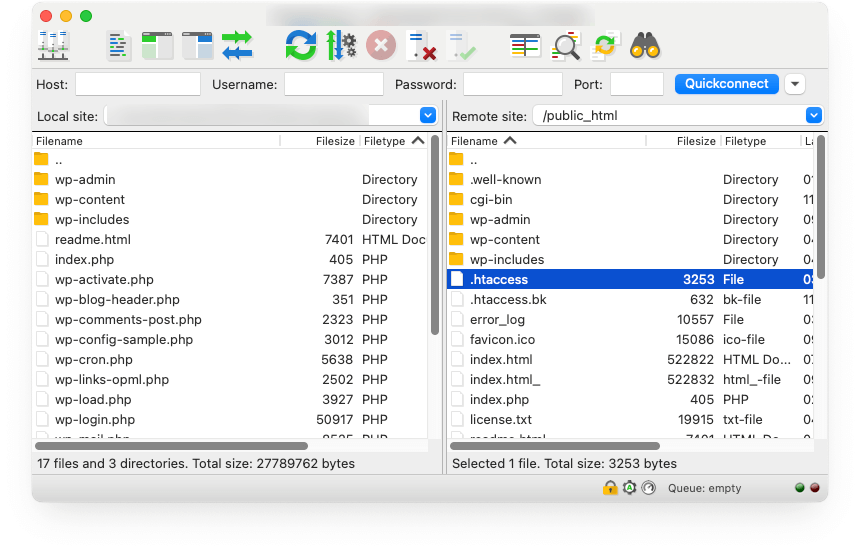
3. Before making any changes, it’s important to back up the existing .htaccess file. You can do this by downloading the file to your computer or copying and renaming it in the same directory for easy restoration if needed.
4. Edit the file by adding the following lines at the end of the file:
php_value upload_max_filesize 64M
php_value post_max_size 64M
php_value max_execution_time 300
Adjust the values as needed.
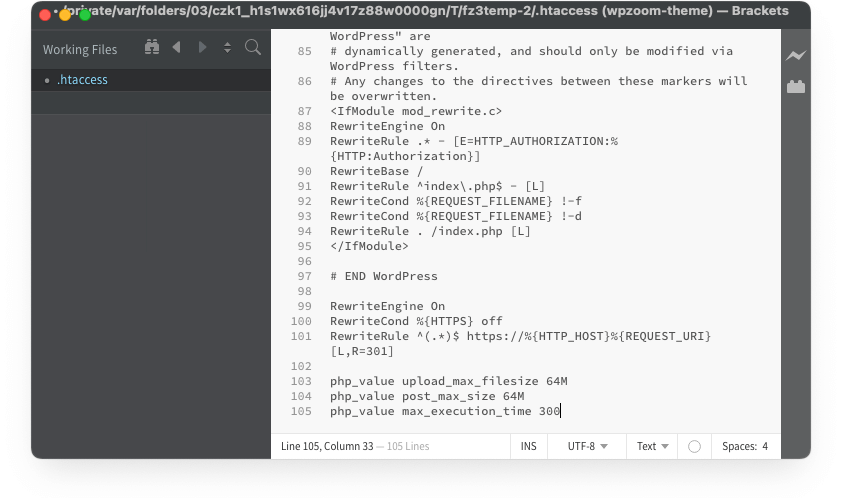
5. Save the file and close it.
Visit your website and attempt to perform the action that previously triggered the error, such as uploading a large file or installing a plugin/theme.
Check to see if the error persists. If the changes are sufficient, the error should be resolved.
This method is beneficial as it does not require modifying WordPress core files or PHP configurations directly through the hosting control panel.
Method 5: Increasing Limits in the php.ini File
The php.ini file is the primary configuration file for PHP on your server. Adjusting settings in this file can directly impact how PHP processes execute, which can resolve issues like the “The Link You Followed Has Expired” error in WordPress.
Here is how you can modify the php.ini file to increase the file size and execution time limits:
1. Connect to your website’s server using an FTP client or your hosting provider’s File Manager.
2. Search for the php.ini file in the root directory where your WordPress is installed. If you cannot find it, it might be located in a directory with restricted access or may not exist. In the latter case, you can create a new file named php.ini.
3. Open the file and add or update the following lines:
upload_max_filesize = 64M
post_max_size = 64M
max_execution_time = 300
4. Save your changes. If you create a new php.ini file, save it in the directory where PHP scripts are executed, usually the root directory of your WordPress installation.
5. Depending on your hosting environment, you may need to restart your web server (if applicable) for the changes to take effect. This can usually be done through your hosting control panel.
Check to ensure that the error no longer appears by performing the same action that previously caused it.
If the error persists, you may need to consult with your hosting provider to ensure the php.ini changes are recognized, as some hosts use a master php.ini that overrides local changes.
Method 6: Update Your PHP Version
Older versions of PHP might contribute to the “The Link You Followed Has Expired” error due to inefficiencies or outdated configurations.
Here’s how to update your PHP version safely and effectively:
1. Before making any changes, determine which version of PHP your site is currently using. You can check this by installing a simple plugin like Display PHP Version or by viewing the information in your hosting control panel under the PHP section.
2. Ensure that your website and its components are fully compatible with the newer PHP version you plan to use. You can check compatibility by reviewing plugin and theme documentation or using compatibility checker tools provided by some hosting services.
3. Back up your website before updating PHP. This includes your database, WordPress files, plugins, and themes. Backups ensure you can restore your site to its previous state if the update causes issues.
4. Log into your hosting control panel and navigate to the Software section and click on Select PHP Version.
Select a newer, stable PHP version — PHP 7.4 or PHP 8.0 are common choices that offer significant improvements over earlier versions. Avoid selecting a version that is not yet widely supported or is in beta.
After updating, check your website for any immediate issues. Browse through pages, test functionality, and ensure everything operates as expected.
Monitor the site for a few days for any performance issues or errors that may appear. Check your website’s error logs through your hosting dashboard or a logging plugin to identify new warnings or errors.
Updating your PHP version helps resolve potential errors and secures and speeds up your website.
Method 7: Check for Plugin Conflicts
Plugin conflicts are a common source of issues in WordPress, including the “The Link You Followed Has Expired” error. Plugins can interfere with each other or with core WordPress functionality due to overlapping code, outdated components, or compatibility issues with newer versions of WordPress or PHP.
To determine if a plugin is causing the problem and to resolve it, follow these detailed steps:
- Navigate to the Plugins section in your WordPress dashboard.
- Select all plugins, choose Deactivate from the Bulk Actions dropdown menu, and then apply the action. This process turns off all plugins without removing them or their settings, providing a clean slate for testing.
- Attempt to perform the action that triggered the error, such as uploading a file or installing a theme. If the error does not occur, one or more plugins will likely be the cause.
- Begin reactivating each plugin one at a time. After activating a plugin, test the same functionality that previously caused the error. Continue this process until the error reappears. The last plugin you activated before the error returned is likely the culprit.
- Once you identify the problematic plugin, search for updates or alternative solutions. Often, plugin conflicts can be resolved with an update as developers continuously fix bugs and improve compatibility.
Bottom Line
“The Link You Followed Has Expired” is a common WordPress error but can typically be resolved by increasing file size limits, execution times, or updating your PHP version. By systematically applying the methods outlined above, you can identify the solution that best suits your hosting environment and resolves the issue efficiently, restoring your WordPress site’s functionality.