Searching for the best WordPress local development tool?
Whether you’re looking to improve your WordPress website development workflows or you’re just looking for a way to quickly test WordPress plugins and themes, DevKinsta offers an easy way to get started with local WordPress development.
In this DevKinsta review, we’ll start by looking at the key features in DevKinsta and then we’ll show you step-by-step how to set up your first local WordPress site using the free tool.
Table of Contents
DevKinsta Features
Available for all major operating systems, DevKinsta lets you create unlimited local WordPress sites, including helpful functionality like an email inbox, database access, and more.
Best of all, DevKinsta is 100% free for everyone. That is, you do not need to be using Kinsta WordPress hosting to use DevKinsta.
With that being said, Kinsta users do get some special perks to push/pull sites between live hosting and local environments.
1. Support for Unlimited Sites In Your Local Environment
To kick things off, DevKinsta lets you create unlimited local sites, each of which can have its own settings. These are fully functioning WordPress sites, including the ability to enable HTTPS, view emails, and more.
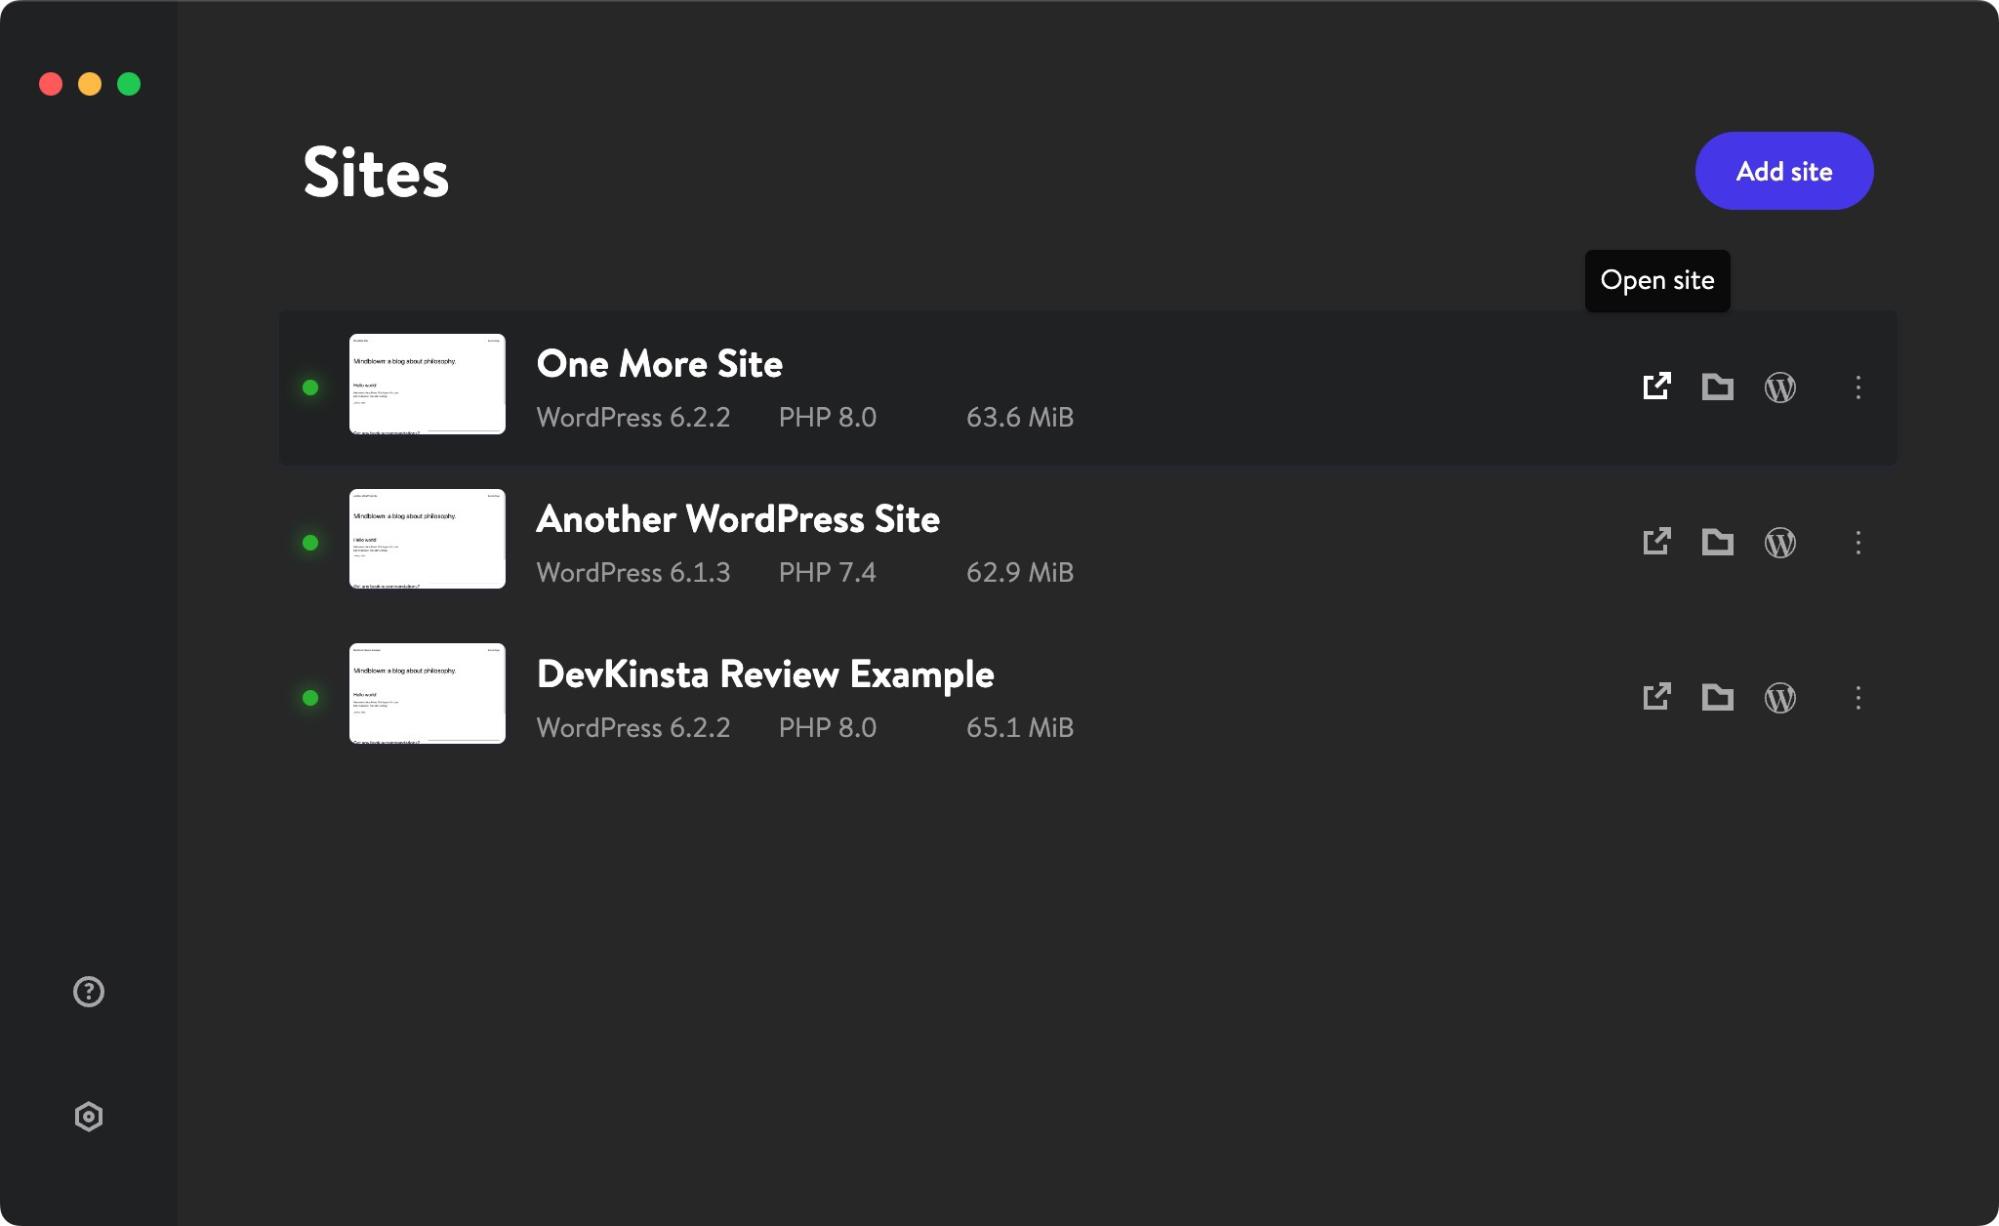
You can also easily start and stop individual sites as needed, which helps you minimize the load on your local computer.
2. Available for Multiple Platforms and in 10 Languages
To serve as many people as possible, DevKinsta supports all major operating systems:
- Windows
- macOS – there are dedicated versions for Apple Silicon chips and Intel chips
- Ubuntu
In addition to supporting multiple operating systems, DevKinsta is also available in 10 different languages:
- English
- Spanish
- French
- German
- Italian
- Portuguese
- Japanese
- Dutch
- Swedish
- Danish
3. Option To Choose Different PHP Versions for Each Site
If you build a lot of WordPress sites, you might be building sites that need to work in different hosting environments.
To account for this, DevKinsta lets you customize the PHP version of each individual site. For example, you could use PHP 8.0 for one site but PHP 7.4 for another site.
DevKinsta supports a variety of different PHP versions, including the most recent version (which is PHP 8.2 at the time of our DevKinsta review).
To achieve this, DevKinsta uses Docker Desktop to create a separate container for each site.
4. Local Email Management to Test and Debug Emails
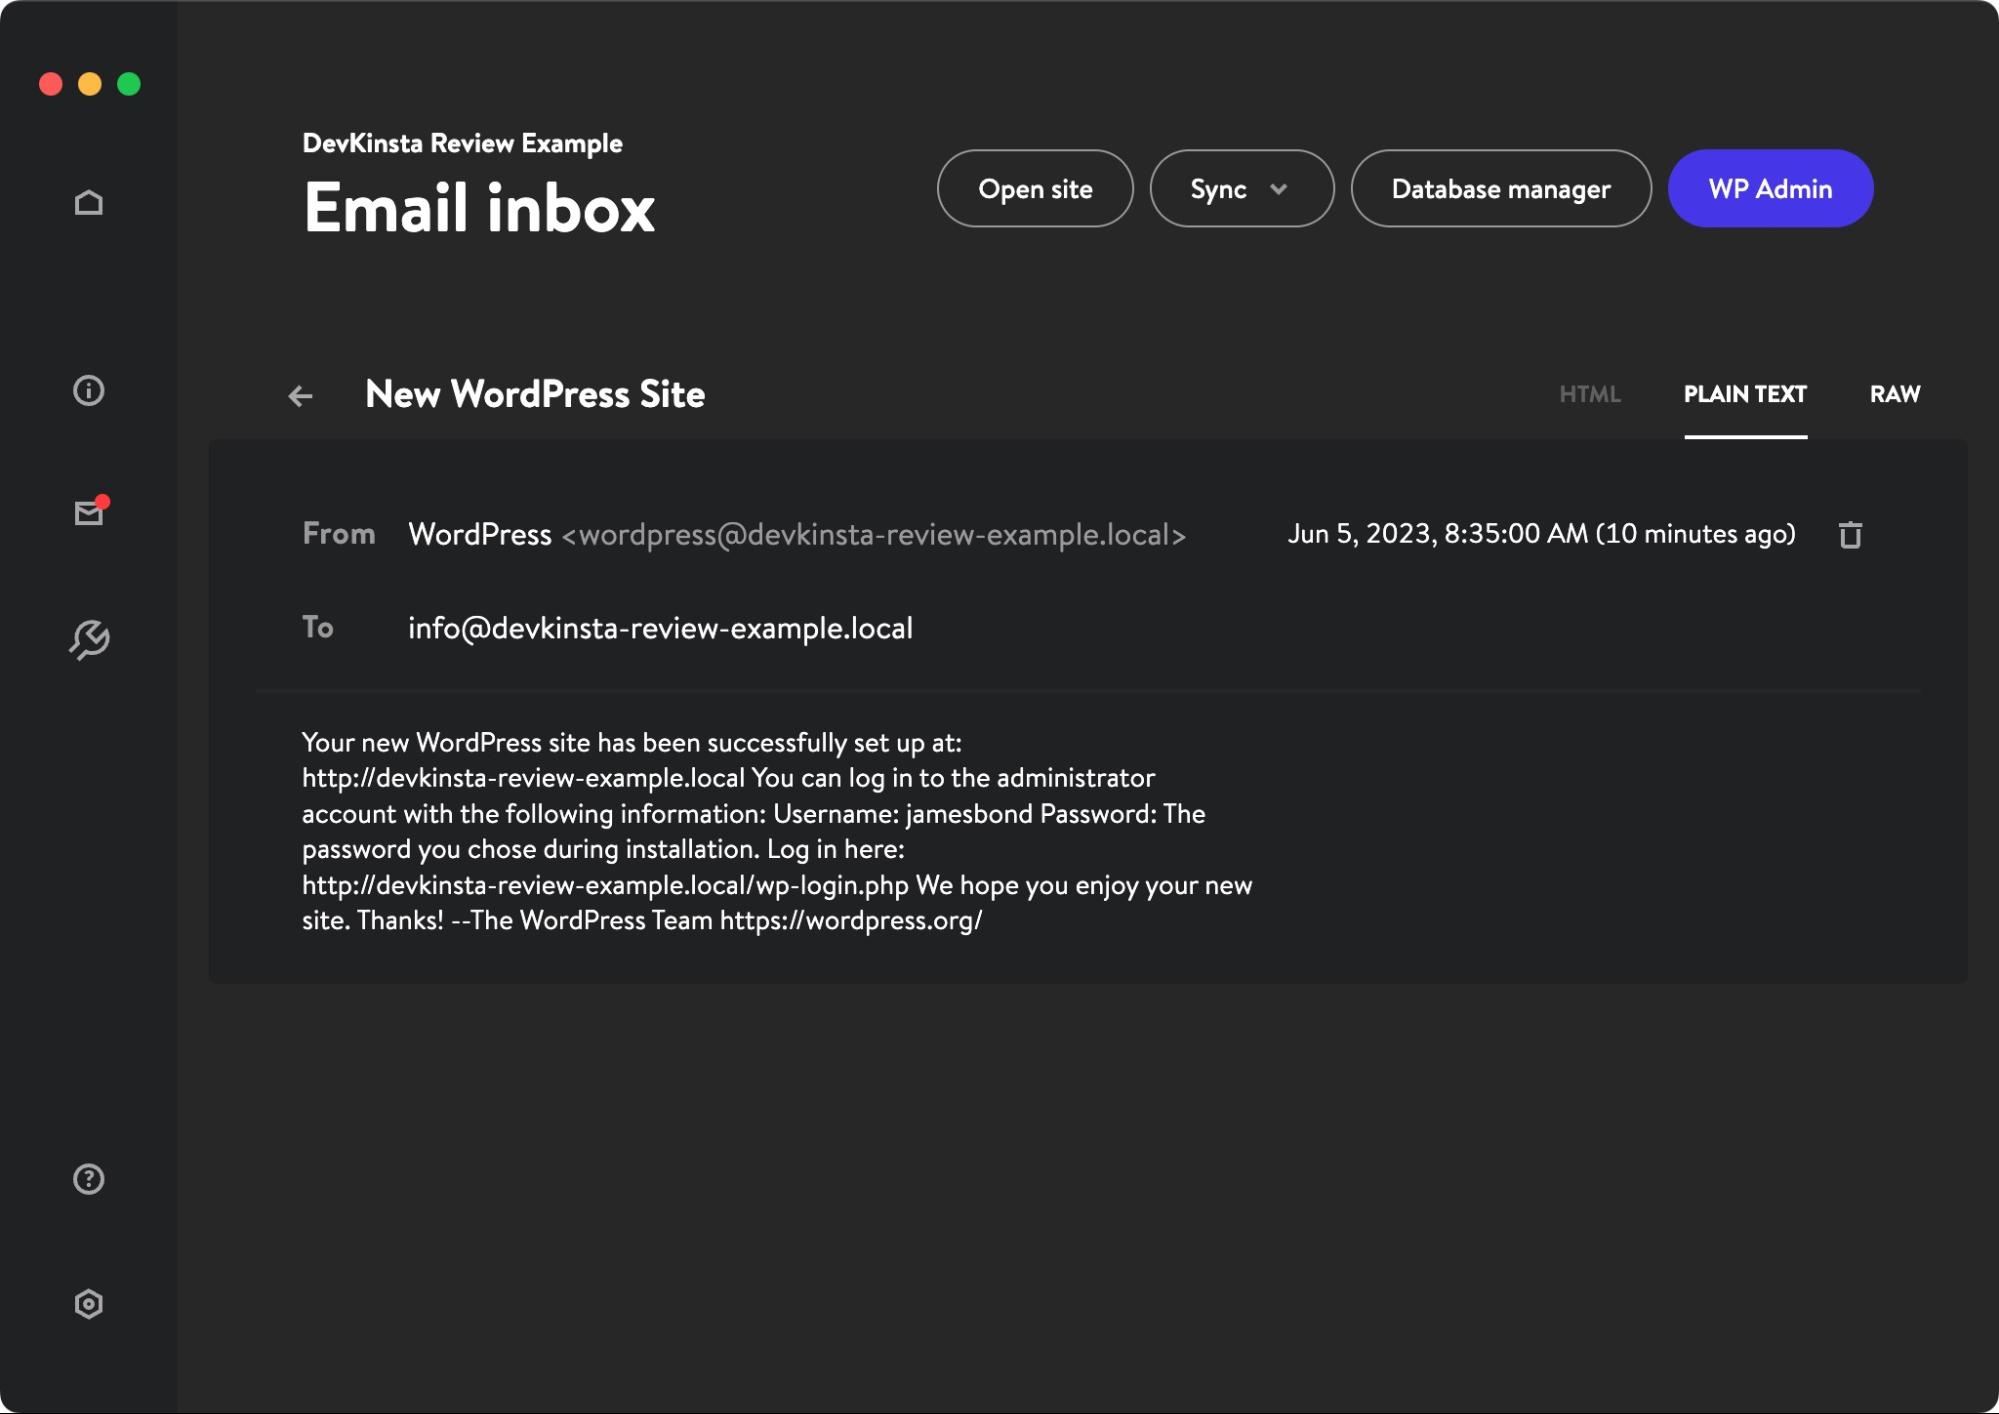
To help you test and debug transactional emails on your WordPress site, DevKinsta includes its own email inbox that tracks every email your local site sends.
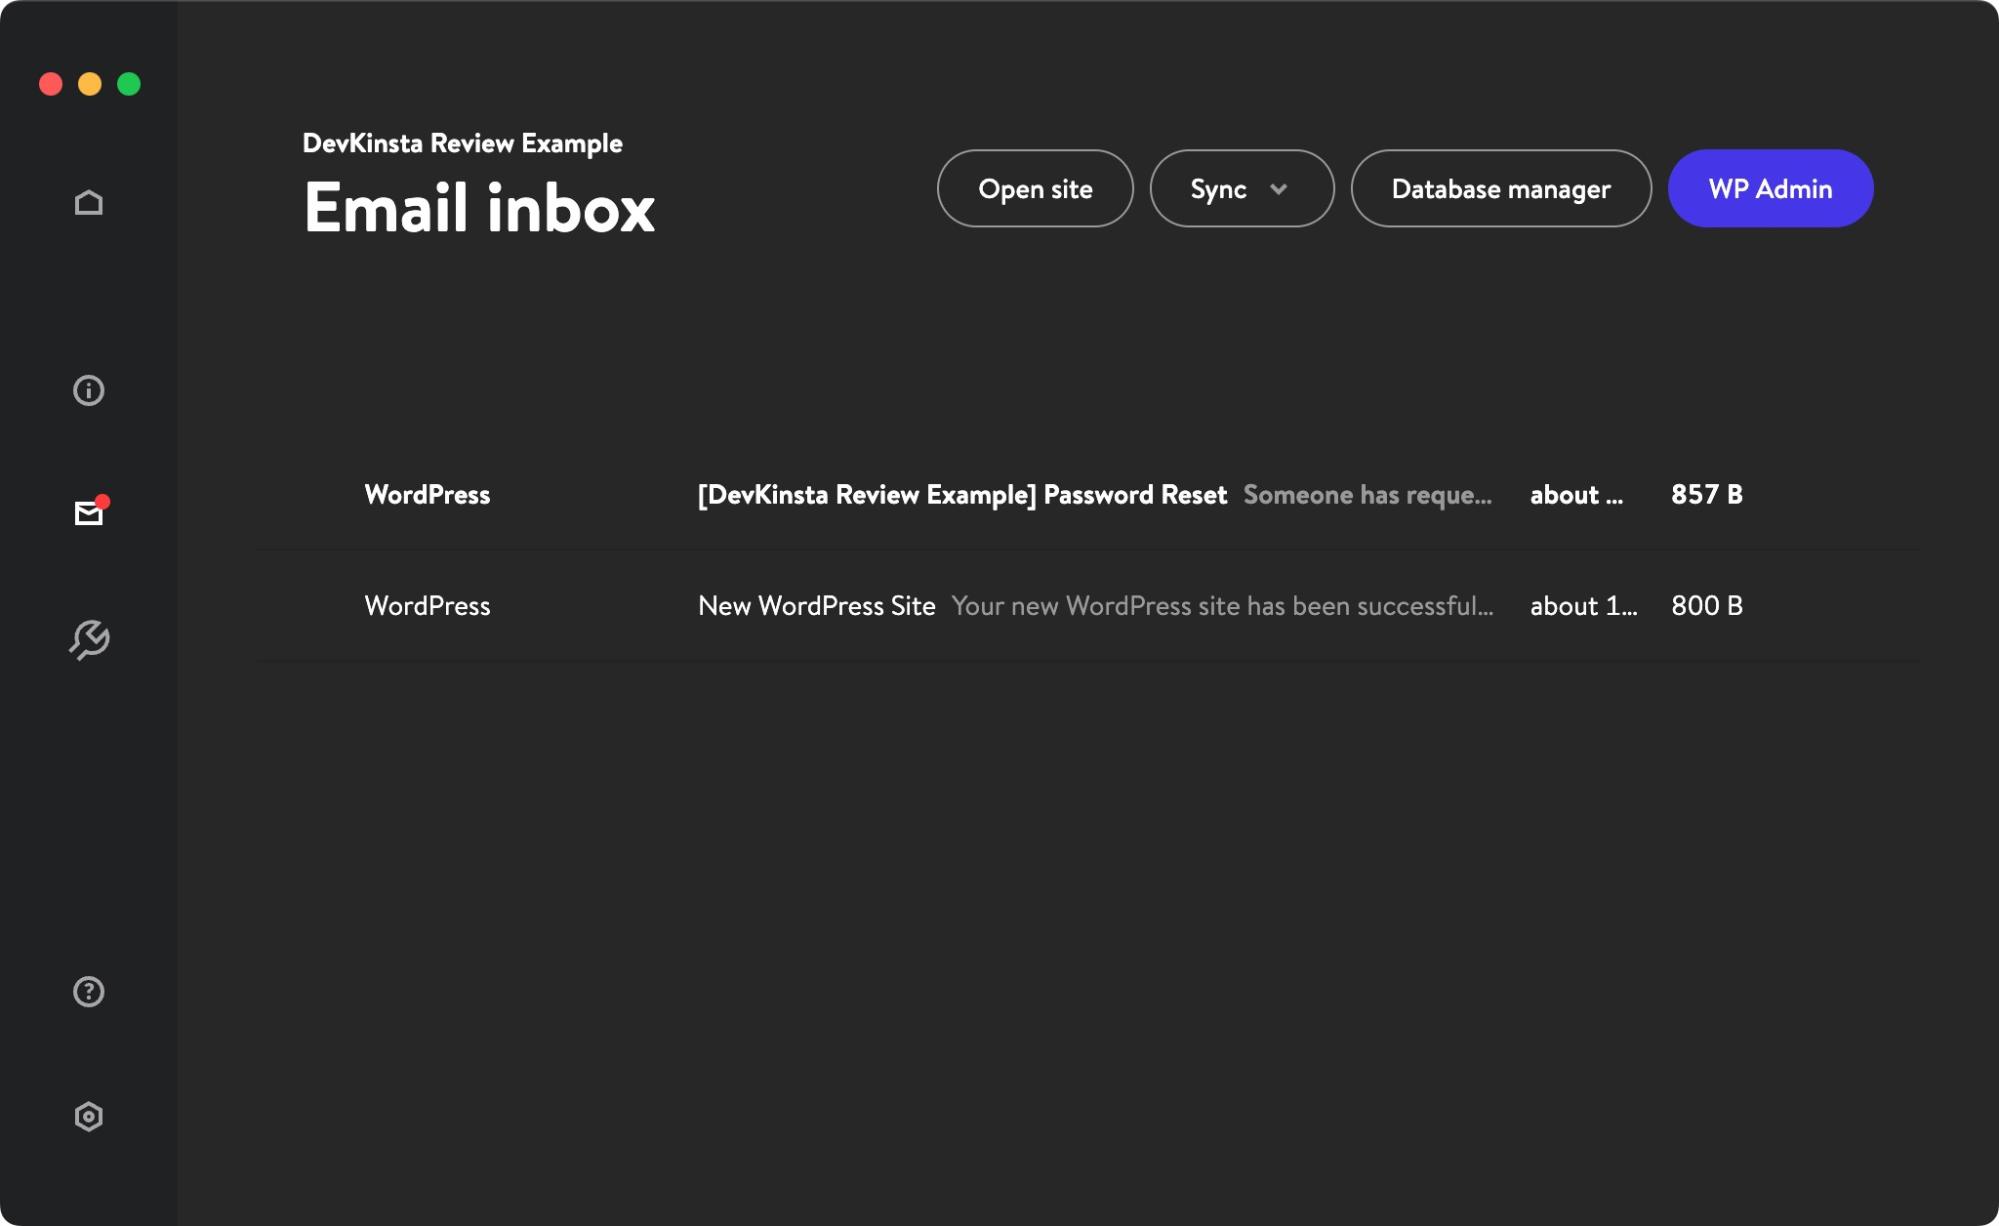
You can also view the full details of each email, including the “From” address, the “To” address, and the email content.
5. Local Database Access via Adminer
In addition to offering local email management, DevKinsta also offers local database access to help you work directly with a site’s database.
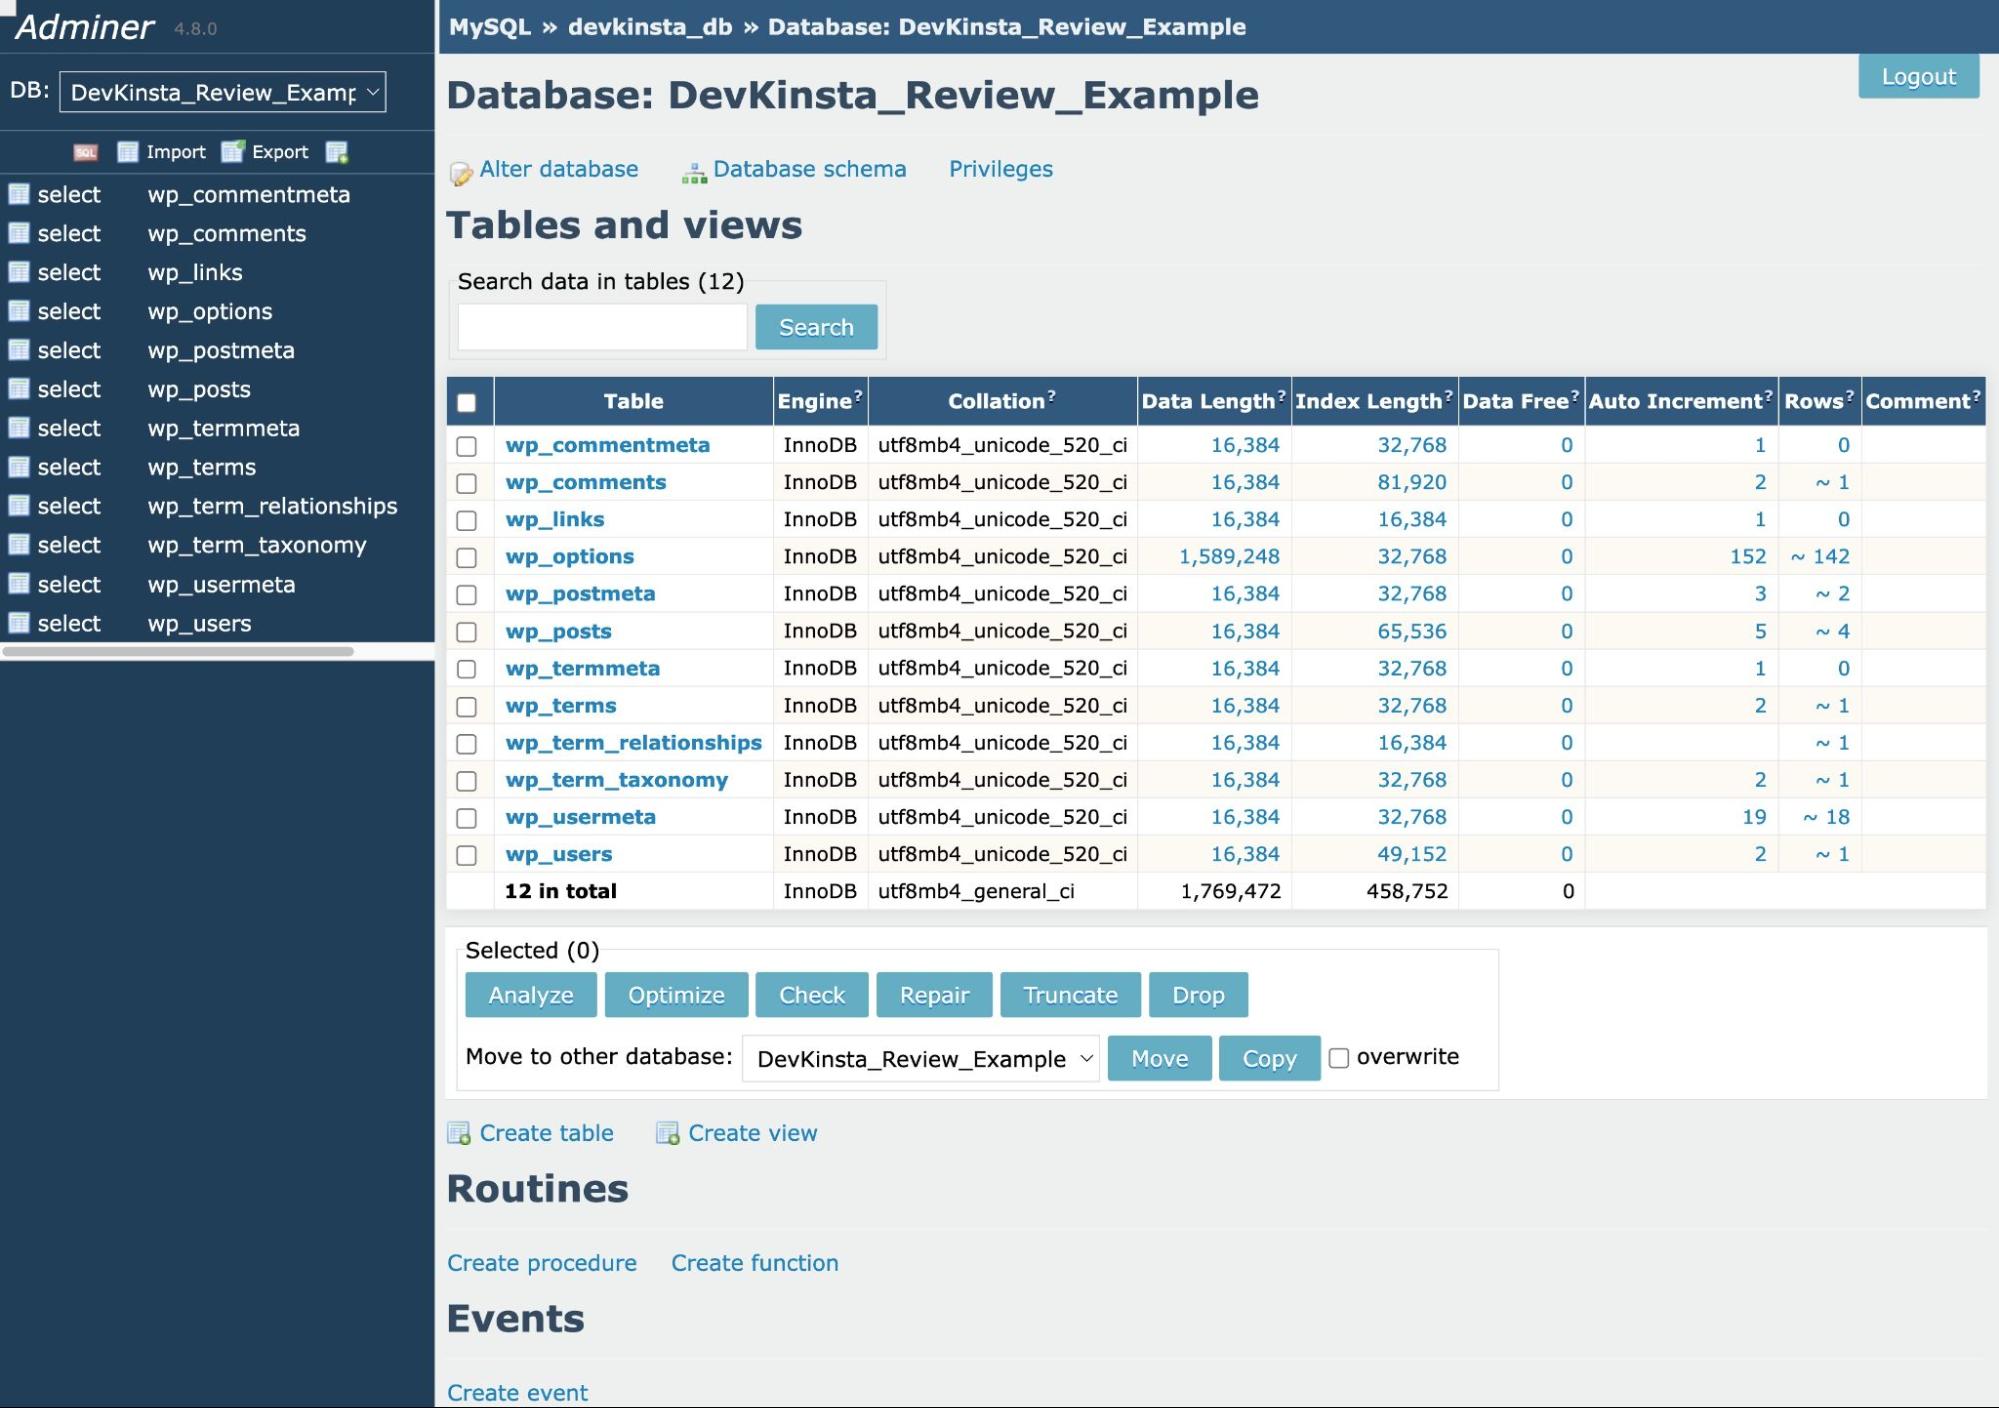
To power this functionality, DevKinsta offers one-click access to Adminer, which functions similarly to phpMyAdmin.
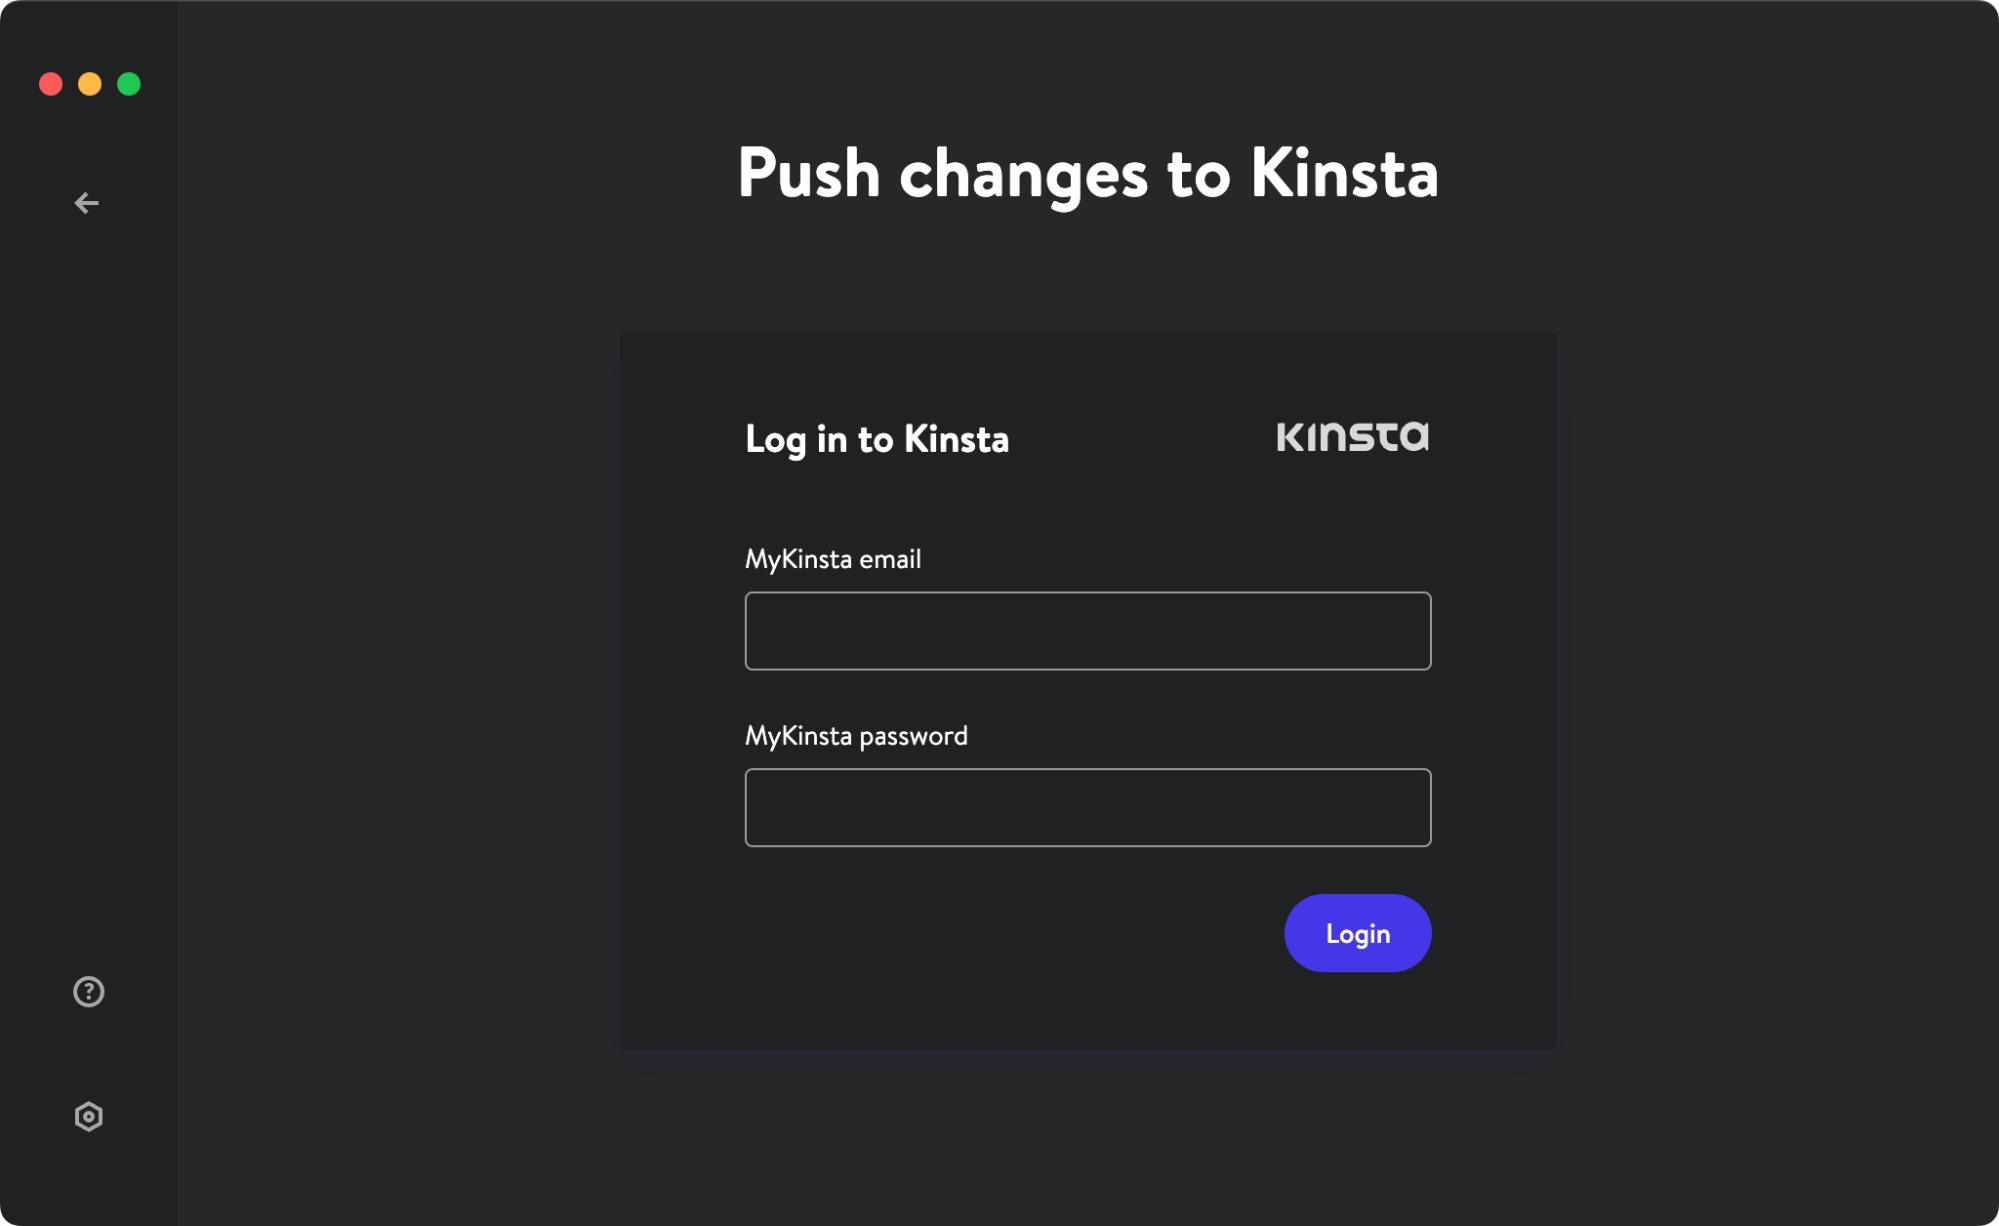
6. MyKinsta Integration To Push/Pull Sites from Live Hosting
You do not need to be a Kinsta hosting customer to use DevKinsta – it’s available for free to everyone.
However, if you are using Kinsta hosting, DevKinsta offers a special integration with the Kinsta hosting dashboard (MyKinsta) to help you easily move sites between live web hosting and your local development environments:
- You can pull a site from your live Kinsta hosting to your local development environment. This creates an exact replica of your live site in your local environment.
- You can push a site from your local development environment to your Kinsta staging environment. Once your site is in your staging environment, you can also push it to the live production environment using MyKinsta.
You can also create a local site based on one of your Kinsta backups.
How To Create Your First Local WordPress Site With DevKinsta
If you want to test DevKinsta for yourself, here’s a quick guide on how you can get started and set up your first local development WordPress site.
1. Download and Install DevKinsta
To start, you’ll want to download and install DevKinsta on your computer.
Again, DevKinsta is 100% free and supports multiple operating systems, including macOS (with dedicated versions for Apple Silicon and Intel chips), Windows, and Ubuntu.
Here’s how to install it:
- Go to the DevKinsta website.
- Click the Download DevKinsta button to download it to your computer.
- Run the file to install it on your computer – the exact process will depend on your operating system.

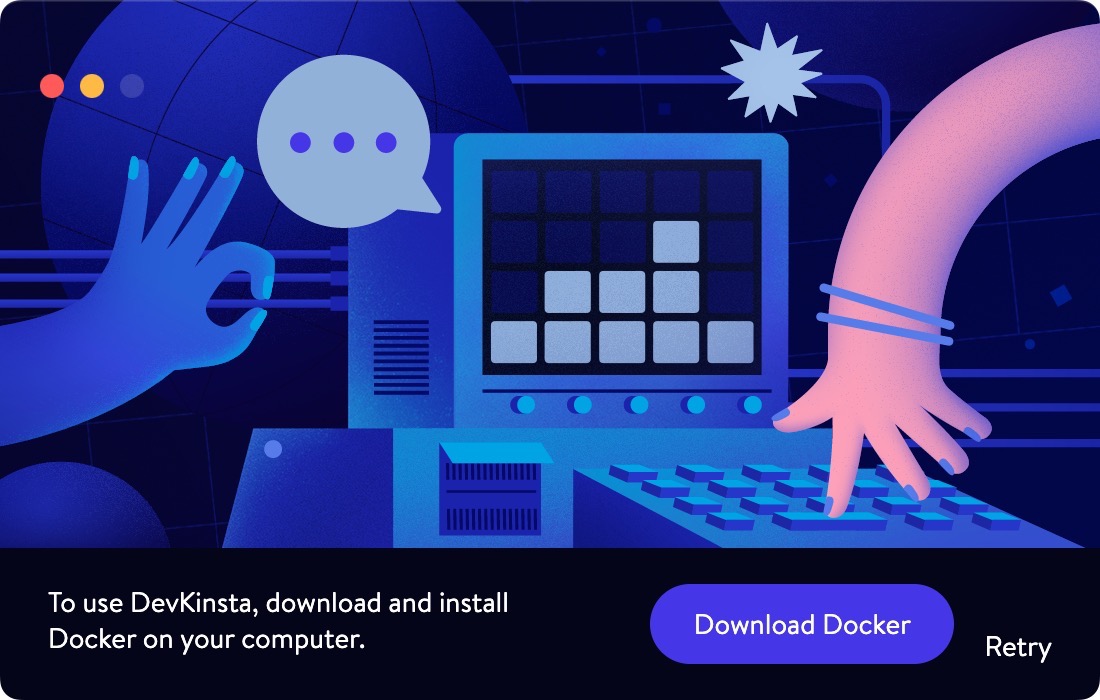
Once you install the main DevKinsta software, you’ll also be prompted to install Docker Desktop.
DevKinsta uses Docker to create a separate container for each website, which is what allows you to adjust the environment (e.g. PHP version) for each site.
You can install Docker Desktop by downloading it from the Docker website – clicking the Download Docker button in the DevKinsta interface will take you to the right page.
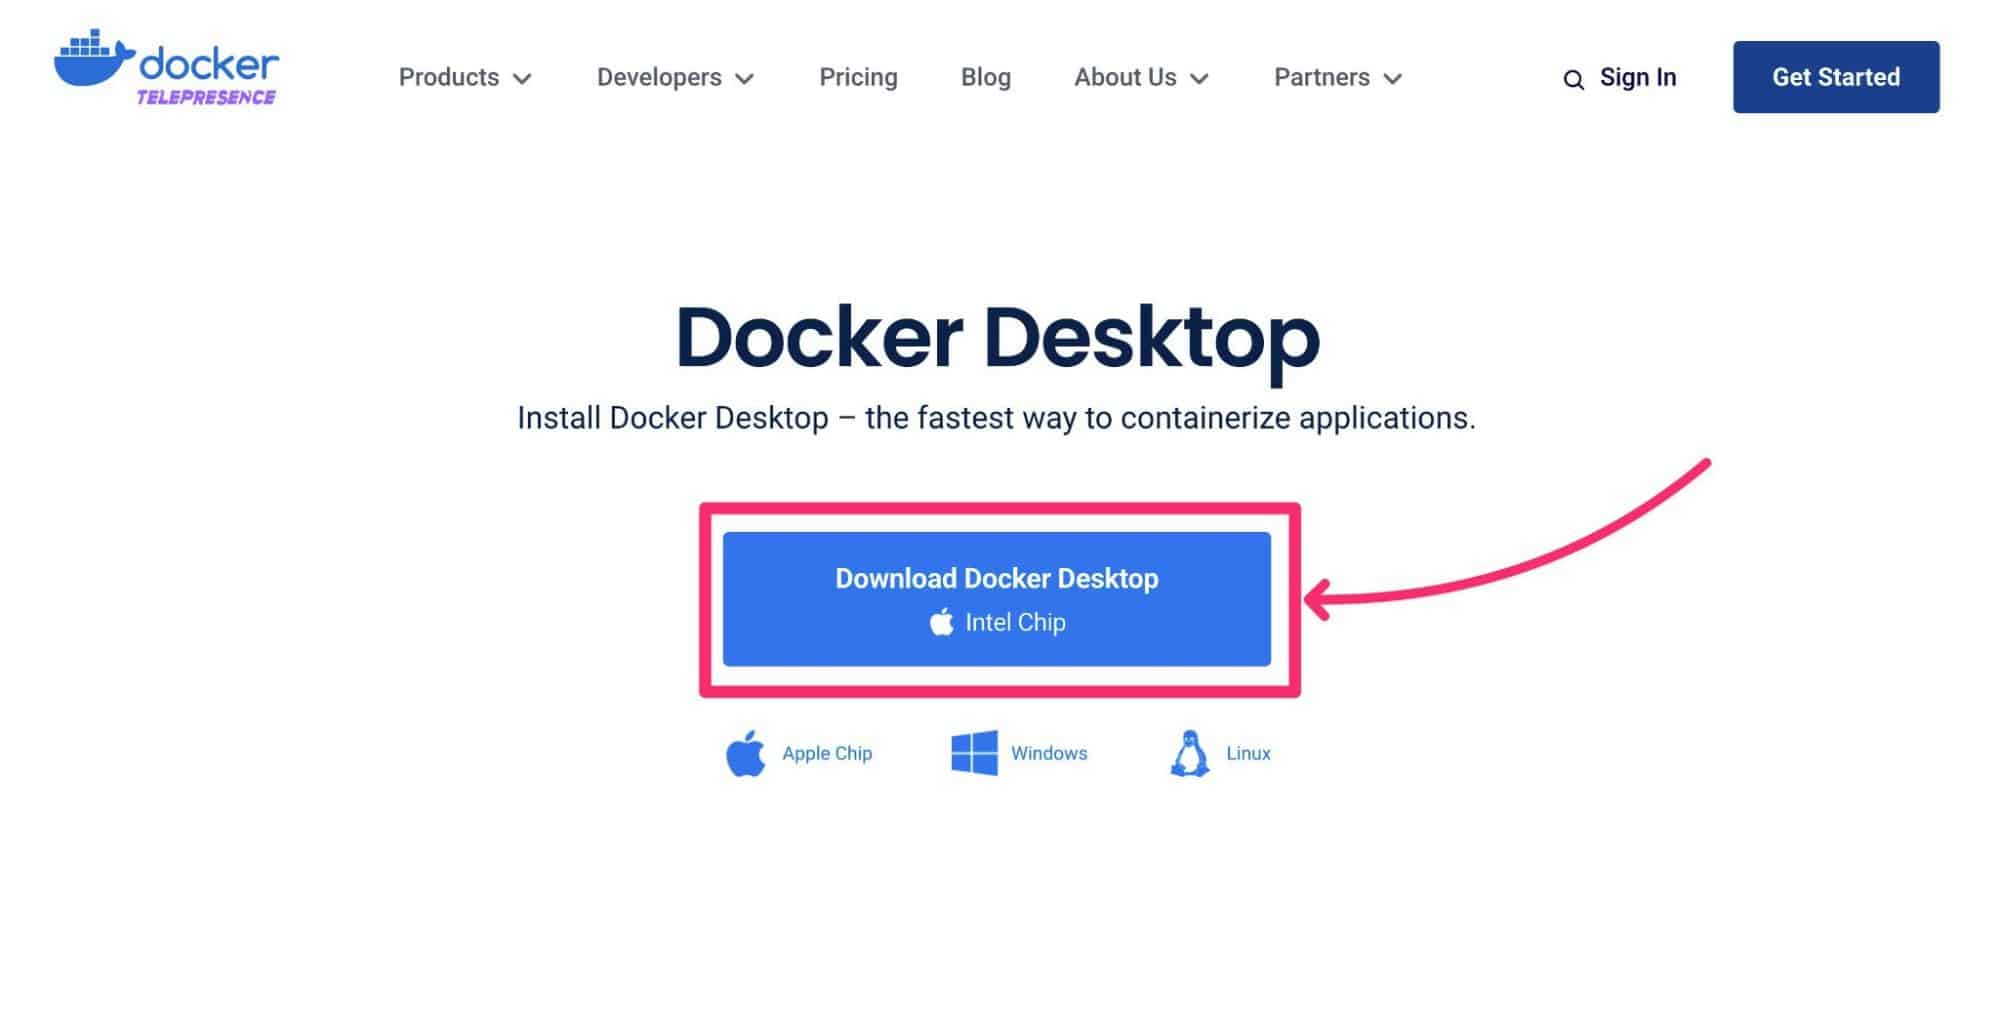
If you’re using macOS, make sure to install the Docker Desktop version for your specific chip – Apple Silicon or Intel. You’ll see options for both versions on the main download page and you can also find both versions here.
If you install the Intel version on a computer with Apple Silicon, you’ll see an error when you try to launch Docker Desktop.
Once you’ve installed Docker Desktop, make sure to launch Docker on your computer to run the Docker Engine.
Once you have Docker Desktop running, you can relaunch DevKinsta.
It should start downloading the needed Docker images – click the Retry button if it doesn’t automatically start downloading them:
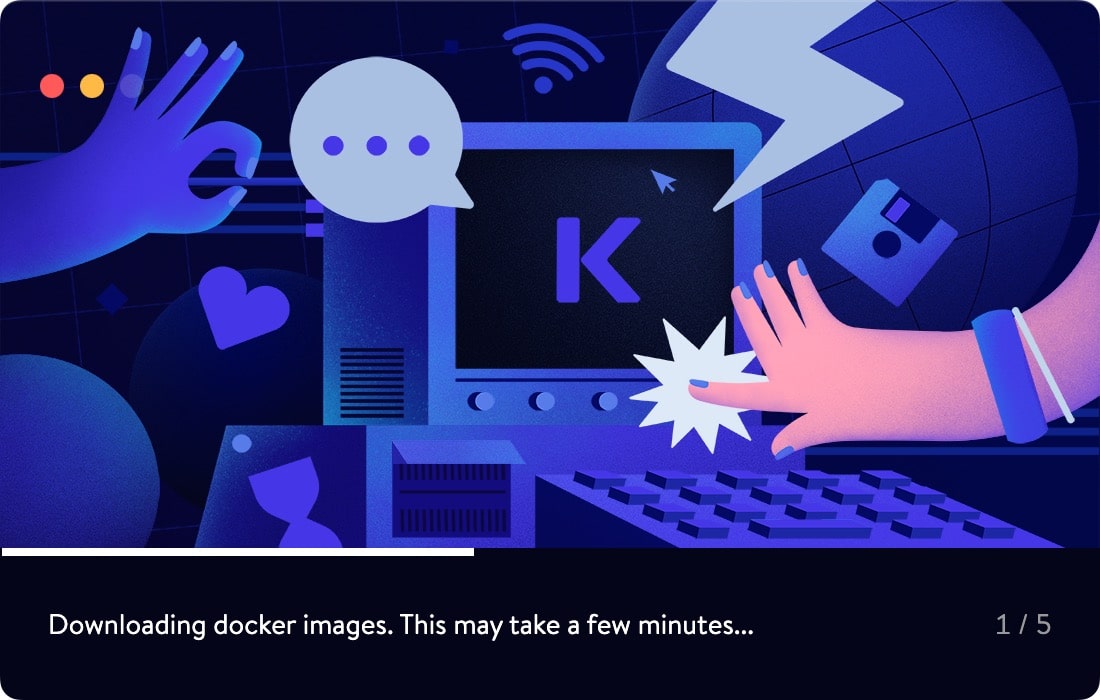
Once DevKinsta finishes downloading the Docker images, you should see the DevKinsta interface and you’re ready to create your first local WordPress site.
2. Create a New WordPress Site
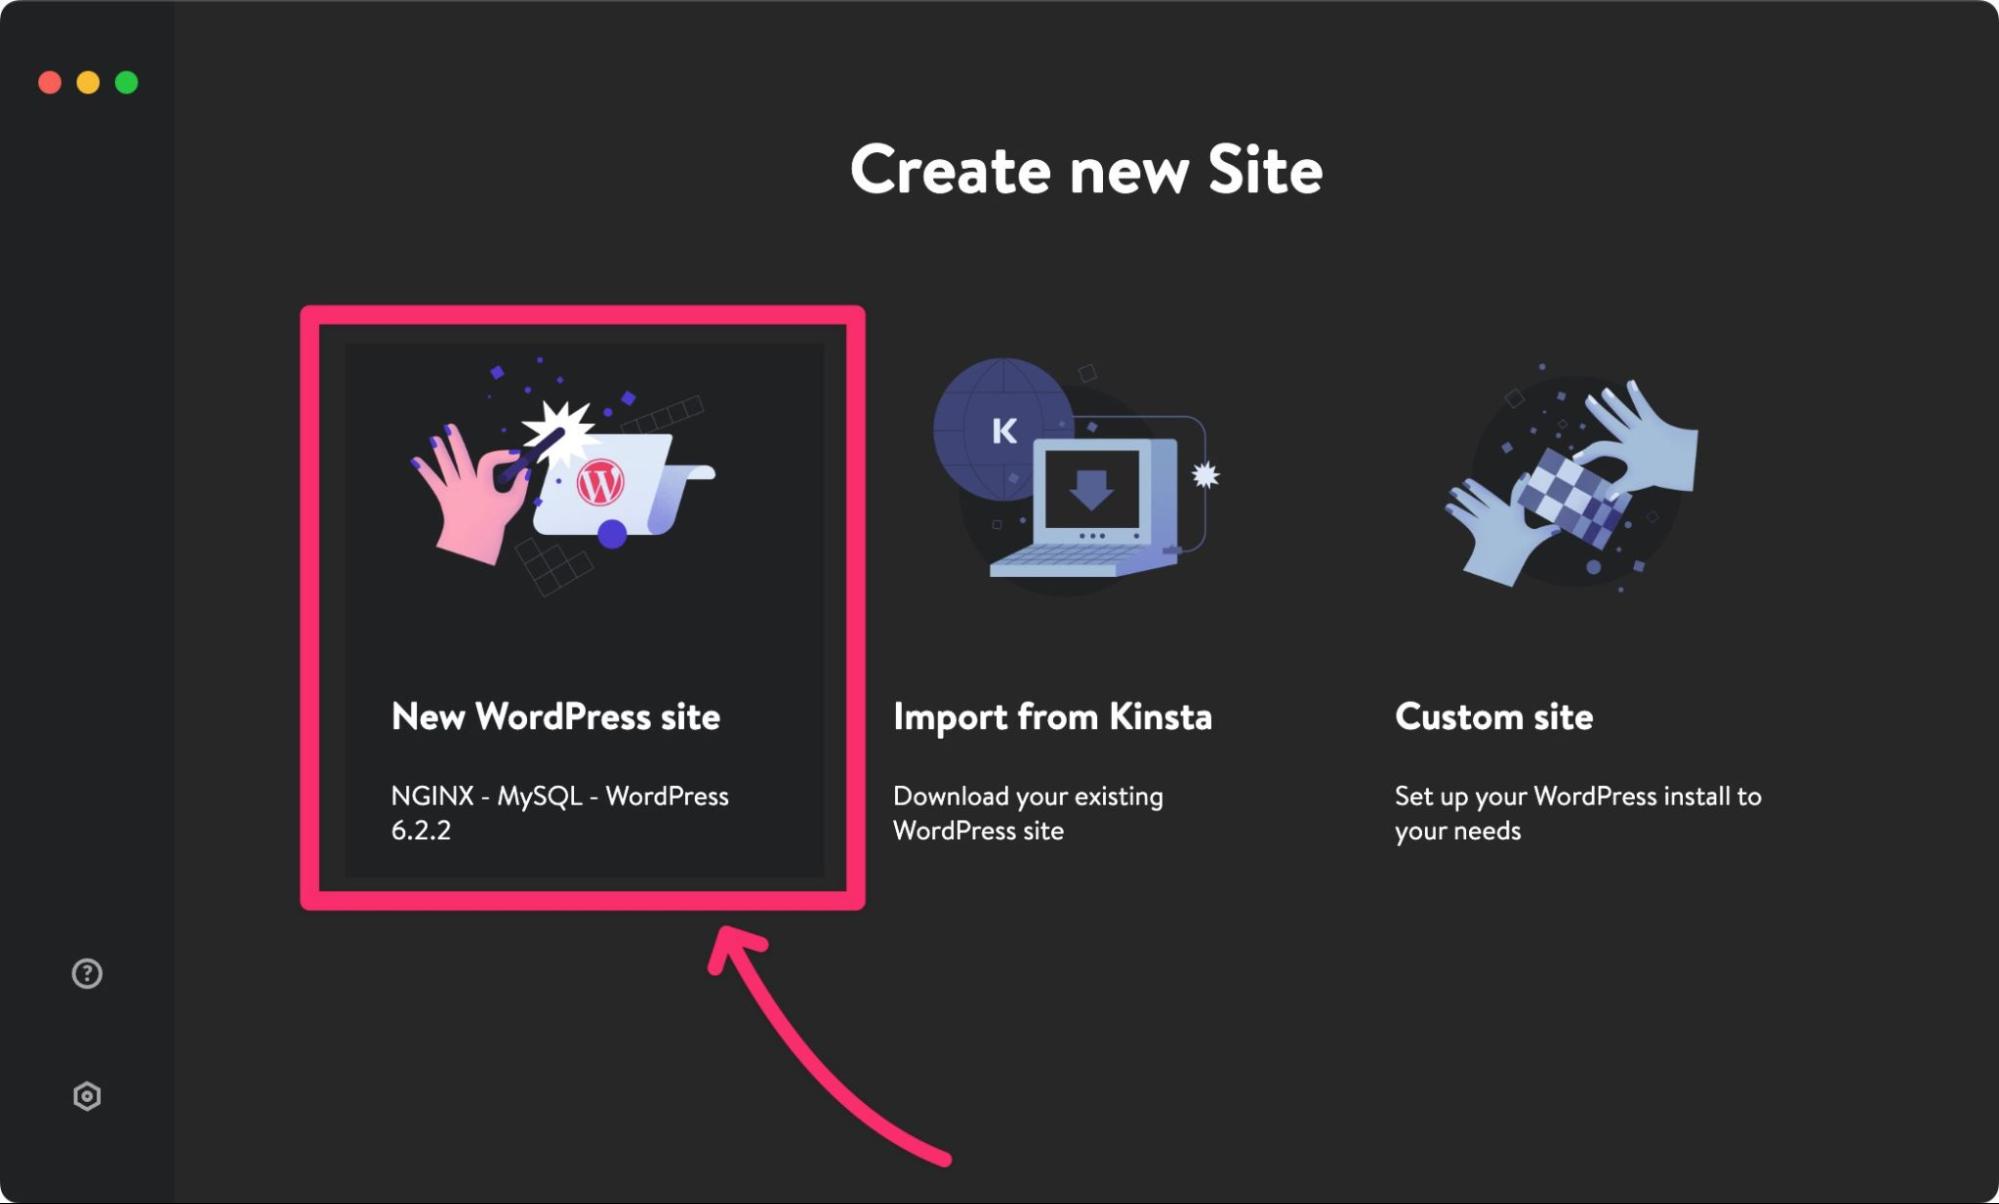
Once you’re in the DevKinsta interface, you’ll see three options to create a new site:
- New WordPress site – quickly create a site using the default environment details (PHP 8.0 at the time of this review).
- Import from Kinsta – import an existing WordPress website from your Kinsta web hosting.
- Custom site – access more advanced setup details, such as enabling WordPress multisite. You can also import a backup.
For the easiest way to quickly create a fresh install, you can click the New WordPress site option.
On the next screen, you can enter your desired site name and admin credentials. Then, click Create site.
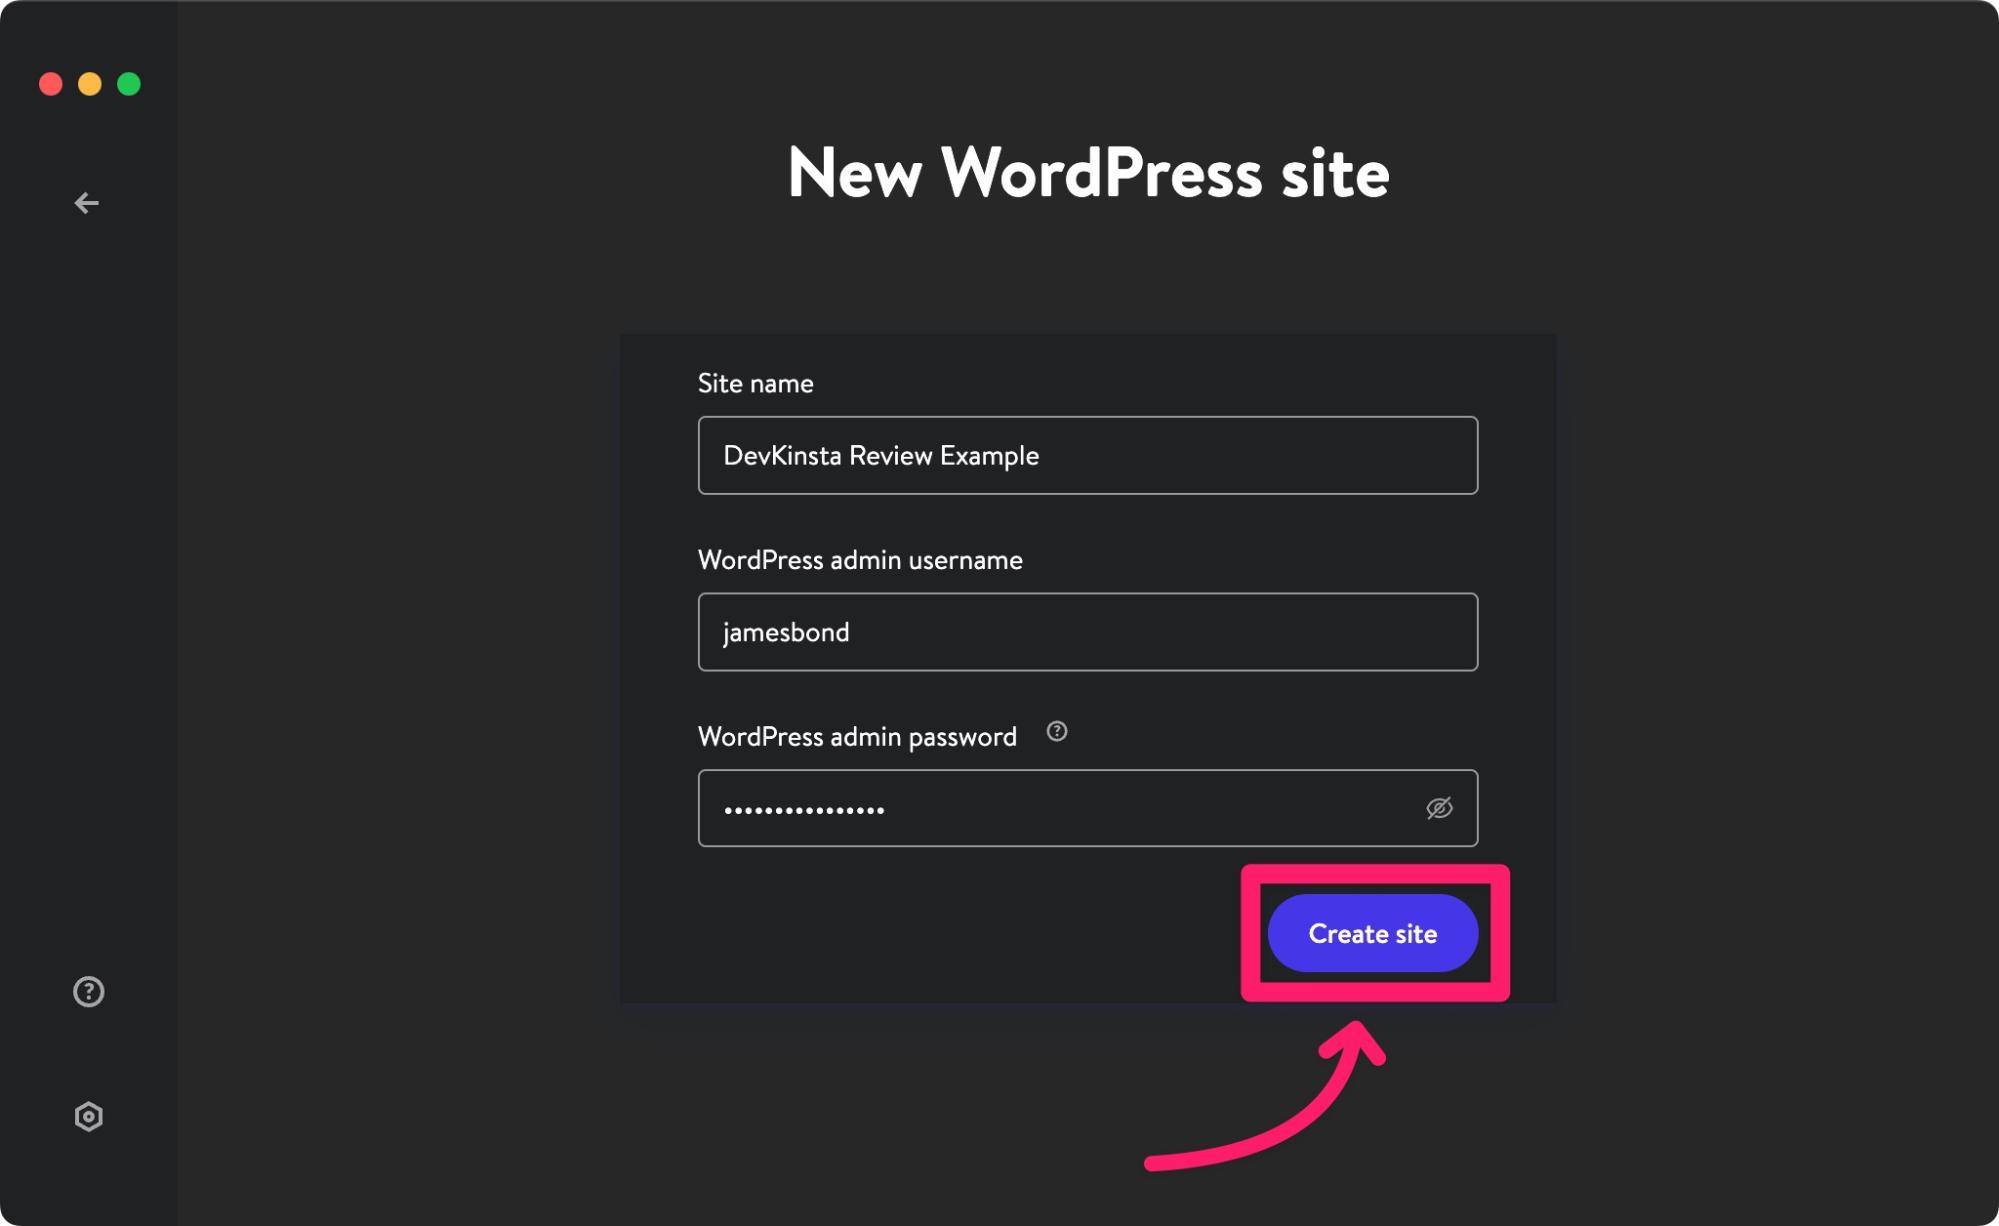
And that’s it! You’ll have a live WordPress site – more on that in a second.
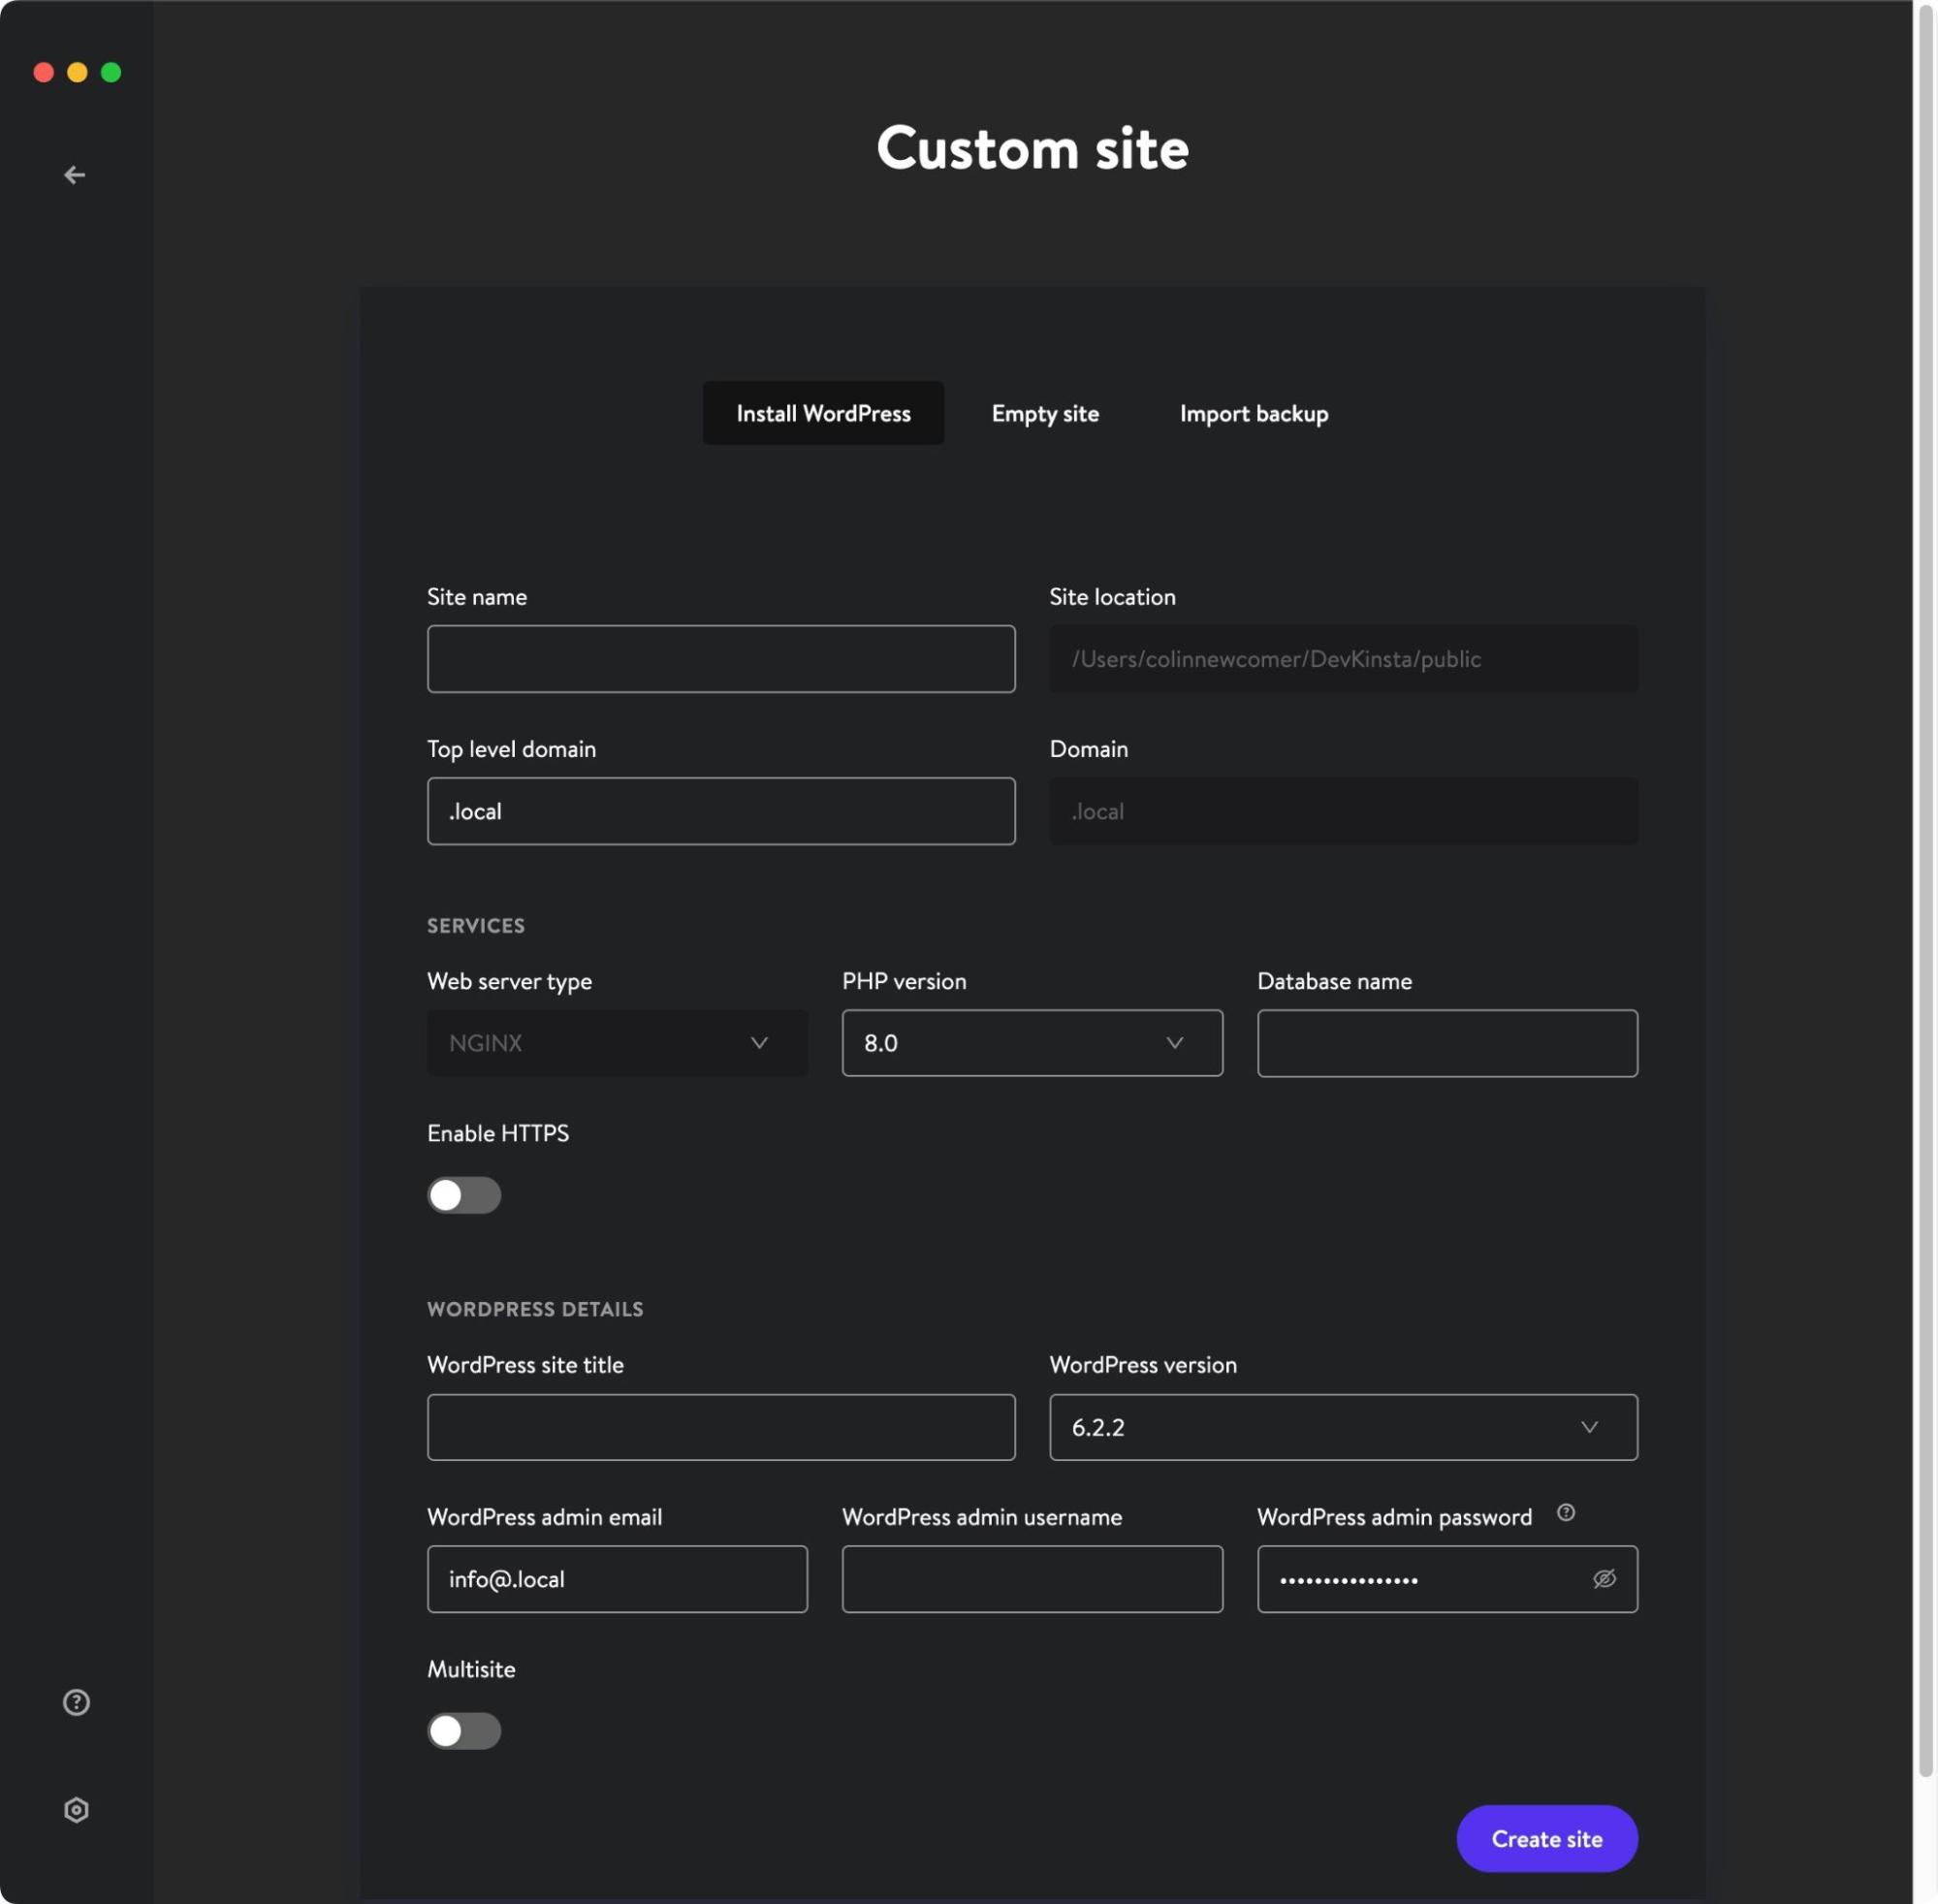
If you want more control over your WordPress install, you might prefer the Custom site option. This lets you choose different versions for PHP and WordPress, enable WordPress multisite, customize all of the technical details, and more.
3. Access Your WordPress Site
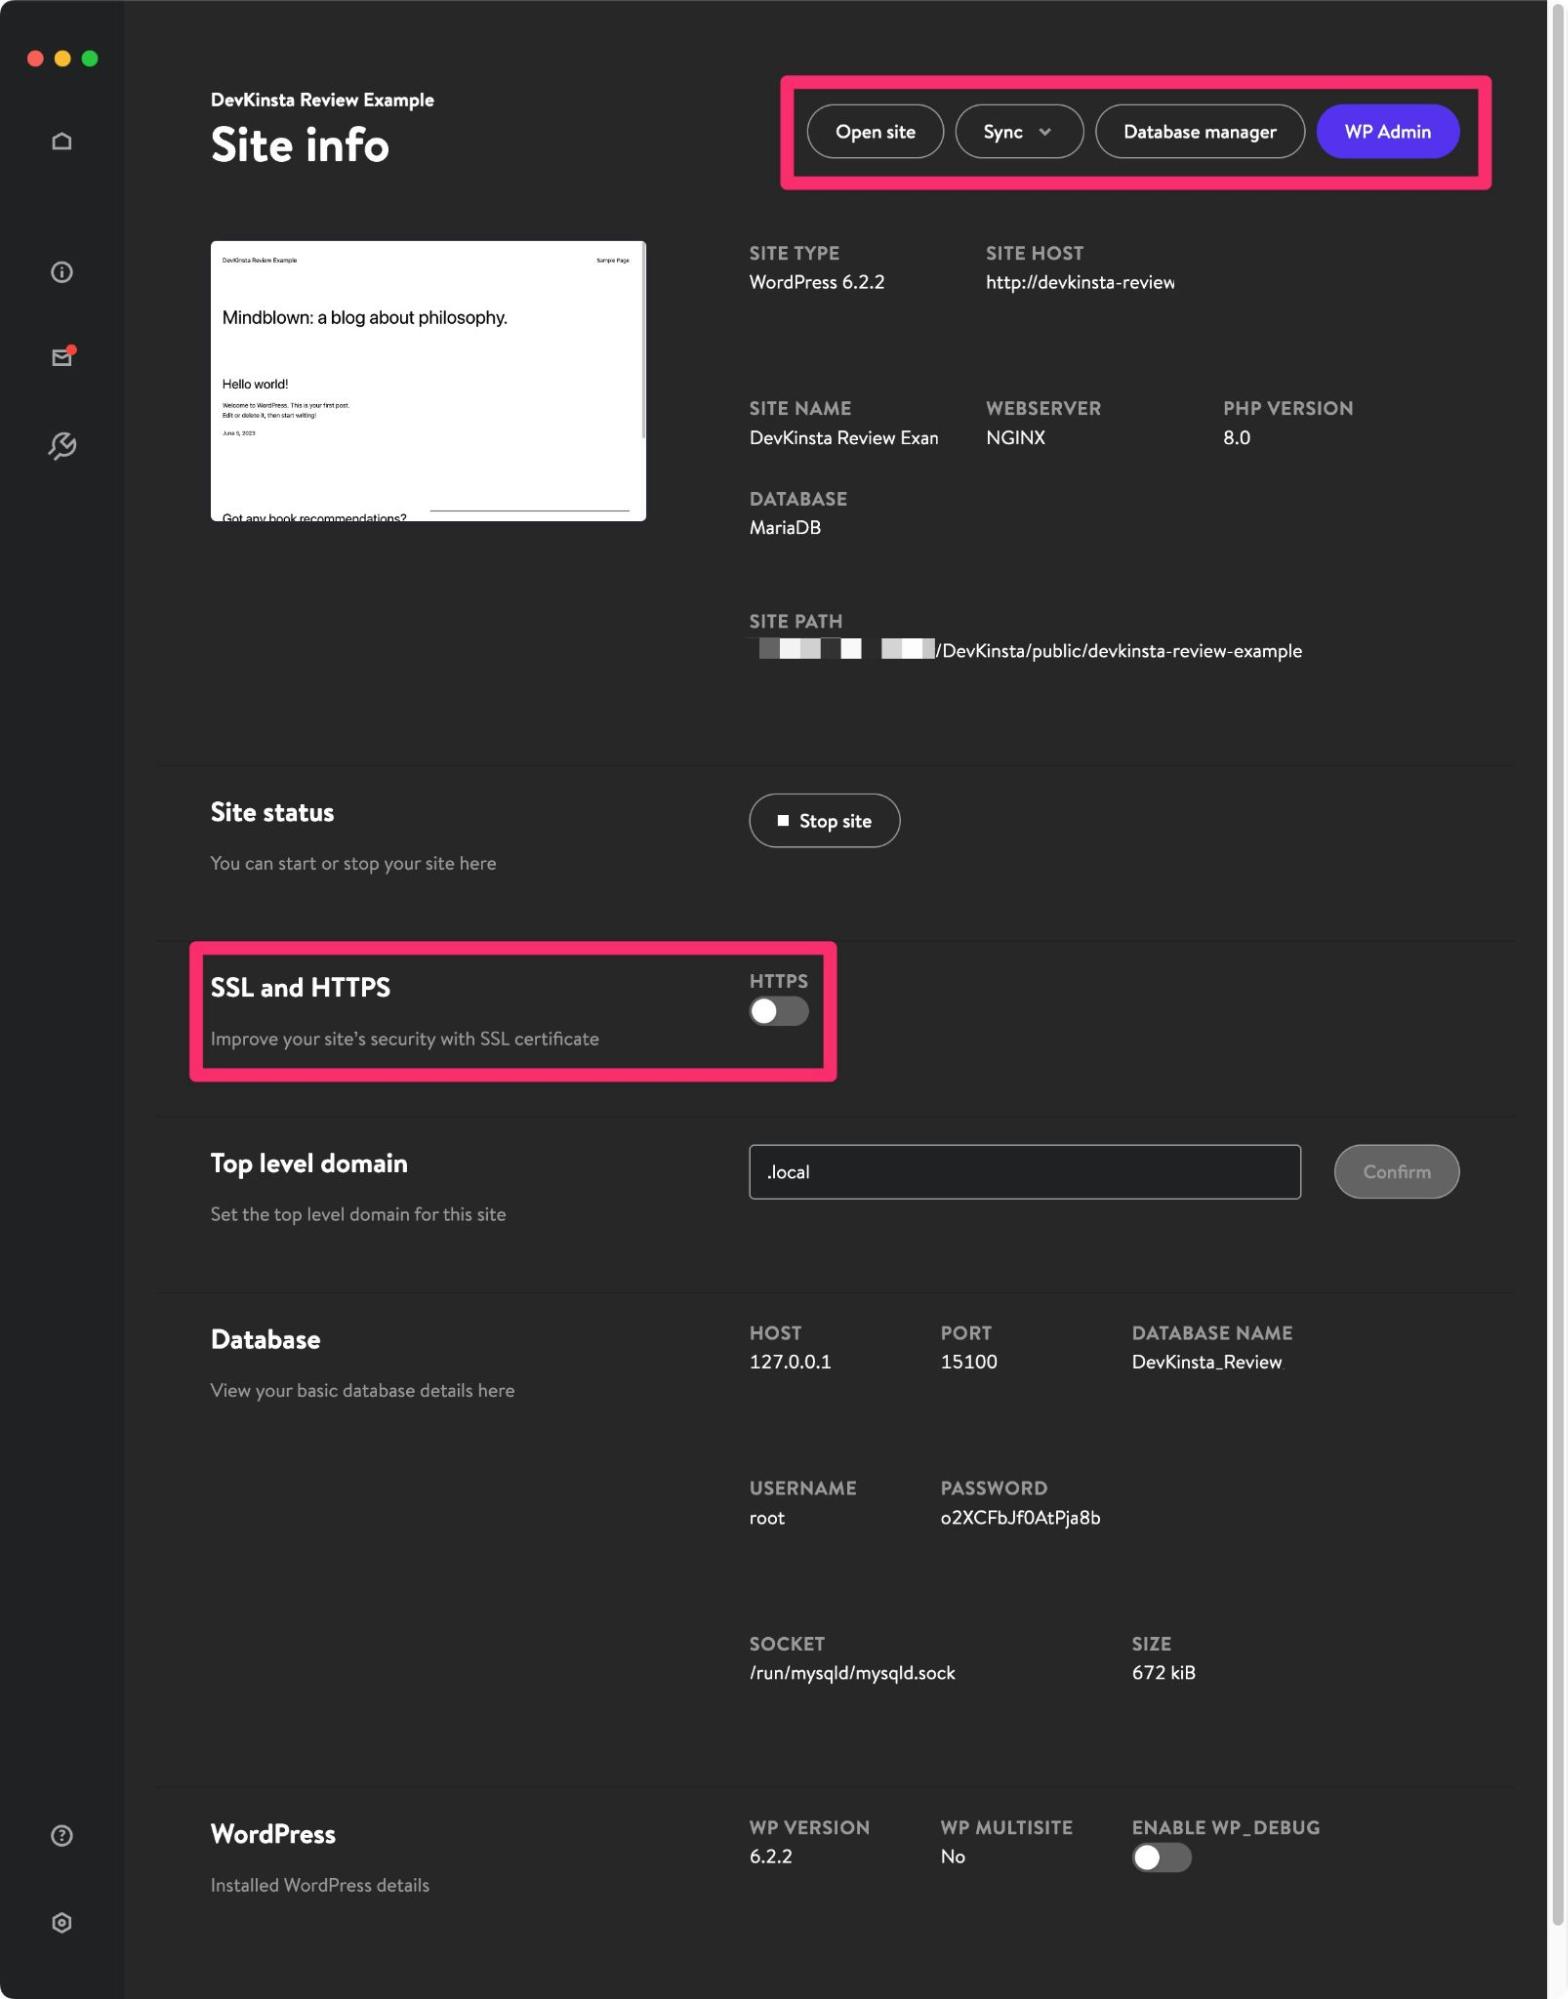
Once you create your site, you should see the dashboard for that site in DevKinsta.
Here, you’ll see technical details for your site, along with buttons to access the frontend site or WP Admin dashboard in the top-right corner.
If you want to enable HTTPS, you can use the toggle in the SSL and HTTPS section.
You can work with your site just as if it were a live website. Feel free to log in to your WordPress dashboard and install some themes and plugins.
But first, let’s go through a few other ways to access your local WordPress site…
Accessing Your Site’s Database
To access your site’s database, you can click the Database manager button on the top bar.
This will open Adminer for your site’s database.
Testing Transactional Emails
Because you can’t use a local WordPress site to send emails to actual email addresses, DevKinsta includes a built-in tool that lets you see all of the emails that your site is “sending.”
You can access this by clicking on the email icon in the left sidebar.
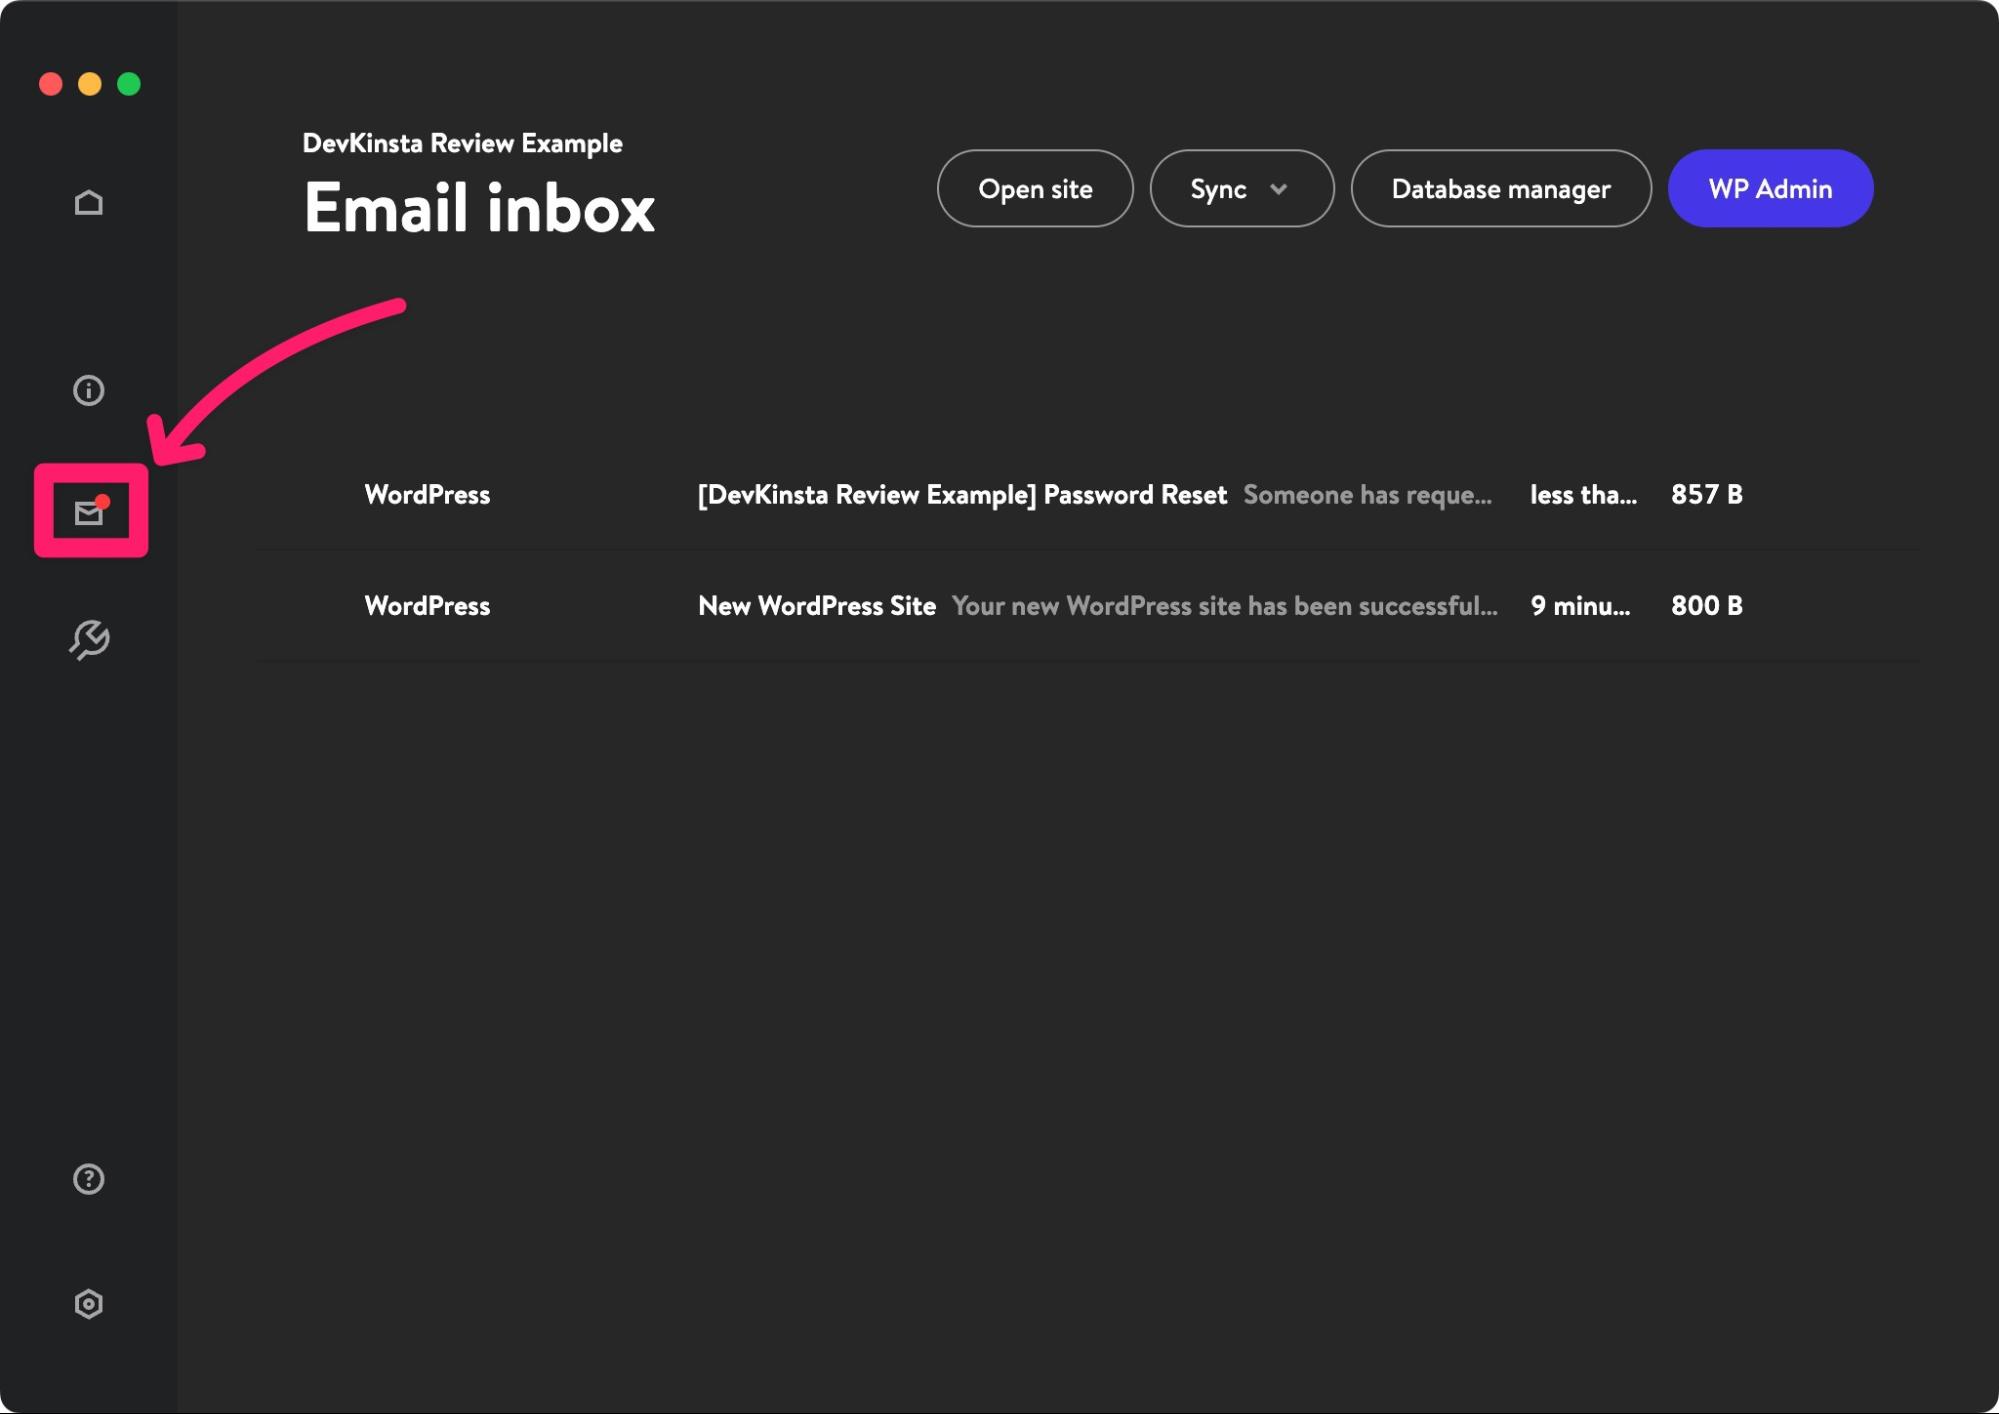
If you click on an email in the list, you can see the full content of the email.
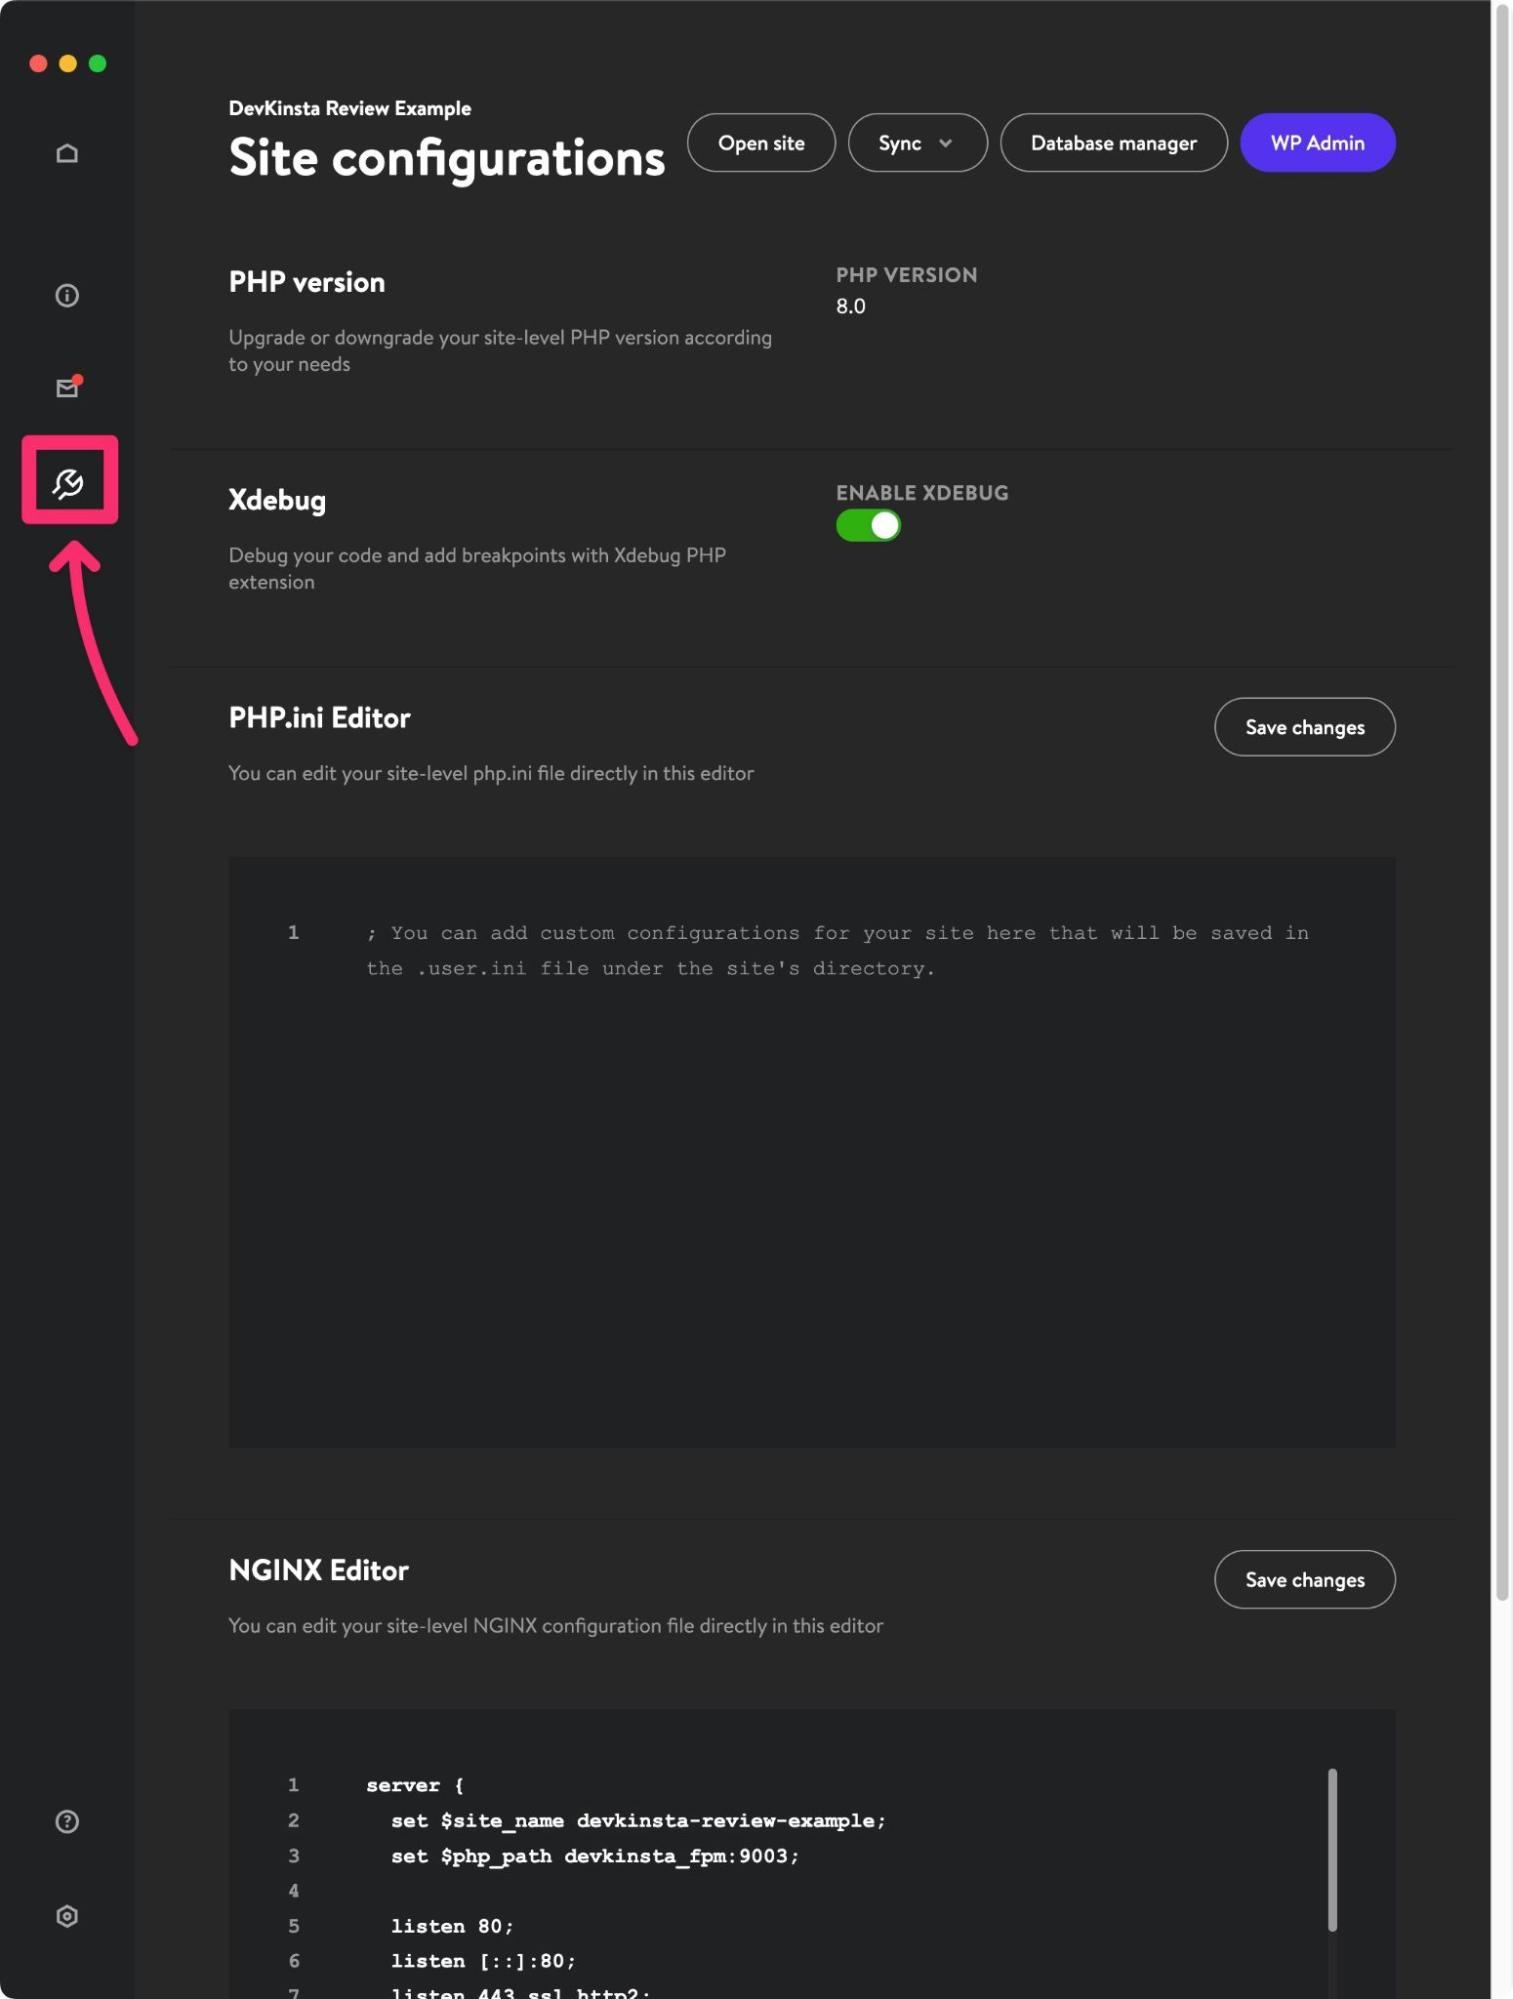
Accessing Site Configurations
While the main site dashboard includes some configuration options, such as enabling HTTPS and/or WP_DEBUG mode, there’s also a separate Site configurations dashboard that lets you:
- Change the PHP version.
- Enable Xdebug.
- Edit the PHP.ini file.
- Editor the Nginx configuration file.
You can access this by clicking the wrench icon on the left sidebar.
Try DevKinsta Today
That wraps up our DevKinsta review.
Whether you want to improve your development workflows or just create some sandboxes to play around with WordPress, DevKinsta makes it easy to get started with local WordPress development.
Because DevKinsta is 100% free and available to everyone, you can test DevKinsta yourself at no risk to your wallet.
If you want to try it out, head to DevKinsta and download the version for your operating system.