You’re likely familiar with WordPress.com’s ease and convenience, but you’re hitting the ceiling of its capabilities, and it’s time for a change. Moving from WordPress.com to WordPress.org opens up a new world of possibilities, from complete design freedom to access to an extensive library of plugins and themes that can transform your site.
However, this move isn’t just a straightforward switch; it requires careful consideration of hosting options, domain management, and the transfer process. As you stand on the brink of this pivotal shift, you’ll need to navigate these waters precisely, ensuring your site retains its essence and is also set up for future growth.
Let’s explore why this move could be a game-changer for your online presence and what you need to know to migrate from WordPress.com to a self-hosted WordPress site.
Table of Contents
- Why Migrate from WordPress.com to Self-Hosted WordPress?
- How to Move from WordPress.com to WordPress.org
- Post-Migration Steps
Why Migrate from WordPress.com to Self-Hosted WordPress?
The commercial relationship between WordPress.com and WordPress.org is subtle and confuses many people. They’re two separate entities:
- WordPress.com offers a hosted (or “managed”) version of WordPress with a limited amount of control and themes. It’s free with paid-for add-ons.
- WordPress.org lets you install your version of WordPress on your hosting. From now on, we’ll just call it “self-hosted WordPress. ” This requires having your own hosting and domain name (we’ll cover these later).
Moving from WordPress.com to WordPress.org is like graduating from high school and stepping into the vast world of college. It’s all about upgrading to more freedom, customization, and control over your digital presence. But why make the move, and what should you know before packing up your digital belongings?
WordPress.com is the cozy dorm room provided by Automattic, equipped with furniture (themes), a meal plan (hosting), and some house rules (limitations). It’s great for beginners, with its ease of use and built-in features, making the blogging journey as smooth as a cafeteria line.
WordPress.org, on the other hand, is like renting your apartment. It’s a bit more work, as you’re in charge of utilities (hosting), furnishing (themes), and even security (plugins). But the trade-off? Unparalleled freedom to mold and expand your space (website) as you see fit.
The allure of WordPress.org lies in its limitless possibilities. Custom themes? Check. Any plugin you can think of? Double-check. Complete control over your website’s look, feel, and functionality? Triple check.
But with great power comes great responsibility. You’ll need to choose a hosting provider, manage backups, and handle all aspects of website maintenance. It’s more hands-on but well worth the effort for those ready to take their online presence to the next level.
Suggested Reading
For a deeper dive into the differences and to help you decide which platform is right for you, check out this comprehensive comparison:
How to Move from WordPress.com to WordPress.org
Ready to leap? Stay tuned for the detailed steps, where we’ll guide you through the migration process, ensuring a smooth transition to your new WordPress.org site.
1. Export the WordPress.com Site to WordPress.org
First things first, you need to export your content from WordPress.com. This includes posts, pages, comments, custom fields, categories, and tags.
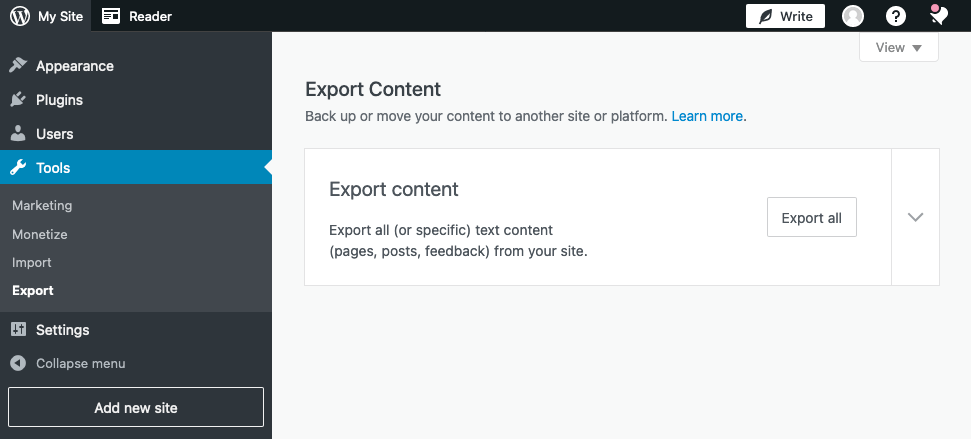
- Log into your WordPress.com dashboard.
- Go to Tools > Export.
- Click the Export all button or click the downward arrow to select specific content to export.

The screen will differ when your site have plugins. In this case, select All content or specific types of content, and then click the Download Export File button.
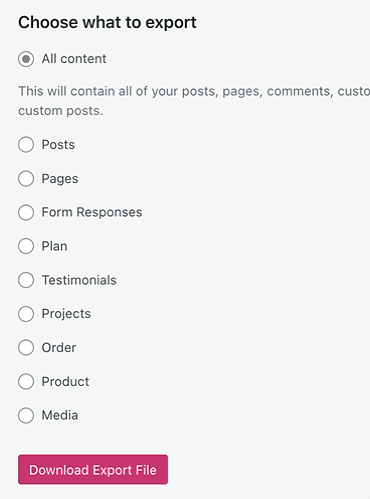
This will create an XML file you can use to import your content into WordPress.org.
2. Set Up Your Self-Hosted WordPress Site
Before you can import your content to your self-hosted WordPress, you need a place to import it. This means setting up your WordPress.org site.
- Choose a Web Hosting Provider and a Domain Name: Website hosting is just somewhere to store your website, and a domain name is just a website address for people to go to. You might have previously used yourblog.wordpress.com, but you can now get yourblog.com.
Select a web hosting provider that offers WordPress-specific services for optimal performance. There are many website hosts, but we recommend SiteGround.
Most hosts will also offer you a domain name, but if you prefer buying a custom domain name separately, we recommend Namecheap. - Install WordPress: Installing WordPress is generally straightforward, regardless of your hosting provider, and follows a similar procedure on most platforms.
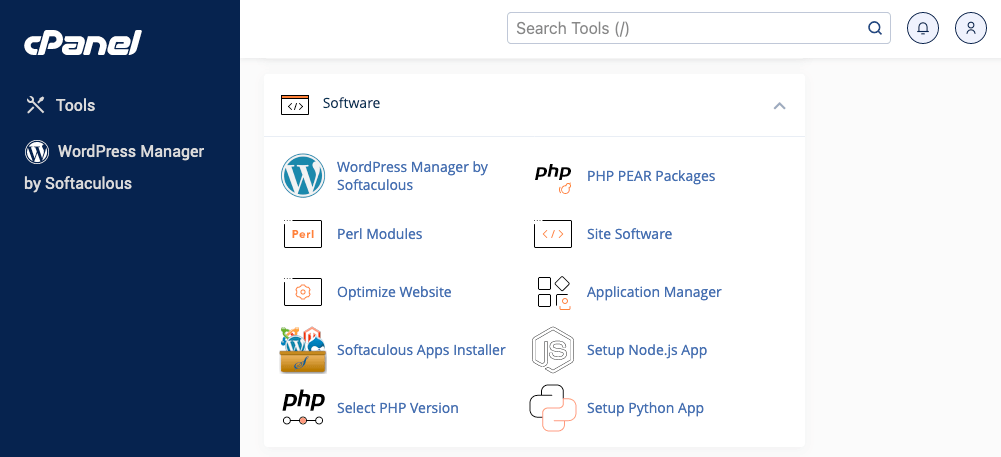
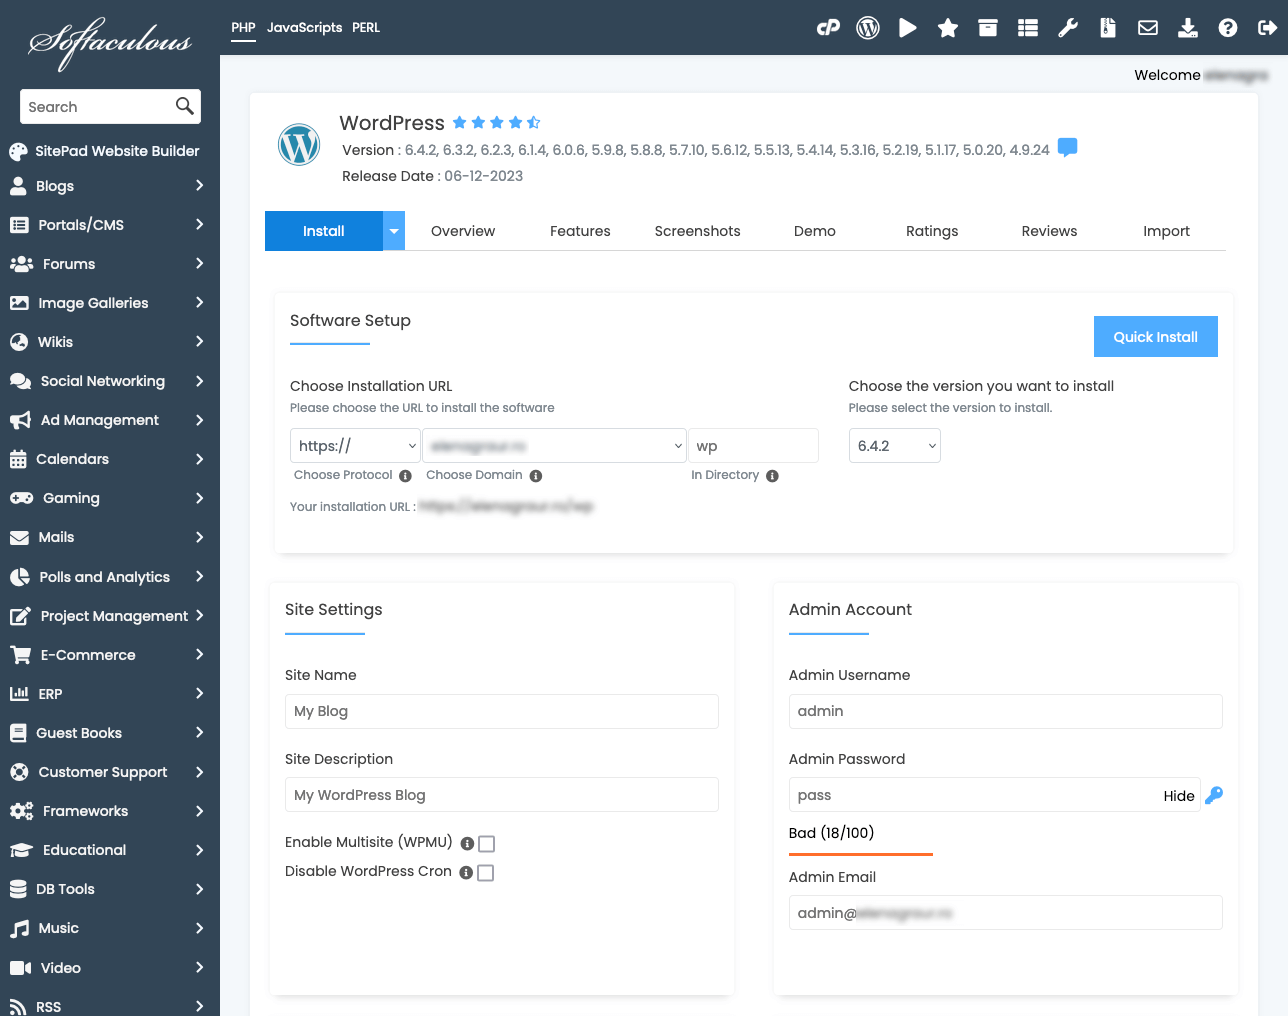
Access your hosting control panel, such as cPanel or Plesk. Most hosting services provide a one-click WordPress installation feature, often found under sections named ‘Website’ or ‘Software and Services.’ Tools like Softaculous, Fantastico, and QuickInstall make the installation process effortless.
Activating the WordPress installer initiates a simple setup process, guiding you through each step.
- Select and Activate a WordPress Theme: You can choose a premium theme or a free one. Consider one similar to your WordPress.com theme for consistency, or take this opportunity to refresh your site’s look.
Once you have installed WordPress, it is time to import your content into your new self-hosted WordPress website.
3. Import Content into Your Self-hosted Website
Importing content into your new self-hosted WordPress website is straightforward:
- Log into your self-hosted WordPress Dashboard.
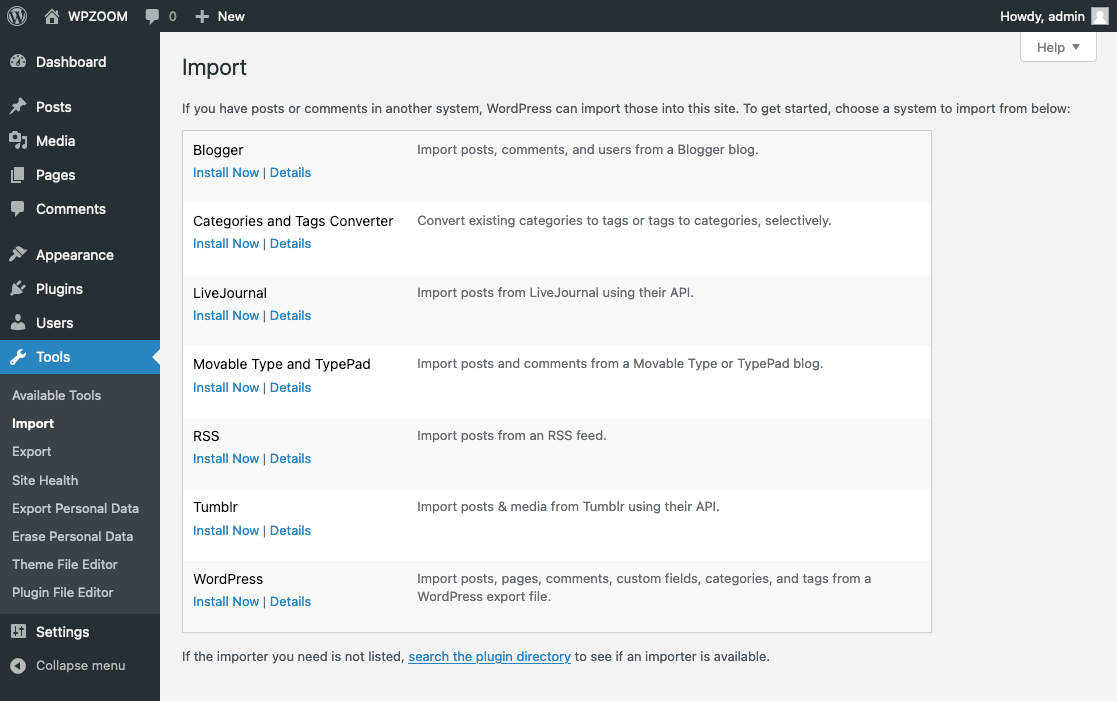
- Navigate to Tools > Import in the left sidebar. This section lists various platforms from which you can import content.
- Find WordPress in the list.
- If it’s your first time using this tool, you’ll be prompted to install the WordPress Importer plugin. Click Install Now to add the WordPress Importer tool to your site.

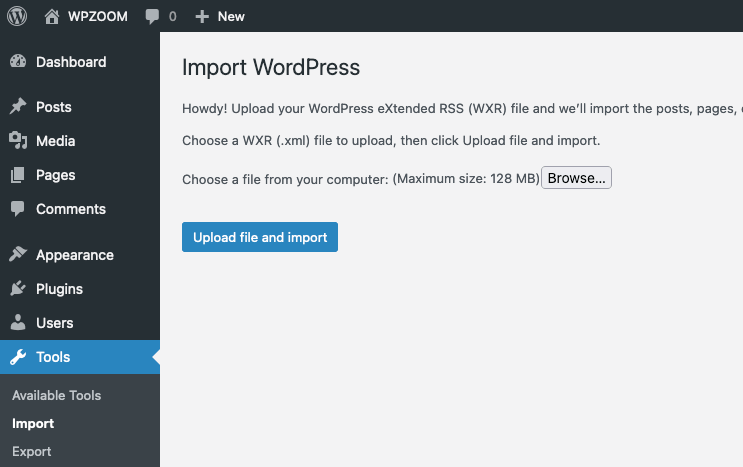
WordPress will download and install the plugin for you. - After installation, click Run Importer. You’ll be redirected to an importer screen where you can upload your content.
- Click Browse… and select the XML file you exported from WordPress.com.
- Click Upload file and import.

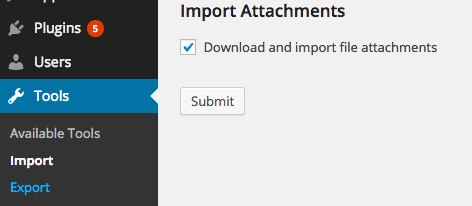
- You’ll be asked to assign the imported content to an existing user on your new site or create a new user. Make your selection based on your preferences.
- Ensure you check the box that says Download and import file attachments. This is crucial for transferring media files associated with your posts and pages.

- Click Submit to start the import process.
WordPress will import your content, including posts, pages, comments, custom fields, categories, and tags.
Once the import is complete, you’ll see a success message. It’s a good idea to browse your site to ensure everything has been transferred correctly.
4. Finalize the WordPress.com to WordPress.org Migration
After importing your content, there are a few more steps to complete moving from WordPress.com to WordPress.org:
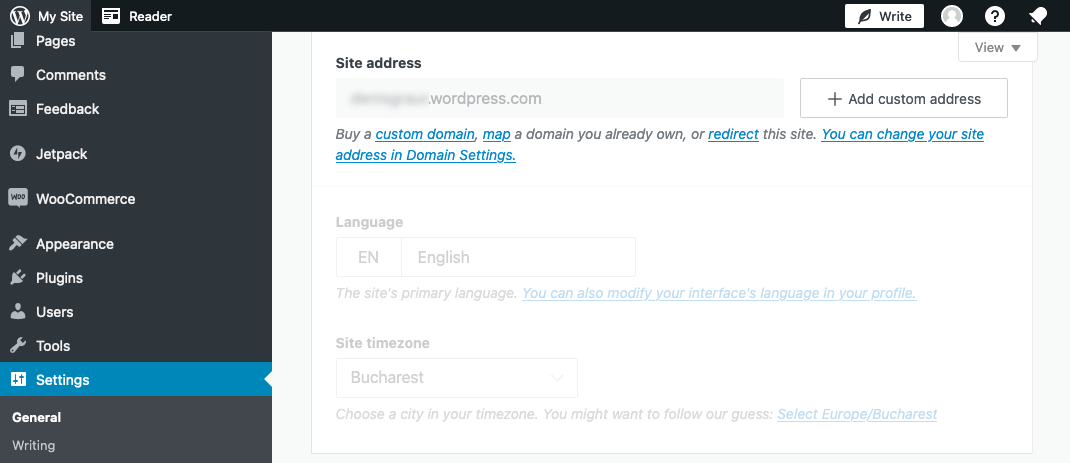
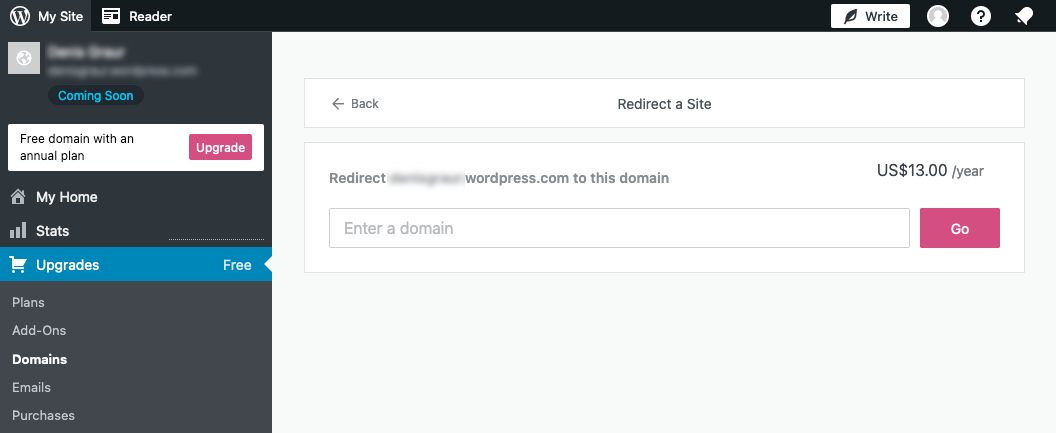
- Set Up Redirects and the Old Site to Private: If you’re keeping the same domain, you’ll want to set up redirects from your old WordPress.com site to your new self-hosted site to retain your traffic and SEO rankings. WordPress.com offers a paid Site Redirect service for this purpose.
To use this feature, navigate to your WordPress.com site’s Dashboard and go to Settings -> General. The Redirect link is located within the Site address section.
Here, you can input your new domain name. This service incurs a fee of $13 annually.
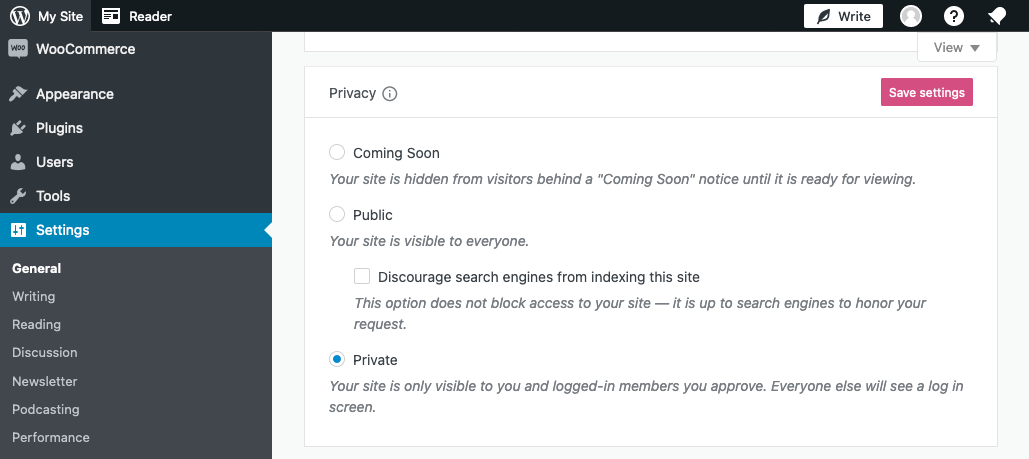
Alternatively, users who prefer not to redirect their website can set the WordPress.com site to private. Go to Settings > General, find the Privacy section, and set the site to Private. Confirm your changes by clicking the Save settings button.
- Update DNS Settings: If you’re using a new domain or need to update your DNS settings to point to your new web host, do so now. This may take up to 48 hours to propagate.
- Check Your Content: Review your posts, pages, and media library to ensure everything has been imported correctly. Check for any broken links, missing content, images, and formatting.
- Update Permalinks: Navigate to Settings > Permalinks and ensure they match the same permalink structure you had before, or update them as needed.
- Configure Widgets: If your theme supports widgets, you might need to re-add and configure them.
Post-Migration Steps
Migrating from WordPress.com to a self-hosted WordPress blog offers greater flexibility and control over your website. After successfully migrating your content, you should undertake several essential configurations and steps to ensure your site is optimized, secure, and ready to grow.
- Optimize Your Site for Search Engines. SEO is crucial for making your website visible to your target audience through search engines.
- Optimize Your Site’s Performance. A fast WordPress site delights your visitors and stands out in search engine rankings, a crucial aspect of digital success.
- Enhance Your Security. Securing your site is paramount to protect against hacks, data breaches, and malware.
Migrating from WordPress.com to WordPress.org opens up a new world of possibilities for your website. While the process requires some technical steps, the freedom, flexibility, and control you gain are worth the effort.
Ready to expand your digital presence further and harness the full power of your website? Congratulations on making the move to WordPress.org. Your digital journey has just taken a significant leap forward.
February 11, 2016 7:33 am
I really like wordpress especially for my online product marketing
January 9, 2017 8:15 am
I always use wordpress.
I just love the wordpress because of its flexibility and opportunities.