Learning how to create a child theme in WordPress can have a huge impact on the way you create, run, and maintain your WordPress website. Using child themes comes with a wide variety of benefits and can be a great way for you to customize your WordPress website in a highly secure and forward-thinking manner.
Since using parent-child themes is considered best practice whenever you need to create special customizations of your theme in WordPress, here’s the most complete guide to creating a child theme.
Table of Contents
- What Is a Parent Theme and Child Theme in WordPress?
- Prerequisites Before Creating a WordPress Child Theme
- How to Create a WordPress Child Theme?
- Troubleshooting Common Issues
What Is a Parent Theme and Child Theme in WordPress?
First off, you will need to understand what parent and child themes are, what the dynamic between them is, and how they can actually help your website-building experience.
Parent and child themes can only exist as concepts as long as they are in a direct relationship with each other. A WordPress theme only becomes a parent theme when a child theme is created, and vice versa.
A parent theme is defined as any main theme in WordPress. It is a complete theme, containing all the template files, assets, and other files that make the theme functional. To a certain extent, it defines how the website looks and works.
Child themes come into play as a clever solution whenever you want to make changes to the parent theme’s files and code. If you decide to make customizations to your parent theme’s files to modify its look or templates, be aware that these changes can be at risk. They can be reverted and lost in case an update is released and installed for the parent theme.
The child theme inherits all the templates, functionalities, features, and overall style from the parent theme. The difference is that the child theme folder only contains files that can be easily modified and that won’t be affected even if you update the parent theme.
That way, you will never lose your customizations, and you will always be able to keep your parent theme up to date with all the newest versions.
Prerequisites Before Creating a WordPress Child Theme
Before we move on to explore how to create a WordPress child theme, we should take a look at the things you need to have and know. While creating a child theme is not necessarily a very complicated process, it does require some knowledge and experience in web development, or at least some understanding of key concepts.
In terms of things to know, you should have some basic understanding of a couple of key concepts, such as:
- CSS (Cascading Style Sheets). It is a coding language that is used to describe the style and look of an HTML or XML file. In the context of WordPress themes, it is the language through which the general look of your website is defined.
- Stylesheets: Also known as the style.css file, are responsible for the visual design and layout of your web pages. This is where you will enter additional code to modify the way your website looks.
- PHP. Is an open-source scripting language used to create dynamic web pages. It represents an integral part of the WordPress core software and is used for WordPress features.
- Templates: These are predefined structures for different WordPress post types and are included in every WordPress theme.
- Functions.php: It is a file in your WordPress theme that influences the way your website functions.
On top of basic knowledge and understanding of WordPress and certain terminology, you will also need to have:
- Access to your WordPress site’s file system. In order to be able to create a child theme, you will need access to the folders and files that make up your WordPress website. These can usually be edited in cPanel, through FTP, or using a file manager plugin.
- Code writing tools. Learning how to create a WordPress child theme is a lot easier when you have the right tools. To be able to easily edit the WordPress files through FTP, you will need a text editor with dedicated functions for code writing. Tools like Notepad++ or Brackets have dedicated features that make writing code a lot easier and more straightforward.
- FTP. An FTP client is a great tool for making these changes in your theme’s folders and files. Tools like FileZilla, WinSCP, or ForkLift are generally seen as the top choices.
One key thing to consider when creating a child theme that we cannot stress enough is creating a backup before you even start doing anything.
Creating backups is generally considered best practice in many aspects of WordPress web development. This is no different when it comes to creating child themes for your site.
Even though the process is generally pretty straightforward and easy to go through, things can still go wrong. That is when the importance of backups becomes obvious: not losing all your hard work is generally a good idea, and creating backups is a small price to pay for your peace of mind.
How to Create a WordPress Child Theme?
It’s time to have a more detailed look into learning how to create a child theme in WordPress the right way.
Creating a Child Theme With Code (Without a Plugin)
The most commonly used way to create a child theme in WordPress is to do it manually. While dedicated plugins do exist, the manual code-writing method comes with a series of important advantages, like the fact that your website’s performance and security will remain the same.
Creating the child theme manually is also going to give you a much better understanding of what happens behind the scenes, how the website is actually organized, and how things work on a deeper level.
Here are the steps involved in creating a child theme manually:
Quick Summary
Step 1. Create the child theme folder
Step 2. Create the style.css file
Step 3. Create the functions.php file
Step 4. Install and activate your child theme
Step 5. Customize the child theme
Remember, even if things may seem somewhat intimidating at first, if you follow our instructions step by step, things are going to work out quicker and easier than you might expect.
Step1: Creating the Child Theme Folder
The first thing you need to do after creating your backup is create a child theme folder.
We highly recommend doing all this in your local system first (your computer). That way, once all the files are created and organized properly in the child theme folder, you will be able to upload them all at once.
Another thing that is important to note is that you will need to use a certain naming convention for this folder. It should have the name of your parent theme, followed by the word -child. For example, if you are making a child theme of inspiro theme, your child theme folder should be named inspiro-child.
Step 2. Creating the Stylesheet File (style.css)
Inside this newly created child theme folder, the next required thing is a stylesheet.
This style.css file can be created using a regular text editor or (preferably) using a dedicated code editor.
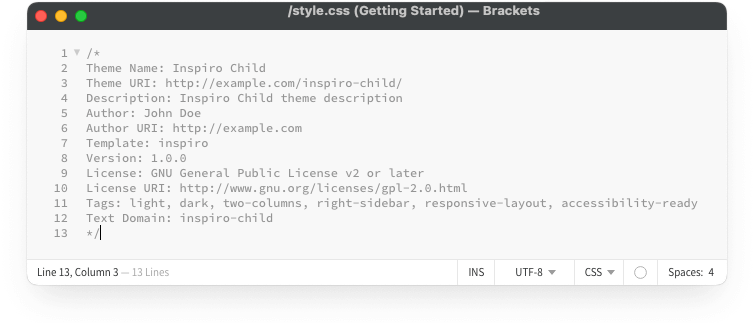
The first thing you will need to have within the style.css file is a properly written header. The comments within the header will need to contain basic information about the parent-child theme dynamic and should generally contain the theme name and the template directory.
Here’s how that would look:
/*
Theme Name: Inspiro Child
Template: inspiro
*/
Important! The name of the template must be named EXACTLY the same as the folder name of your parent theme. If the folder uses lower case (“inspiro”), then you must use lower case. If the folder uses an uppercase letter (“Inspiro”), then you must use that.
You can have a lot more information at the top of your child theme’s stylesheet if you like. However, it is not necessary.
Below is an example of the different types of info you can put in the header area if you like.
/*
Theme Name: Inspiro Child
Theme URI: http://example.com/inspiro-child/
Description: Inspiro Child theme description
Author: John Doe
Author URI: http://example.com
Template: inspiro
Version: 1.0.0
License: GNU General Public License v2 or later
License URI: http://www.gnu.org/licenses/gpl-2.0.html
Tags: light, dark, two-columns, right-sidebar, responsive-layout, accessibility-ready
Text Domain: inspiro-child
*/
Step 3. Creating the Functions File (functions.php)
The next thing to do after your new stylesheet is created and added to the folder is to create a new functions.php file. This is an absolutely essential file in your child theme simply because it is used by WordPress as a guide when loading your website’s resources.
More precisely, WordPress loads the functions file in your child theme first. This means that whatever instructions you give in your child theme’s functions.php file are going to be the ones WordPress will execute first.
This is where you will enqueue the style and templates of your parent theme. You can add PHP code to this PHP file to instruct WordPress to use the style.css file and templates from the parent theme, and this is how these will be “duplicated” or “inherited” by the child theme.
This step can be a bit tricky because the code you need to use depends on how your parent theme is made. Usually it will look like this:
<?php
add_action( 'wp_enqueue_scripts', 'inspiro_enqueue_styles' );
function inspiro_enqueue_styles() {
    wp_enqueue_style( 'child-style',
    get_stylesheet_uri(),
    array( 'parenthandle' )
    );
}
Check the WordPress Codex for help. It has a lot of useful information that can help you figure out the code for your theme and get your child theme set up correctly.
Step 4. Install and Activate your Child Theme
Once these two files are created (style.css and functions.php) in your child theme folder, it is time to think about uploading, installing, and activating your child theme.
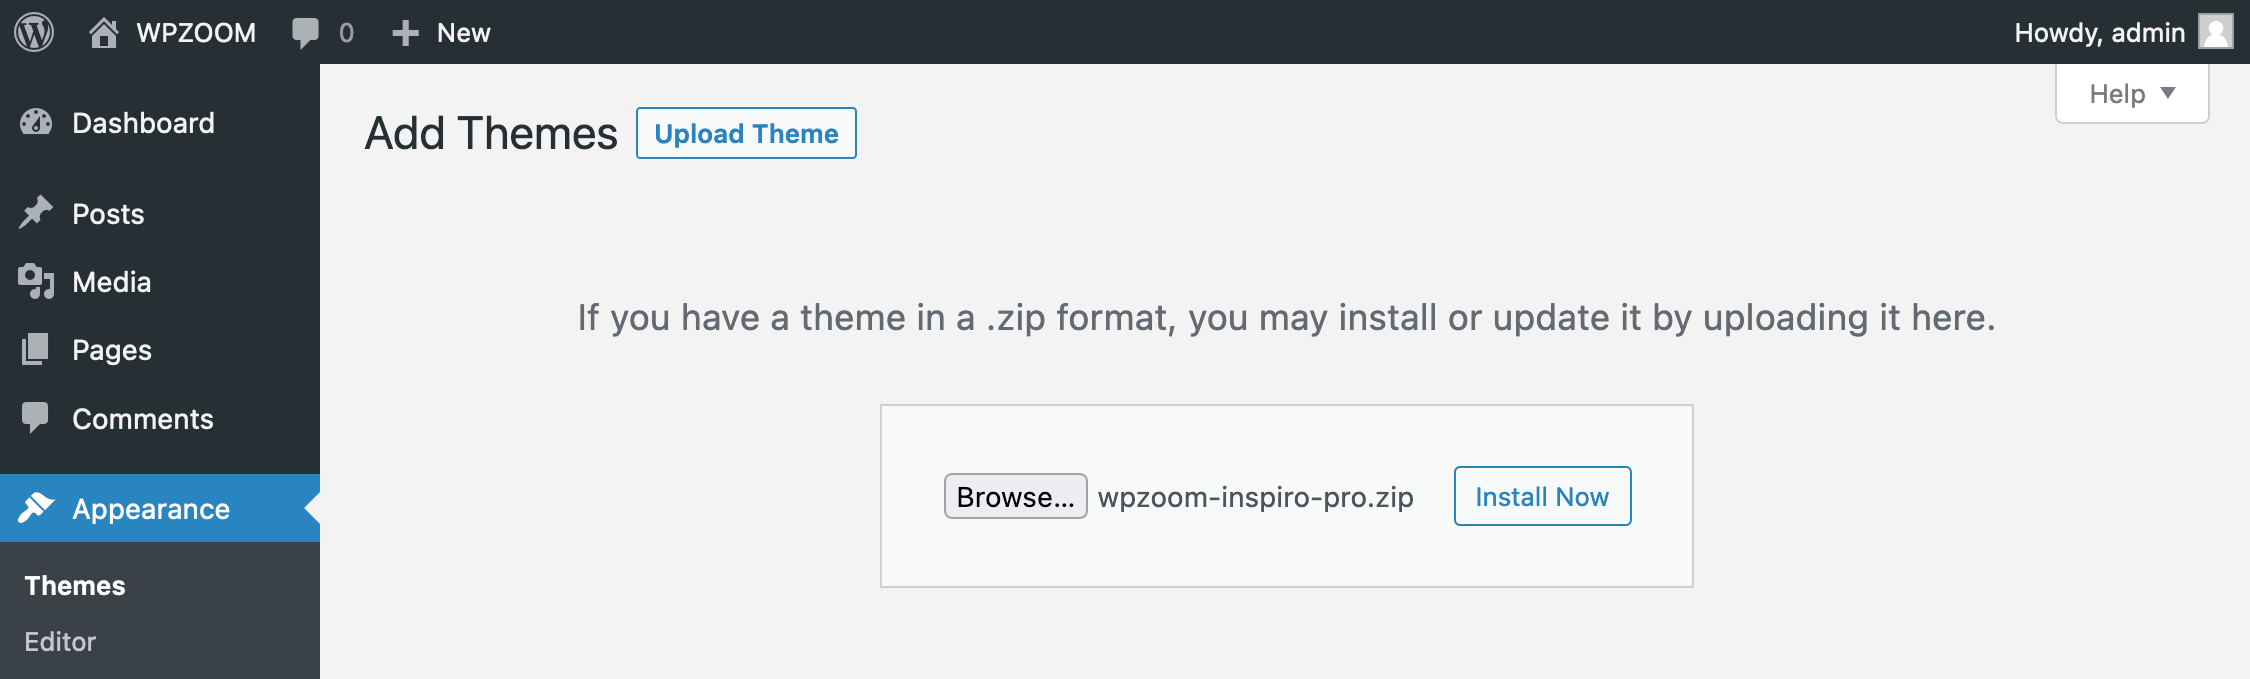
First, you will need to create a ZIP archive of the child theme’s folder in order to be able to upload it in a way that WordPress can accept. You can now upload the files through the WordPress dashboard.
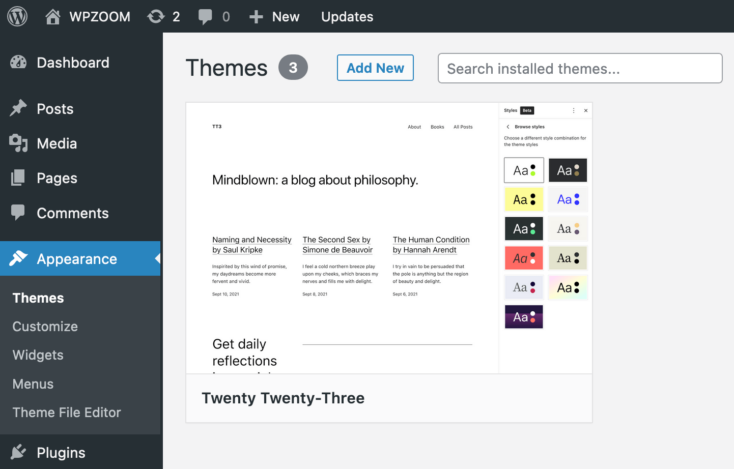
1. Go to Appearance -> Themes and click the Add New button.
3. Click the Upload Theme button.
Click on Browse and upload the ZIP archive.
Click on Install Now and activate the theme.
Your child theme is now live.
Step 5. Customize your Child Theme
Since the whole purpose of using a child theme is to be able to modify the parent theme without having to worry about losing these customizations during theme updates, it’s safe to assume that once your child theme is created, you are going to want to make some changes.
There are three main ways in which you are probably going to want to make changes to your WordPress child theme: theme templates, functions, and custom CSS.
- Editing Templates. To edit a template from the parent theme, all you need to do is make a copy for this file in your child theme’s file and edit it there. Once customized and saved in your child theme’s folder, WordPress is going to override the template in the parent folder and use the one from the child theme.
- Editing Functions. To override a specific function from the parent theme, you need to recreate that function with your desired changes in your child theme’s functions.php file. The function must have the same name as the function in the parent theme, and WordPress will use the child theme’s version.
- Adding Custom CSS. Custom CSS in the child theme’s CSS file (style.css) is meant to improve or completely override the styling of your parent theme. Every element you edit and update in the child theme will override the styling in the parent theme.
Creating a Child Theme Using a Plugin
The easier way to go when it comes to creating a child theme is to use a dedicated plugin. Of course, this can come with a variety of advantages, but also with some drawbacks.
On one hand, plugins take out of the equation any need for technical knowledge from your side. If you are not a developer and you don’t have experience working with child themes, the manual method may seem overwhelming. In such cases, you can simply use a plugin to get the whole thing sorted with minimum effort.
On the other hand, using plugins can be taxing for your website, both in terms of performance and security. How you choose to create your WordPress child theme is up to you and how you value your time and your skills.
Here are some of the best WordPress plugins we found:
- Child Theme Configurator: with more than 300,000 active installs and a 4.7-star rating, this is one of the most commonly used plugins for creating child themes.
- Child Theme Wizard: another top choice, despite the low number of active installs (20,000+), the 4.9-star rating should tell you something about the quality of this plugin.
- WP Child Theme Generator: 5 out of 5 stars, with more than 10,000 active installs. This is another WordPress child theme generator plugin you should definitely look at.
If you are using a theme from WPZOOM, creating a child theme becomes even more straightforward. All WPZOOM themes come with a built-in 1-Click Child Theme installer, simplifying the process significantly. To make the most of this functionality, be sure to follow our step-by-step tutorial on how to create a child theme for WPZOOM themes.
Troubleshooting Common Issues
While the process of creating and configuring the WordPress child theme is pretty straightforward and usually runs smoothly, there are still some issues that can arise.
Issue 1: Stylesheet Not Loading
The problem can lie in the way your enqueue function is configured. You should check and make sure that WordPress is correctly instructed on how the child should inherit the styling from the parent and how to load the modifications you made.
Issue 2: Function Conflicts
Most often, function conflicts can occur between parent and child themes after updating the parent theme. If the custom code in your child theme comes into conflict with the new version of the parent theme, here are some things you can do:
- Switch to the parent theme and see if the error goes away
- If the problem disappears, you should check the code of your child theme
- If the error doesn’t go away, you should disable plugins one by one and see if that helps.
Useful Tips
While these are some of the most common things that can go wrong, WordPress child themes can surprise us from time to time. Here are some more useful tips and tricks for troubleshooting various scenarios in which your child theme does unexpected things.
- Make sure that your child theme is active and that your parent theme is not the one displaying on the live version of the website.
- Clear cache and use hard refresh options in your browser to make sure you load the correct and latest version of the website.
- Check the functions.php file and make sure that the child theme is correctly positioned in the parent-child relationship.
- Ensure that your parent theme is correctly referenced and that WordPress doesn’t see your child theme as a main theme.
- Use the !important rule (but don’t overdo it) in CSS to make sure that WordPress displays these CSS characteristics in the child theme instead of the same elements in the parent theme.
- Always double-check to make sure files are named correctly.
- Never make any changes without backing up.
Bottom Line
Using child themes in WordPress is certainly a great way to manage your website. Now that you know how to create a child theme in WordPress and how to always make sure things are running smoothly, there’s no reason not to use them.