WooCommerce has emerged as the most popular ecommerce platform, but what exactly is it? WooCommerce’s popularity stems from its seamless integration with WordPress, the world’s most popular content management system. This combination makes it an ideal choice for those already familiar with WordPress, but it’s also intuitive enough for newcomers to the digital storefront arena.
This article aims to demystify WooCommerce. We’ll answer the question “What is WooCommerce?“, we’ll explore the core features of WooCommerce, why it might be the right choice for your online business venture, and how to set up a WooCommerce store.
Table of Contents
- What Is WooCommerce?
- Why Should I Use WooCommerce?
- How to Use WooCommerce? Setting Up a WooCommerce Store
What Is WooCommerce?
WooCommerce is an open-source free plugin used to turn your WordPress site into a fully-functional ecommerce platform, allowing you to sell anything from digital downloads to physical goods with ease.
With its user-friendly interface and customizable nature, WooCommerce simplifies setting up and managing an ecommerce website, making it accessible to everyone, regardless of their technical expertise.
It is made by Automattic, the corporate arm of WordPress, so when you use it, you’re in good hands.
WooCommerce vs WordPress: What Is the Difference?
While WooCommerce and WordPress are often mentioned together, they serve distinct purposes. WordPress is a versatile content management system that allows you to create and manage websites. It’s the foundation on which many types of websites are built, including blogs, portfolios, and business sites.
WooCommerce, on the other hand, is an ecommerce plugin for WordPress. It adds e-commerce functionality to a WordPress website, enabling it to operate as an online store. In essence, while WordPress serves as the base, the WooCommerce plugin is the tool that transforms that base into a sales powerhouse.
Why Should I Use WooCommerce?
Let’s explore the various reasons why WooCommerce is a favored choice for online retailers. From its cost-effective nature to its robust feature set and strong community support, we’ll uncover the facets that make the WooCommerce plugin an attractive option for businesses seeking to establish or enhance their online presence.
1. WooCommerce Pricing: Is WooCommerce Free?
One of the most appealing aspects of WooCommerce is its pricing structure, often leading many to ask, “How much does WooCommerce cost?” WooCommerce is free to download and use. This means you can set up a basic online store without any initial investment, a significant advantage for small businesses and startups.
However, while the core plugin is free, additional costs may arise for advanced features, specialized themes, and integrations with other tools and services.
2. WooCommerce Features: Powerful eCommerce Features Out of the Box
WooCommerce comes equipped with a suite of powerful features to manage an online store efficiently. These features include product management, order, and shipping handling, customer account area, tax settings, and comprehensive payment system integrations. Its adaptability allows for the sale of both physical and digital products, and it can even handle affiliate marketing.

Here are just a small selection of these:
- Product Management: Users can easily add, remove, and categorize products. It supports various product types including physical goods, digital downloads, and even affiliate items. Detailed product descriptions, images, and attributes can be customized, providing customers with all the information they need to make informed purchases.
- Order and Shipping Handling: WooCommerce streamlines the order management process from when a customer places an order to the final delivery. Features include automated order tracking, customer email notifications, and customizable shipping options.
- Customer Account Area: WooCommerce provides a user-friendly customer account area, where customers can view their order history, track current orders, and manage shipping and billing addresses.
- Tax Settings: WooCommerce offers options for setting standard and reduced rates, and can automatically calculate taxes based on customers’ locations. This feature is crucial for businesses selling globally, as it adapts to different tax regulations seamlessly.
- Comprehensive Payment System Integrations: WooCommerce supports a wide array of payment gateways, including popular options like PayPal, Stripe, and credit cards. This versatility ensures that businesses can offer their customers various payment options, catering to different preferences and enhancing the checkout experience.
- Inventory Management: WooCommerce provides detailed inventory tracking, alerting you when stock levels are low or products are out of stock. This feature helps in maintaining adequate inventory levels and planning restocks efficiently.
- Customizable Checkout Process: Businesses can tailor the checkout experience, from modifying fields to offering different checkout options like guest checkout or one-click purchases. This customization can significantly enhance customer satisfaction and reduce cart abandonment rates.
- SEO and Marketing Tools: WooCommerce is built with SEO in mind, helping your store rank higher in search engine results. Additionally, it integrates with a variety of marketing tools and WordPress plugins, enabling strategies like email marketing, social media integration, and targeted promotions to attract and retain customers.
Don’t see all the features you need? That’s not a problem – WooCommerce comes feature-packed, but there are a whole host of ways to extend its features much, much further…
3. Easy Install and Set Up
To install WooCommerce, simply follow the same process as you would for adding any other plugin to your WordPress website. It’s available to download for free from the WordPress plugin directory, which is accessible right from your WordPress website admin.

Once installed, the WooCommerce plugin is also incredibly easy to set up. Thanks to the inbuilt Setup Wizard, it only takes minutes to get crucial aspects of your store sorted, including payment and shipping.
4. WooCommerce Is Highly Extensible
WooCommerce’s flexibility lies in its extensibility. With thousands of plugins and themes available, businesses can tailor their ecommerce stores to meet their specific needs. Whether it’s adding payment gateways, integrating marketing tools, or customizing the checkout experience, WooCommerce’s extensibility makes it a versatile choice for online retailers.
5. Well-documented and Vibrant Developer Community
A strong point of WooCommerce is its well-documented nature and the vibrant community surrounding it. From detailed guides, and forums, to developer resources, users have access to extensive support. This community-driven approach ensures continuous improvement and troubleshooting assistance.
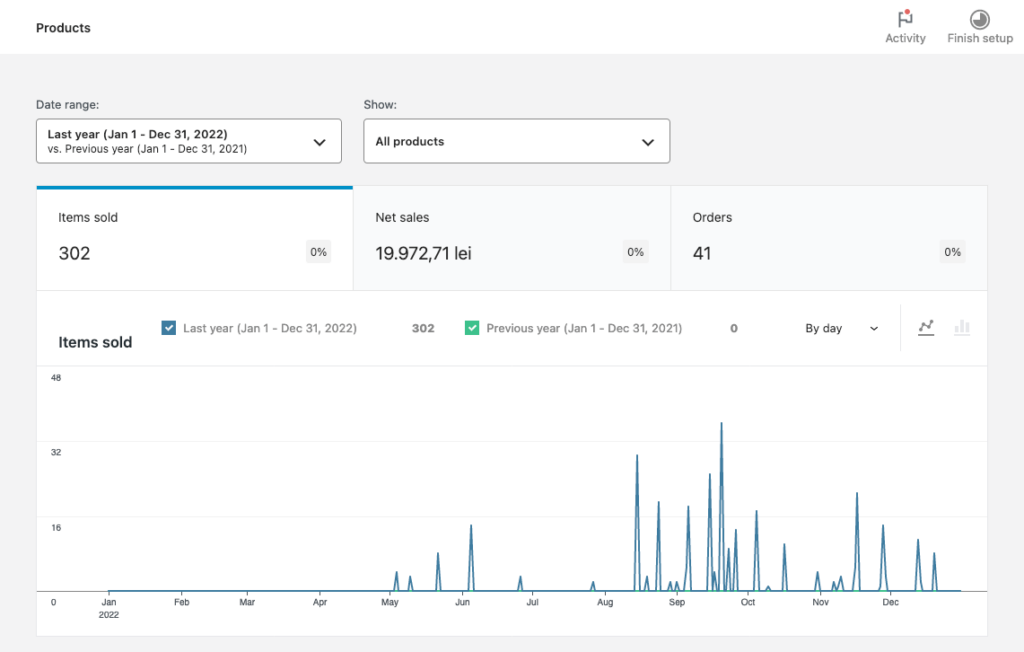
6. Powerful Analytics
WooCommerce provides built-in analytics tools that are crucial for understanding customer behavior and sales patterns. These tools offer clear insights into sales performance, average order values, and customer demographics, aiding in informed business decision-making.
7. Fast and Secure
Speed and security are paramount for any online business. WooCommerce, built on WordPress, benefits from regular updates and a focus on security. Paired with a reliable hosting provider, WooCommerce online stores offer fast loading times and robust security measures, ensuring a safe and pleasant shopping experience for customers.
How to Use WooCommerce? Setting Up a WooCommerce Store
Setting up a WooCommerce store is a straightforward process, designed to be accessible even to those with minimal technical expertise. This section provides a step-by-step guide to help you establish your online store using WooCommerce.
1. Get Hosting and a Domain Name
The first step in setting up a WooCommerce store is to choose a hosting provider and secure a domain name. Your hosting provider will store your website data and ensure your WordPress site is accessible to visitors. The domain name will be your unique address on the internet.
Select a hosting provider that offers good performance and support for WordPress and WooCommerce, and choose a domain name that reflects your brand and is easy to remember. For convenience, you can buy hosting and a domain name from the same hosting company, and then automatically install WordPress for free in minutes.
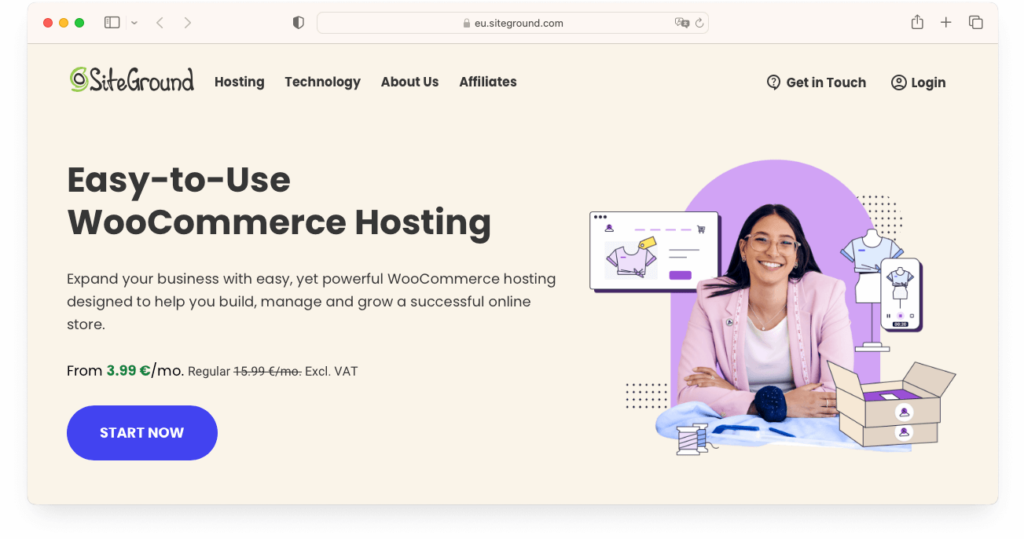
There are lots of hosting companies out there, but we recommend SiteGround for quality, affordable WordPress hosting. As WordPress hosting specialists, they take care of the technical side, letting you get your ecommerce site online quickly.
2. Install WordPress
Since WooCommerce is a WordPress plugin, the next step is to install WordPress on your hosting account. Most hosting providers offer easy, one-click WordPress installation, making this step simple and quick. Once WordPress is installed, you can access the WordPress dashboard to start customizing your site.
3. Install WooCommerce Plugin
With WordPress set up, you can now install WooCommerce. This is done within the WordPress dashboard under the Plugins > Add New section. Search for WooCommerce, click Install Now to install it, and Activate to activate it.
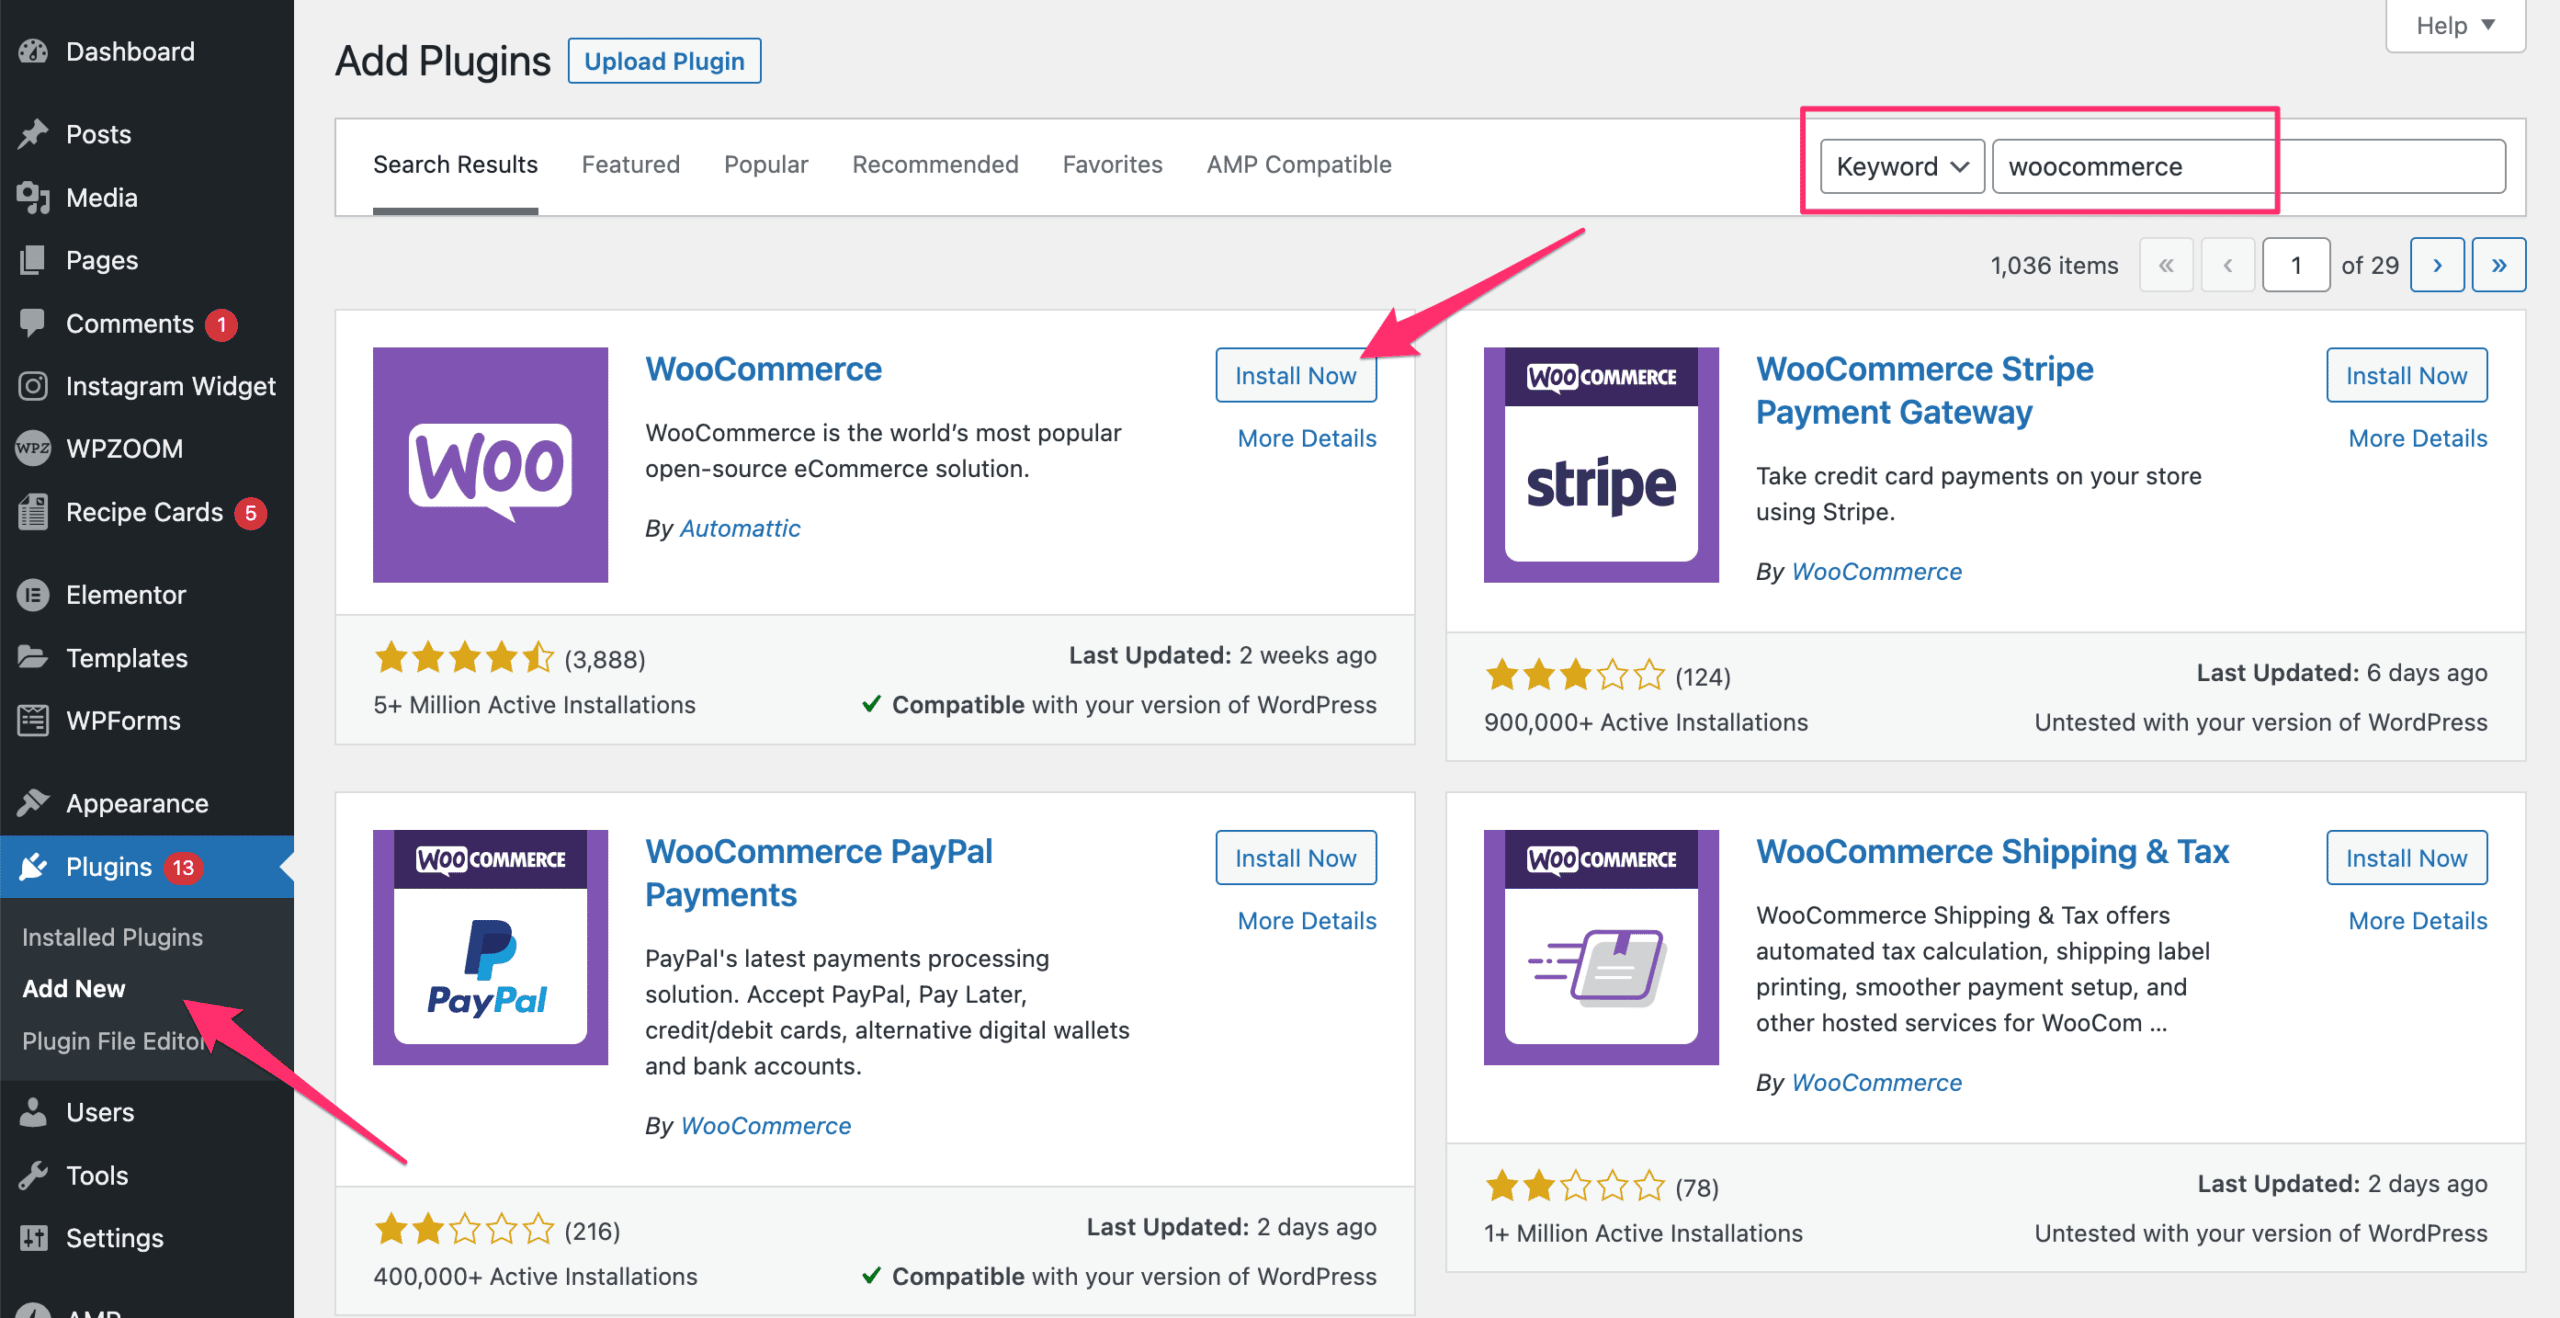
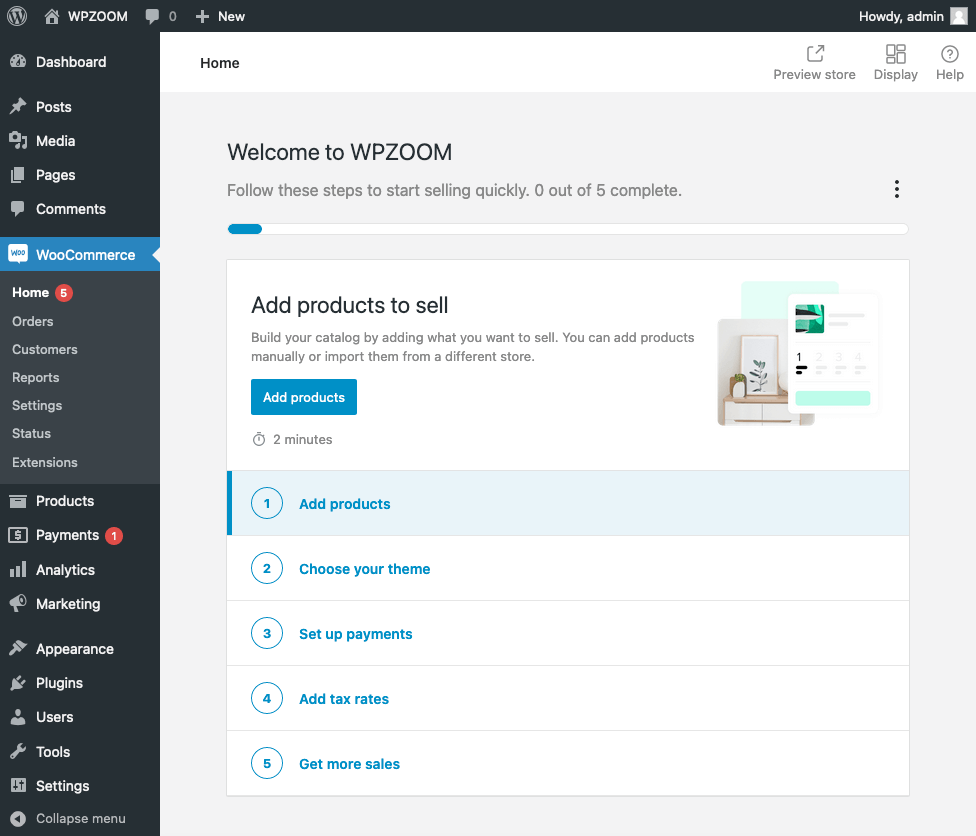
Upon activation, WooCommerce will launch a setup wizard to guide you through the basic configurations of your online store.
4. Set Up the WooCommerce Shop
The setup wizard will help you configure essential elements of your store, such as currency, payment methods, shipping options, and tax settings. Take the time to thoroughly go through these settings, as they are crucial for the smooth operation of your store.
5. Adding Products
Once your store is configured, you can start adding products. WooCommerce allows you to add detailed product descriptions, images, prices, and more. You can organize your products into categories and tags to make them easier to find for your customers.
Go to Products > Add New and you’ll be taken to the product page. It’s similar to adding posts or pages, but specifically for WooCommerce products.
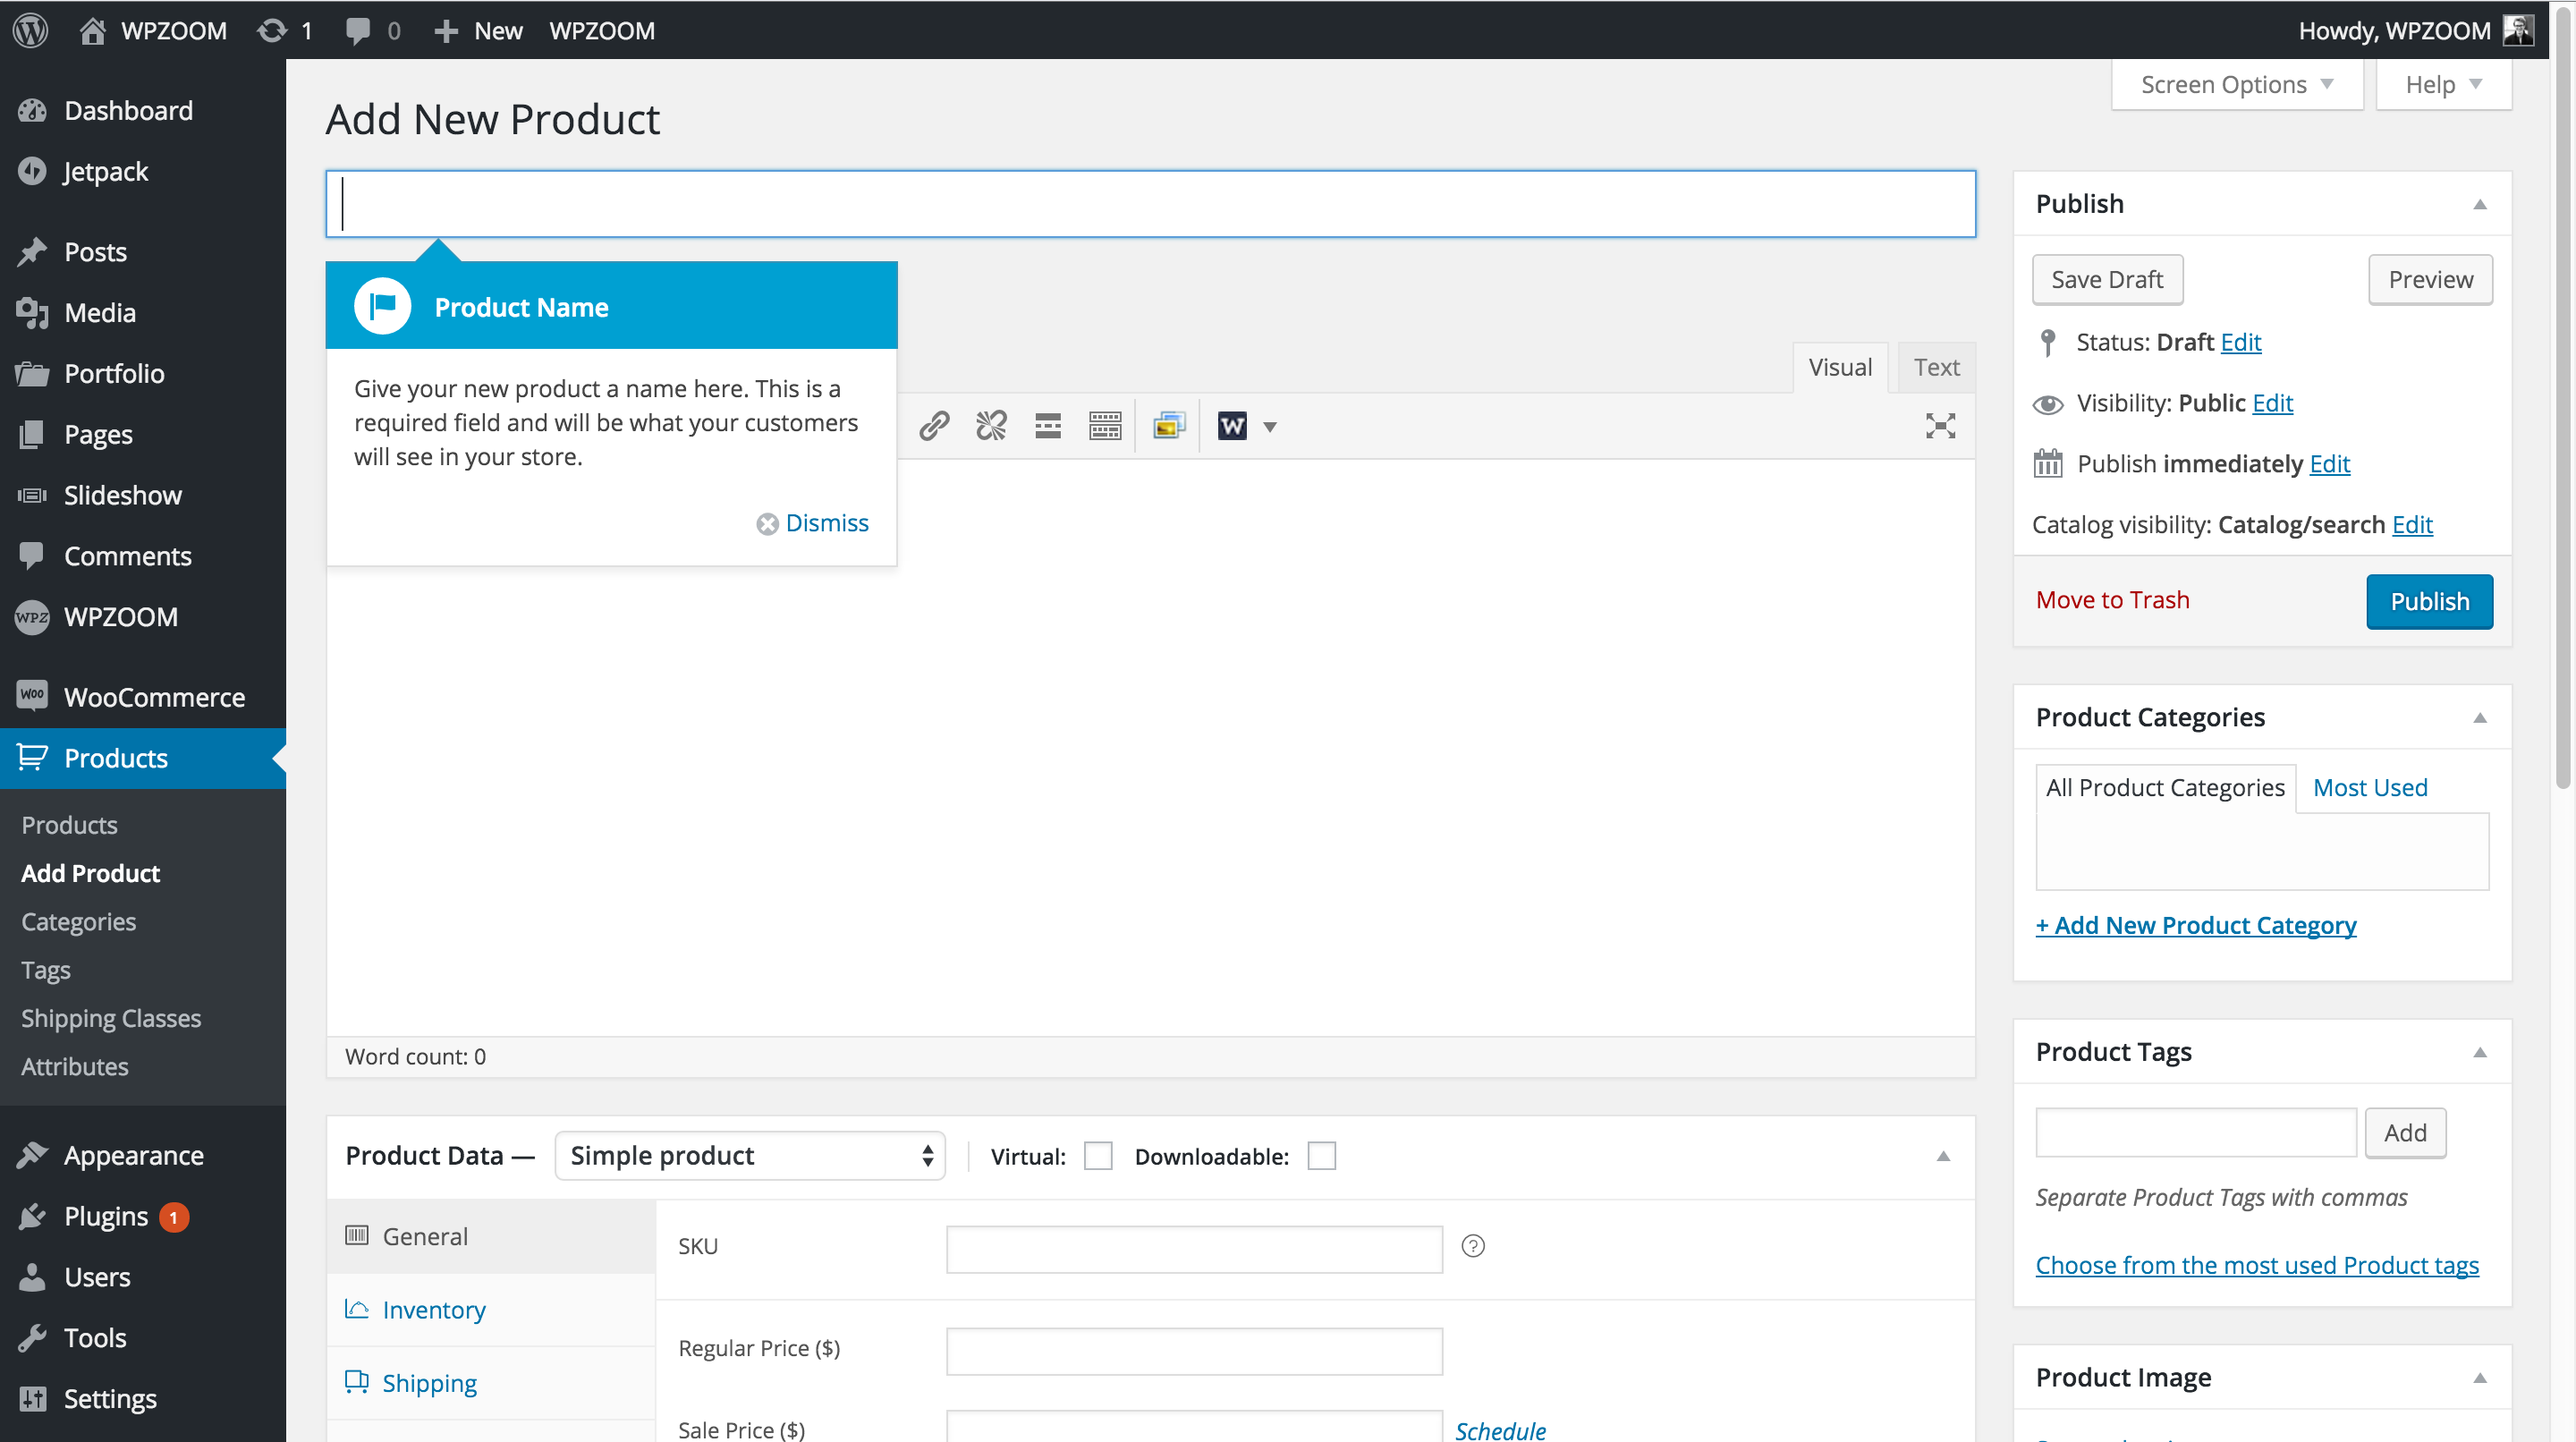
You’ll want to add in all of the information there’s space for, including product name and description, product data, and some nice accompanying images. If it’s your first time adding a product, WooCommerce will provide some helpful prompts telling you a little about each section.
Once you’ve added in all your information, hit publish and you have your first product available on your site.
6. Payment Gateways
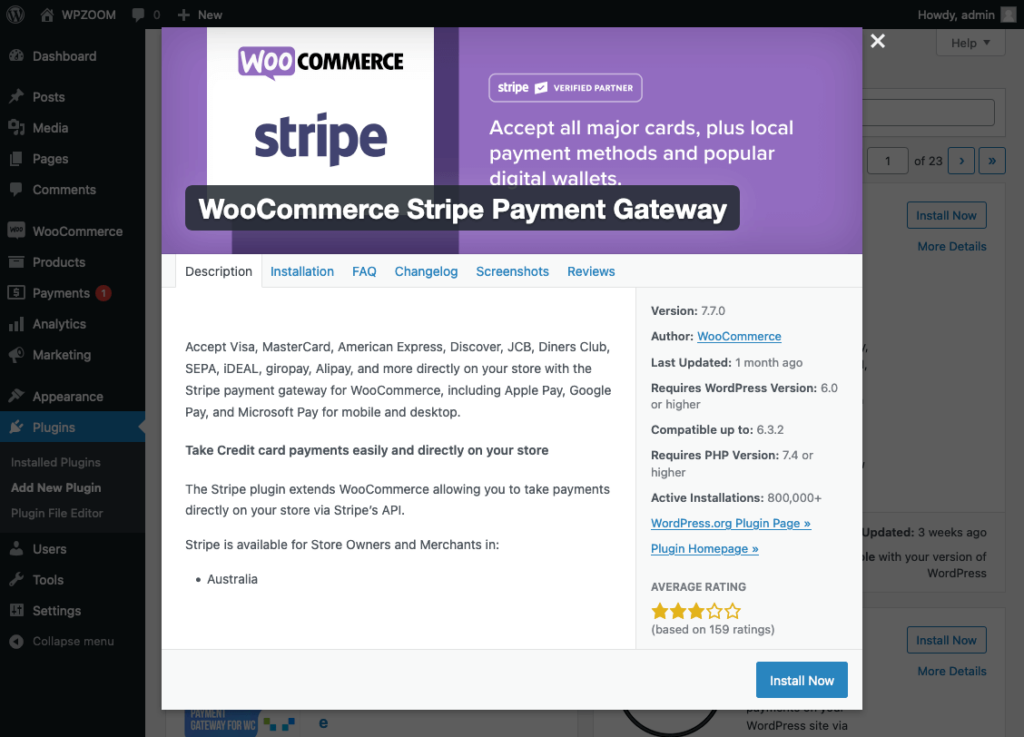
Setting up payment gateways is essential for processing transactions. WooCommerce supports various payment options, including PayPal, credit cards, and bank transfers.
Stripe is a popular way to take online credit card payments. You can install the Stripe plugin either via the WooCommerce Setup Wizard or by heading to Plugins > Add New.
You’ll find your payment gateway options under WooCommerce > Settings > Payments. Choose either PayPal or Stripe and use the check box to enable your gateway of choice. Then follow the instructions to sign up for relevant accounts and connect them to WooCommerce.
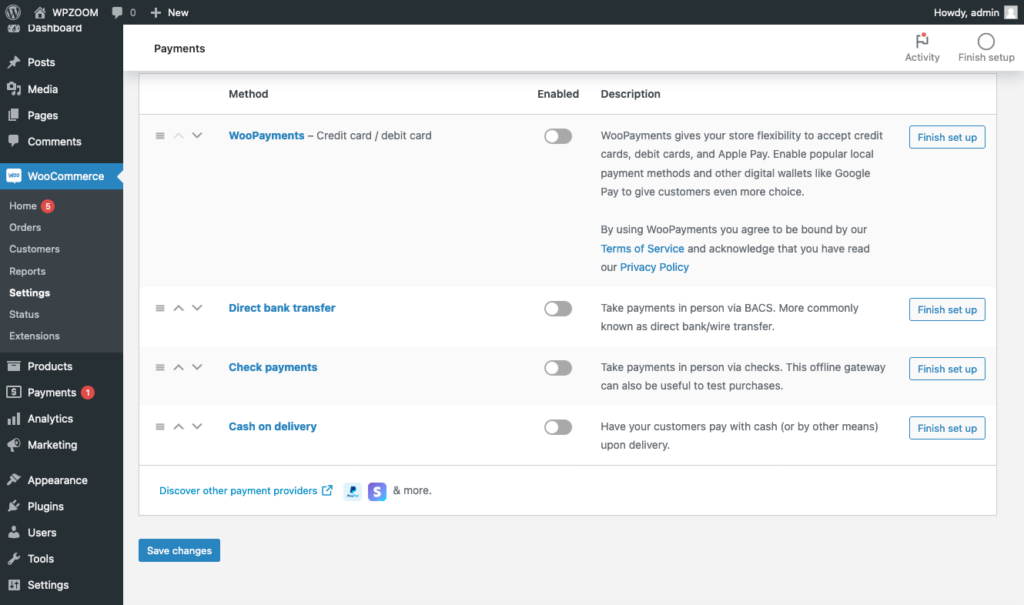
Both PayPal and Stripe will let you take credit card details securely. WooCommerce itself doesn’t charge any fees but all payment processors taking cards will have a fee. There is, however, no start-up cost for using either.
I’d recommend doing some research to find the best option for you. Choose the payment gateways that best suit your business model and customer preferences.
7. Get and Install a WooCommerce Compatible WordPress Theme
The appearance of your store is crucial for attracting and retaining customers. Select a WooCommerce-compatible WordPress theme that aligns with your brand and offers a seamless shopping experience. There are many free and premium themes available that are specifically designed for WooCommerce.
Fortunately, WPZOOM has you covered with our selection of WordPress themes, which are 100% compatible with WooCommerce.
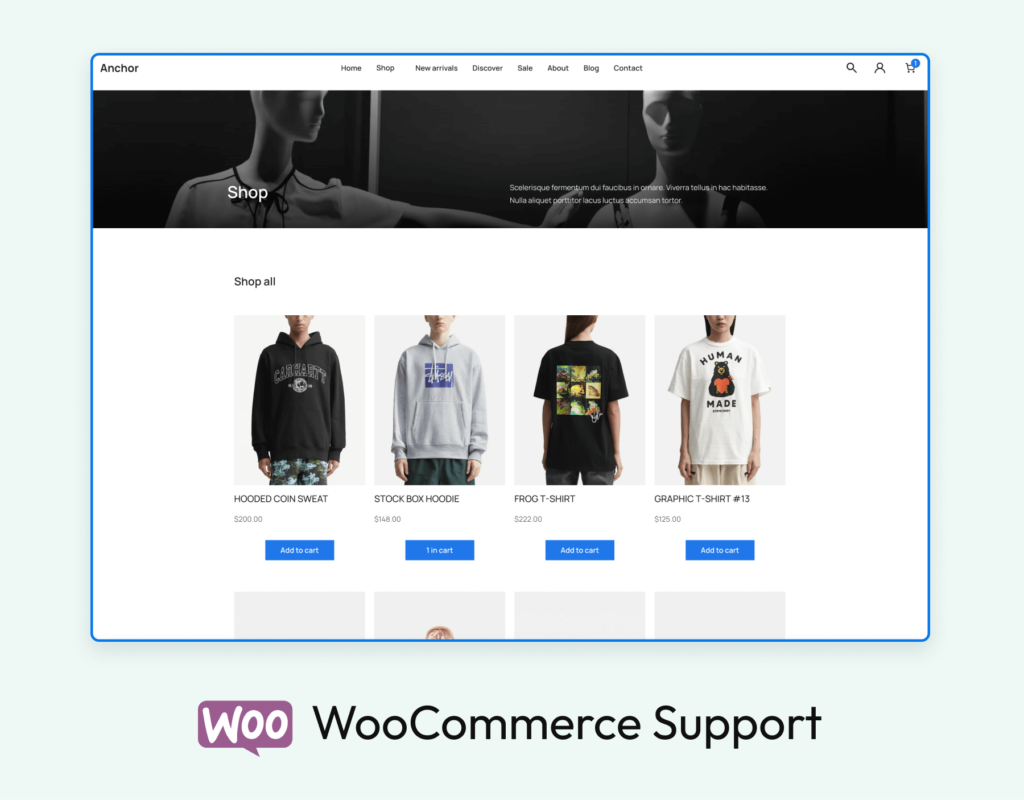
We have a full library of WordPress WooCommerce themes suited to every ecommerce store type! You can:
- Start a new online brand with Anchor or Balance.
- Sell from your fashion blog with Velure.
- Sell from your travel blog with Indigo.
- Sell from your portfolio with Inspiro or Reel.
- Or offer business services with UniBlock Pro.
Installing our WPZOOM WooCommerce themes is very simple, so I’ll quickly run through that now. You’ll need to:
1. Buy, download, and save the chosen WooCommerce-ready theme to your computer.
2. In your site’s admin sidebar, go to Appearance > Themes, click Add New and Upload Theme.
3. Click Choose file. Select the downloaded theme file from your computer, click Open and Install now. This will install the theme onto your new WordPress website.
4. Click Activate. From here you can take the theme tour to learn more about the theme, including extra ways to customize it.
If you need more detailed instructions, you can follow our step-by-step tutorial on how to install a WordPress theme.
8. Add More Features with WooCommerce WordPress Extensions
WooCommerce is hugely powerful straight out of the box, but sometimes you’ll have complex requirements for your WordPress site, that the plugin can’t handle. In that case, you’ll want to choose from one of the huge selection of free and paid extensions.
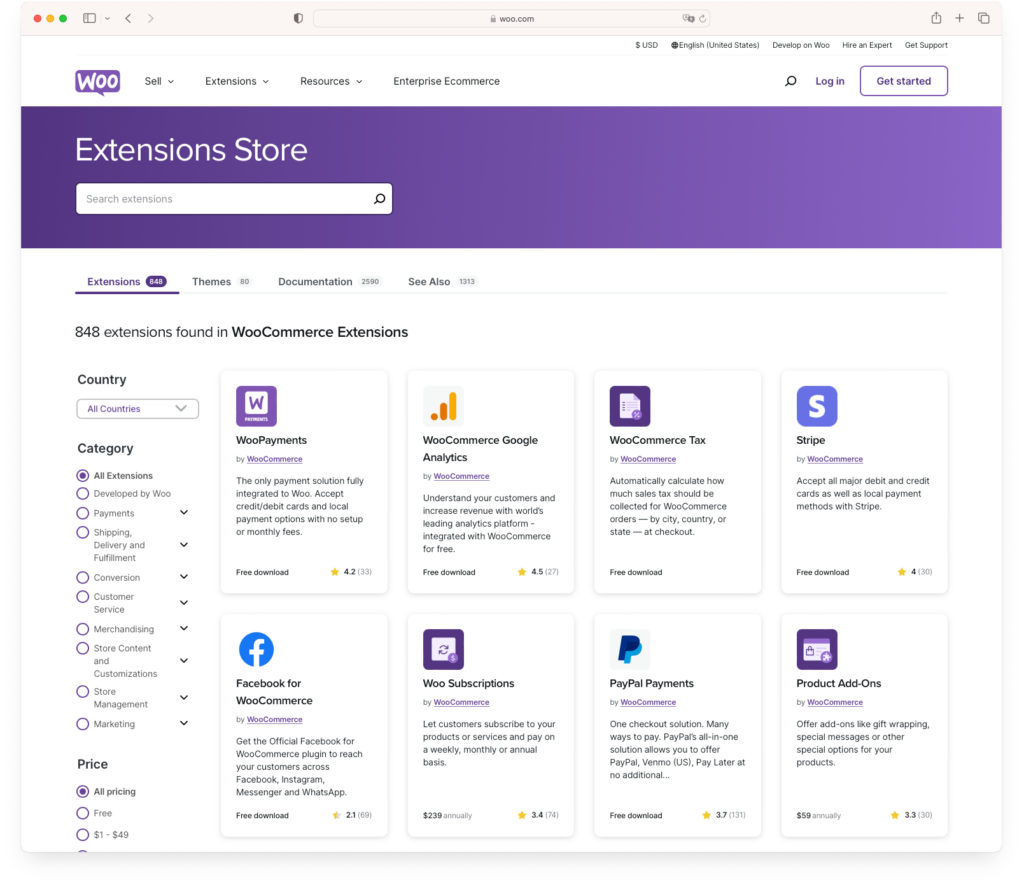
There’s a lot to choose from: from additional payment providers to complex shipping arrangements, accounting, inventory, and marketing – it’s all there.
To get started with WooCommerce, you don’t need many extensions. But they are a great, easy way to add extra functionality later on.
Start Selling with WooCommerce Today!
You’ve now seen exactly how easy and affordable it is to start selling online with WooCommerce, and you can now answer What is WooCommerce?
Just to recap, all you need to get started are:
- Hosting and a domain name (we recommend SiteGround)
- A WordPress-powered website
- The WooCommerce plugin
- A WooCommerce-compatible WordPress theme
Following our guide, you can get a professional fully functioning ecommerce store online today! And, thanks to the extensibility of the WooCommerce ecommerce plugin, your store has limitless potential to scale in the future.


May 13, 2016 11:55 pm
Thank you for the excellent post.
I have one question, when you talk about Payment gateways fees, this are PAYPAL or do Woocommerce charge anything? I am planing a micropayment website, the amounts are the same?
Sorry for the beginner’s questions
May 14, 2016 6:58 am
Oscar,
WooCommerce doesn’t charge a fee for every transaction. Only PayPal or other payment processor does.
June 10, 2016 10:43 pm
Thank you for the excellent post.
September 5, 2016 12:34 pm
When I’m getting constant updates WooCommerce errors. Does this trouble you get when you use the application we have already mentioned? If you help the system will be lifted up again.
November 22, 2016 4:49 am
May I use Elavon Converge Payment Gateway as payment gateways for WooCommerce?
November 28, 2016 11:06 am
There’s an addon for Elavon Converge available, so yes you can.
February 18, 2017 6:10 pm
Thanks for the post and elavon convergence plugin is definitely one of our favourite addon.
March 10, 2017 3:02 pm
Very useful and you saved me tons of time!
I created my first woocommerce shop today:-) I Used your plugin to integrate with stripe and now everything is running as it should! Thanks:-)
April 25, 2018 7:29 am
Thanks for this gonna start shop category on my site soon.
June 11, 2018 11:34 am
Thanks for this great information as I am currently trying to build my store on Abante Cart but I see WooCommerce looks promising, Do you recommend WooCOmmerce over Abante Cart which one is the best?
June 17, 2018 11:26 am
WooCommerce is a very popular eCommerce plugin because if you’re familiar with WordPress, then installing and setting up WooCommerce should be very easy for you.
September 20, 2018 5:12 am
Good description of WooCommerce for begginers and not for developers ;)
April 19, 2020 8:38 pm
Hi
I am totally illiterate about Woocommerce. I found this content while searching for a solution for my business. And I must say that this a grate piece for illiterates like me. The problem is, I provide graphics design service and now I want to expand my business through online. Can I add service price on my website using Woocommerce. This service $$, This service $$ like this way?
Thanks