FLASH SALE Get 20% OFF everything using the coupon code: FLASH20 View Pricing Plans →
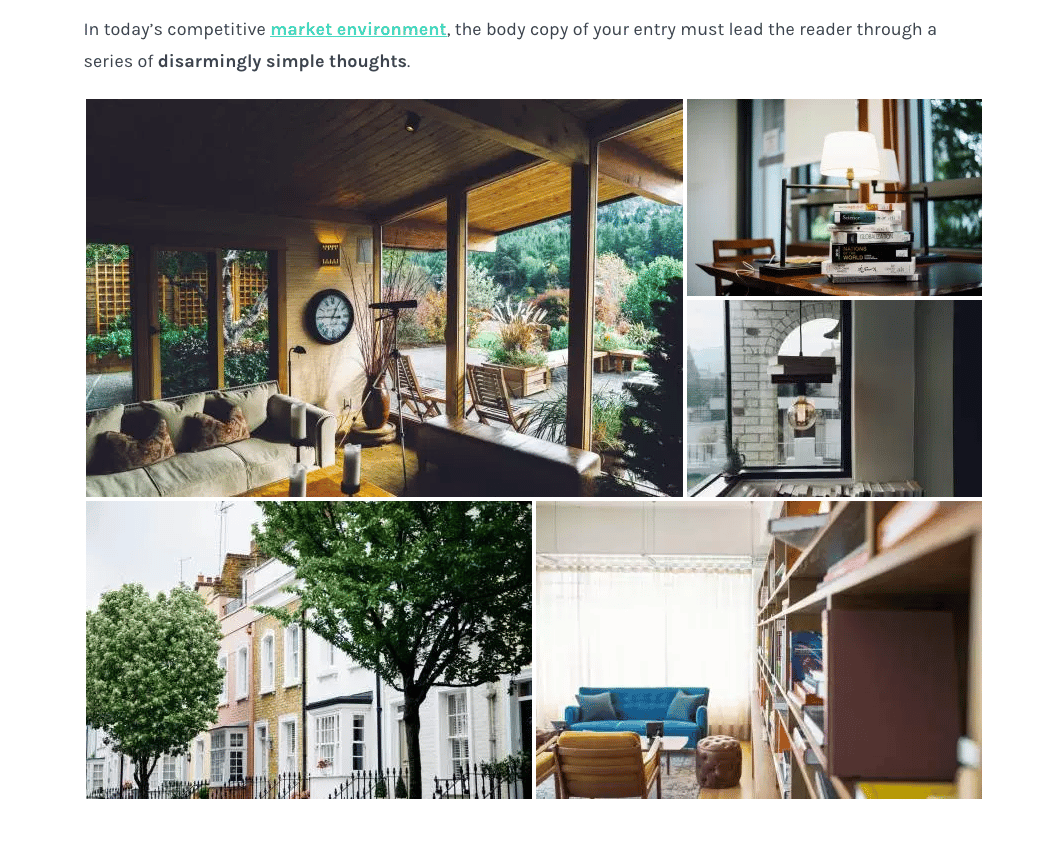
With Jetpack Tiled Galleries you can display your image galleries in beautiful mosaic layouts.
First, install the Jetpack plugin on your website in case you haven’t already did that.

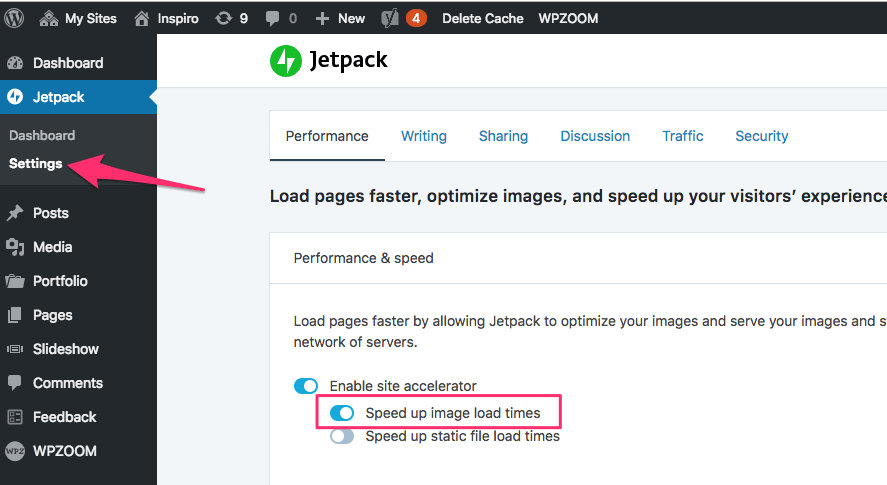
You can enable Tiled Galleries in Jetpack Settings > Writing tab, by turning on the feature called Speed up images and photos:

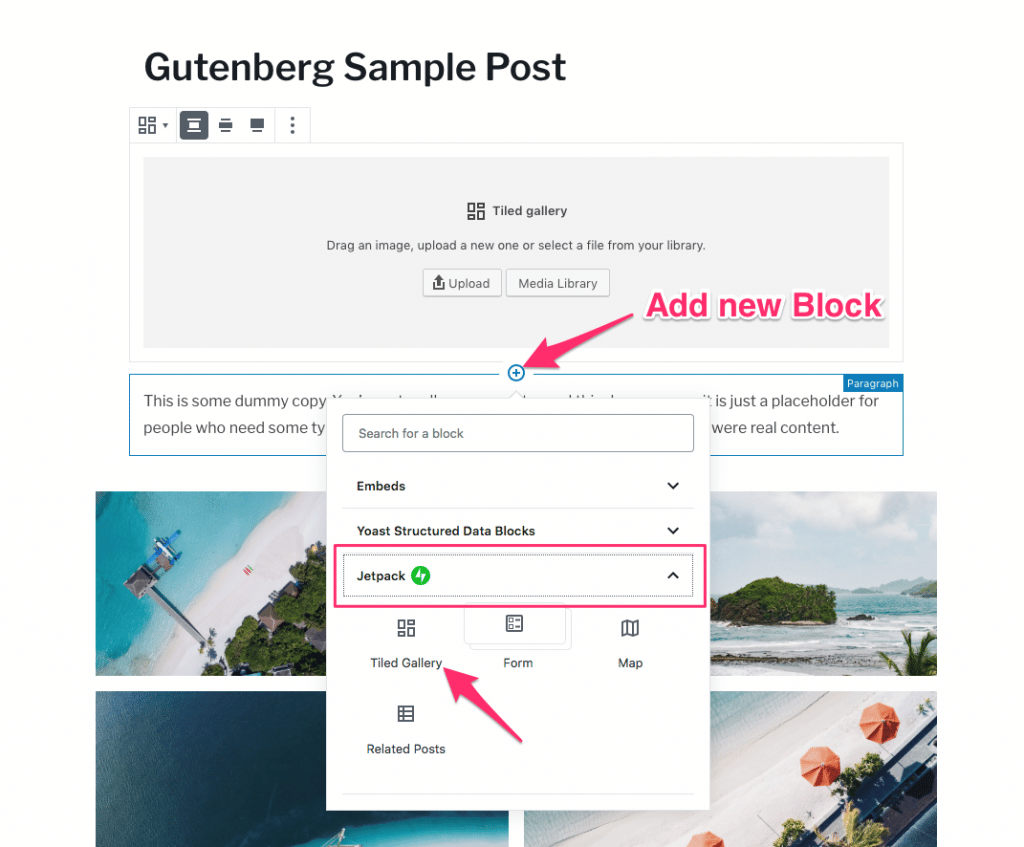
If you’re using the new Block Editor, just select the “Tiled Gallery” block from the “Jetpack” section, and upload your images or select from the library.

If you don’t see the Tiled Gallery block under Jetpack, it means that you didn’t either connected the Jetpack with your wordpress.com (see instructions) or the Speed up image load times option was not enabled in Jetpack Settings.
For more information and details about this block, look here.
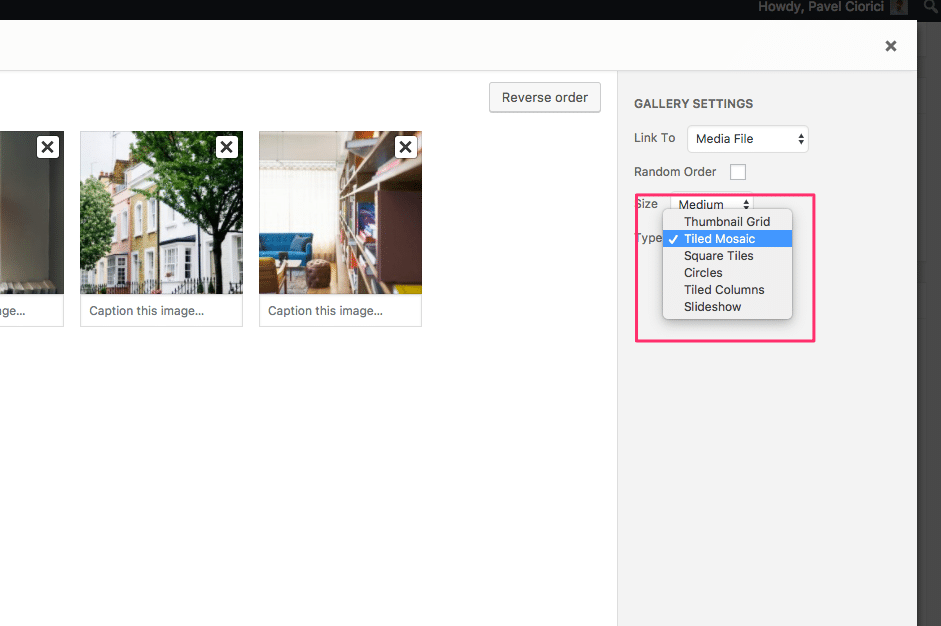
Tiled Galleries can be created just like a regular gallery. Click on the Add Media button in the WordPress post editor, on the left find the Create Gallery link, and select a few images for your gallery.
When you’re done, look in the Gallery Settings for Type dropdown, and here you can find Tiled Mosaic layout:

For more information click here.